> ## Documentation Index
> Fetch the complete documentation index at: https://docs.ruloans.com/llms.txt
> Use this file to discover all available pages before exploring further.
# How to Add Multiple Bank Accounts for a DSA on RuConnect
> Assisted flow for adding up to 3 approved bank accounts and switching between Primary and Secondary for a DSA
## Introduction
This document provides a comprehensive step-by-step guide for DSAs to add multiple bank accounts on the RuConnect platform. A DSA can add up to **3 approved bank accounts**. Of these, one account is always marked as **Primary** and the remaining accounts are marked as **Secondary**. DSAs can switch which account is Primary at any time. This guide covers adding accounts, understanding the 3-account limit, and switching between Primary and Secondary.
## Step 1: Access the RuConnect Platform
1. **URL**: Open the RuConnect platform at [https://ruconnect.ruloans.com/](https://ruconnect.ruloans.com/).
2. **Login**
## Step 2: Navigate to the Dashboard
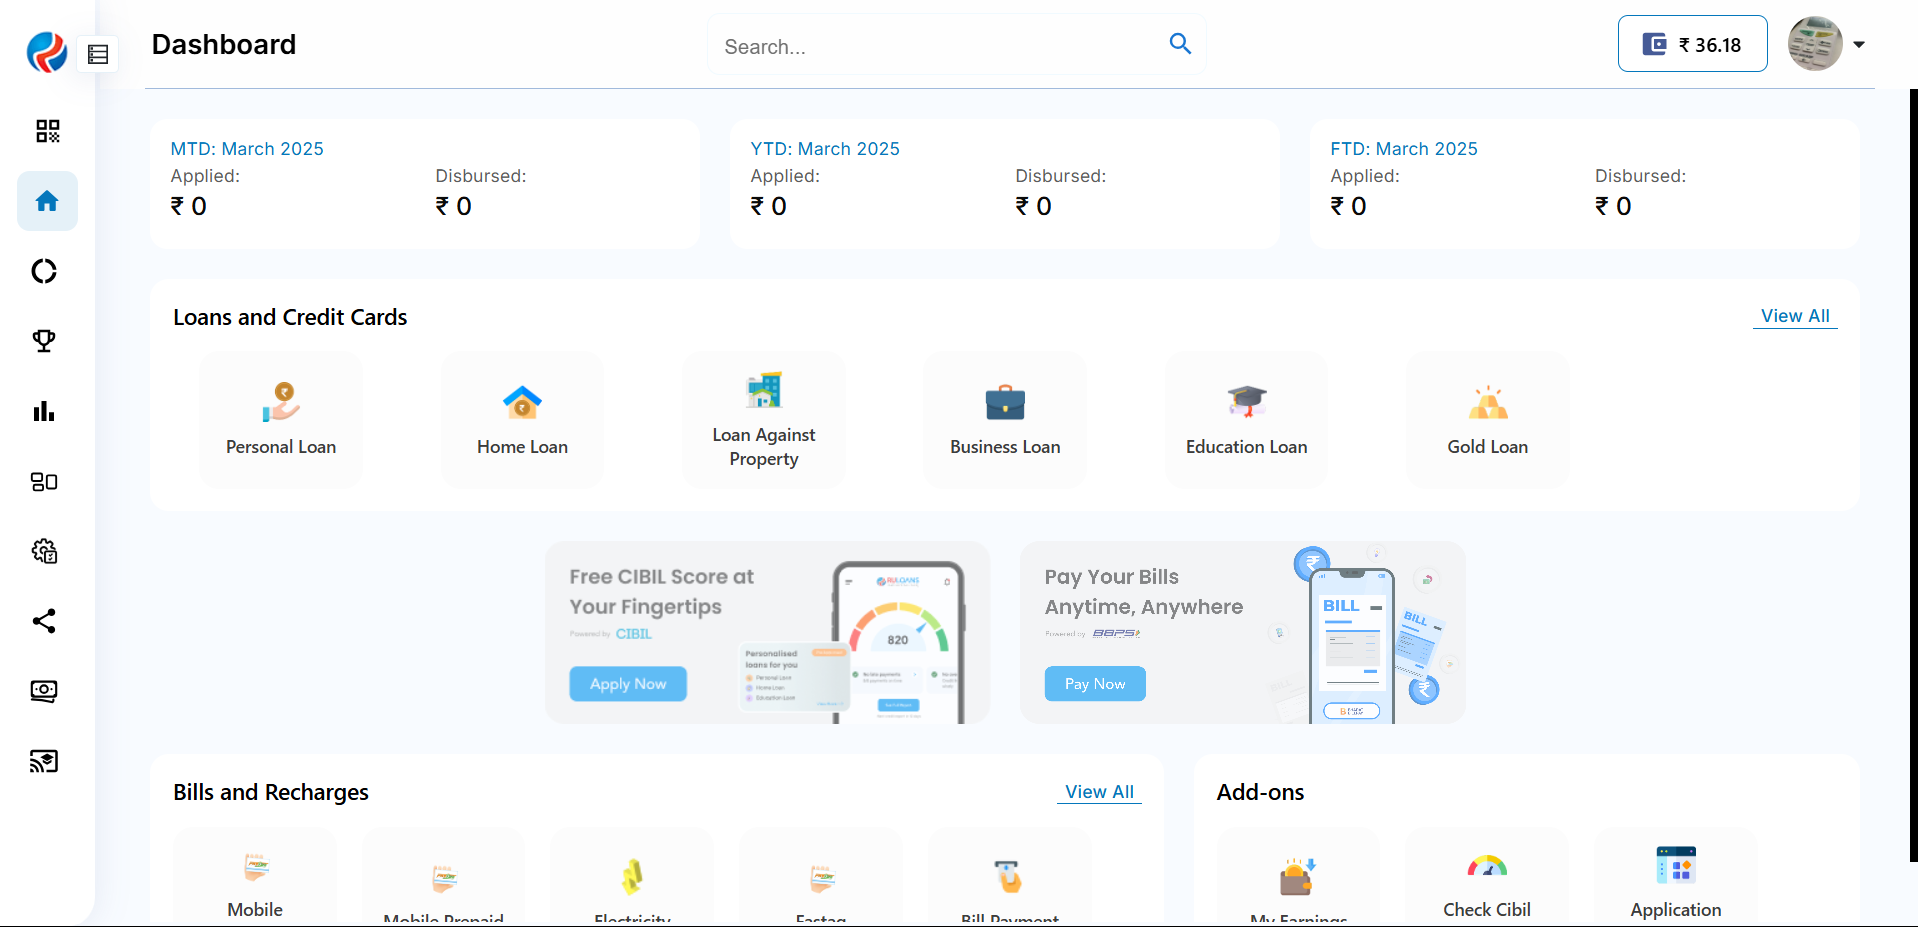
1. After successful login, you will land on the Dashboard.
2. The Dashboard provides:
* **Quick Access Links**: Links to personal loans, home loans, and other products.
* **Status Overview**: Displays details of ongoing or past applications.
 ## Step 3: Navigate to Profile Selection
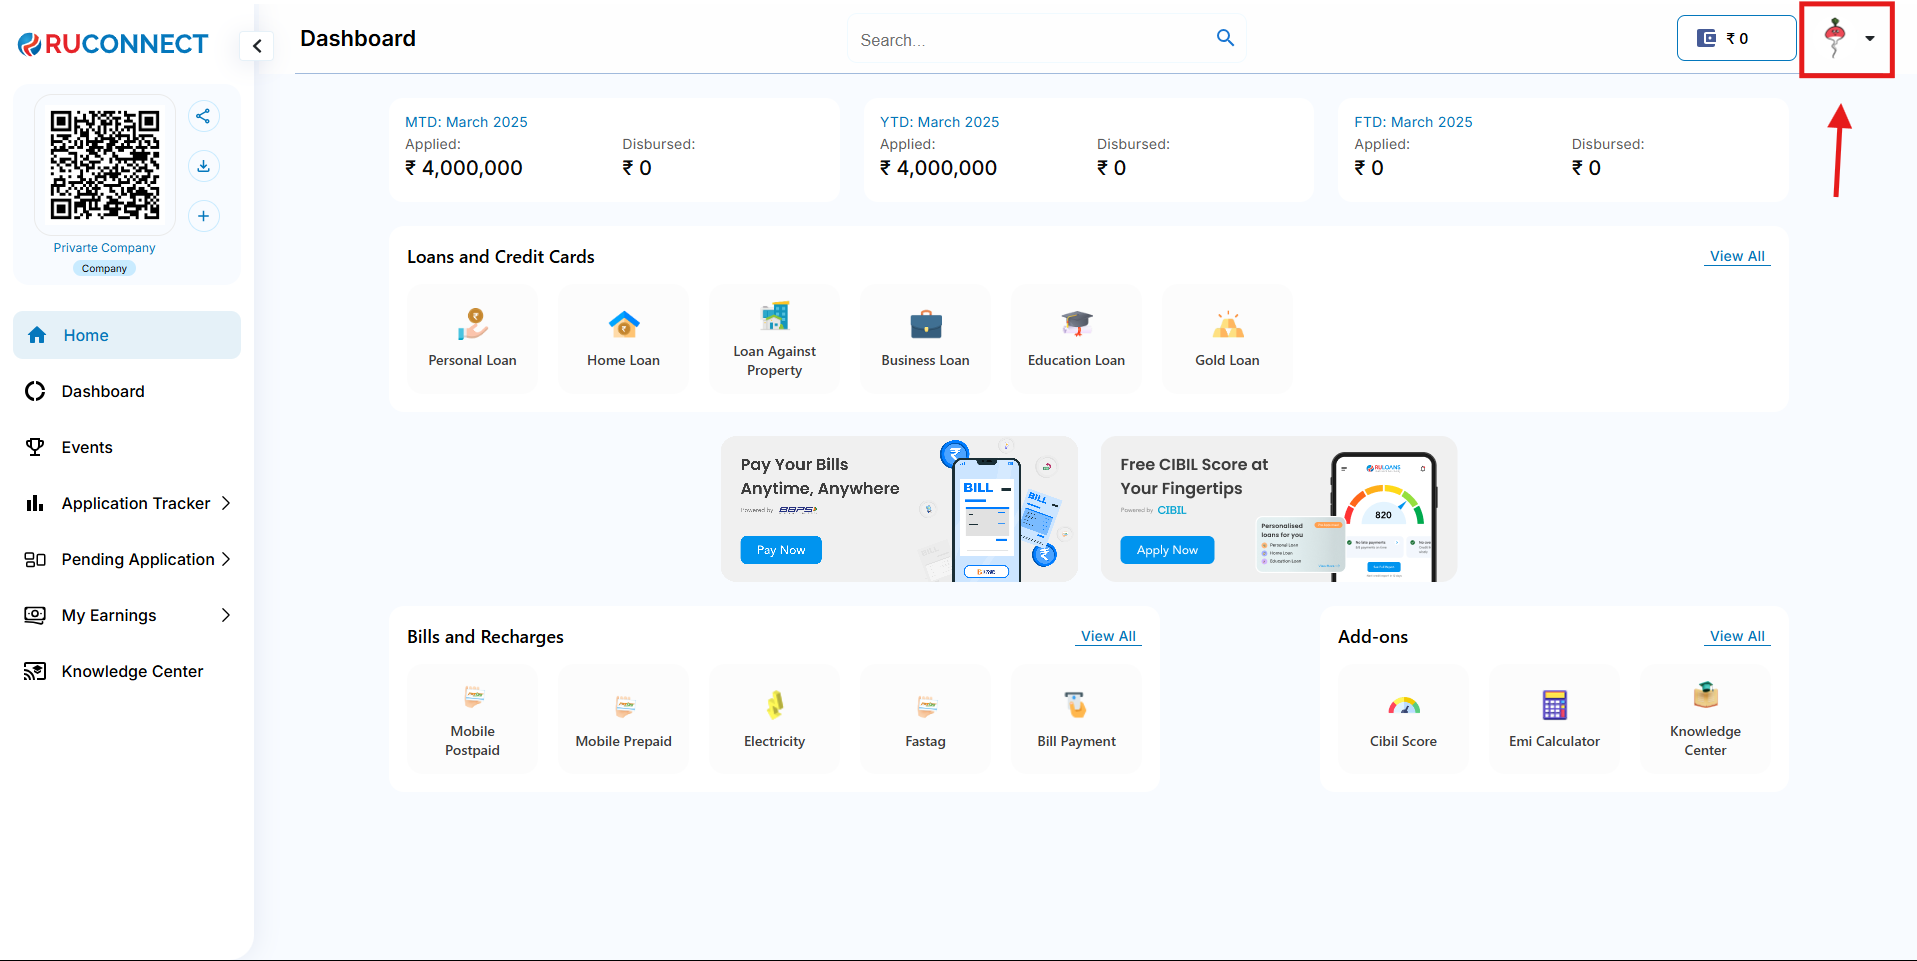
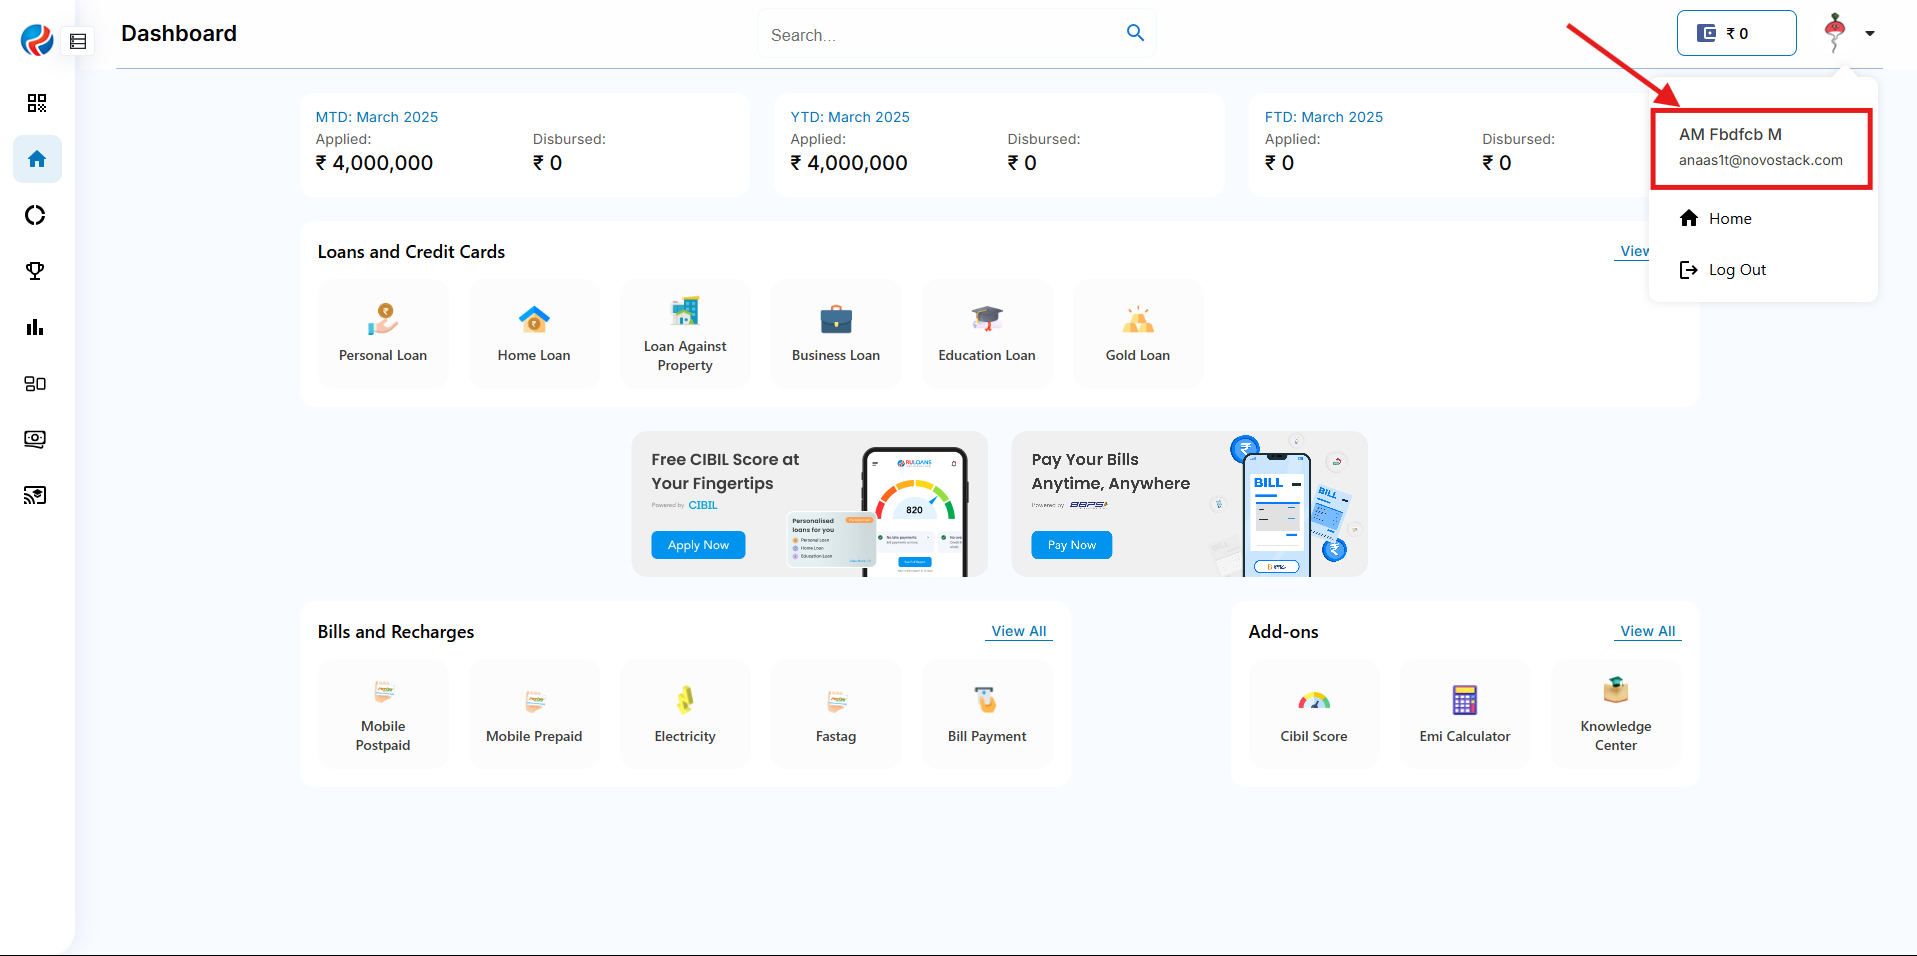
1. Click on the Profile image of the DSA.
2. Click on the Name of the DSA to navigate to the profile section.
## Step 3: Navigate to Profile Selection
1. Click on the Profile image of the DSA.
2. Click on the Name of the DSA to navigate to the profile section.
 ## Step 4: Individual and Company Tabs
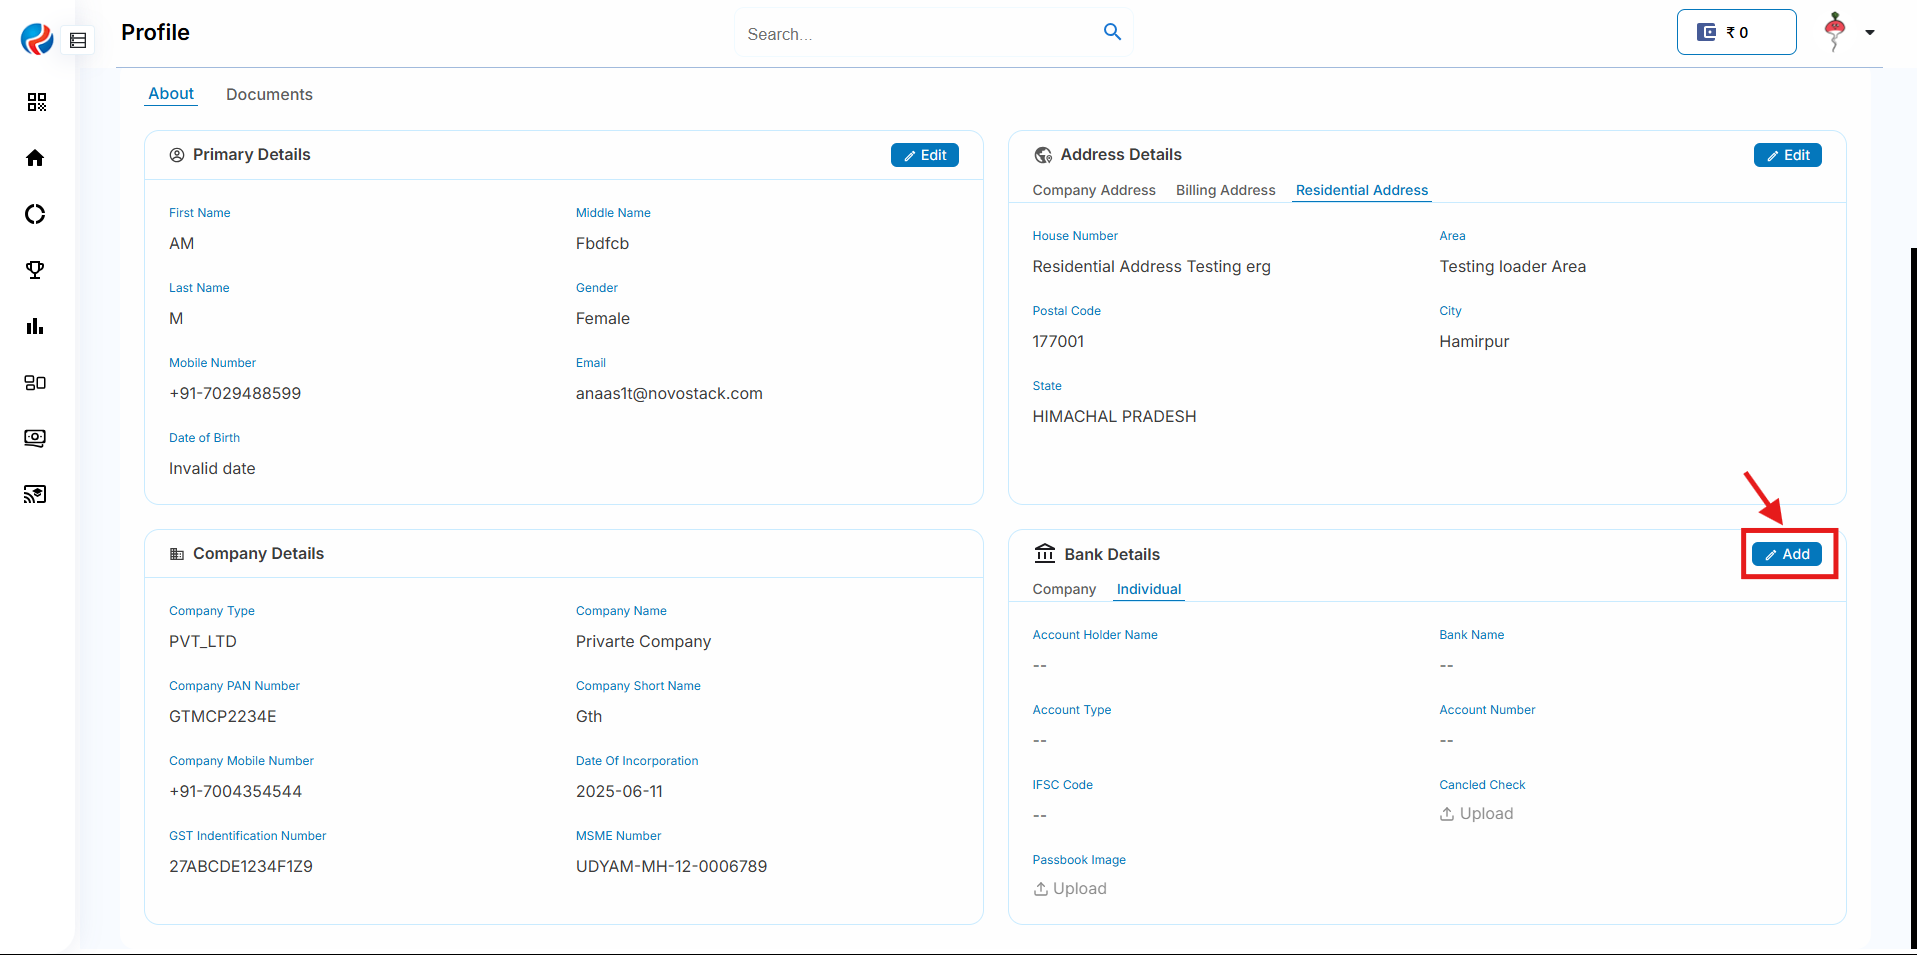
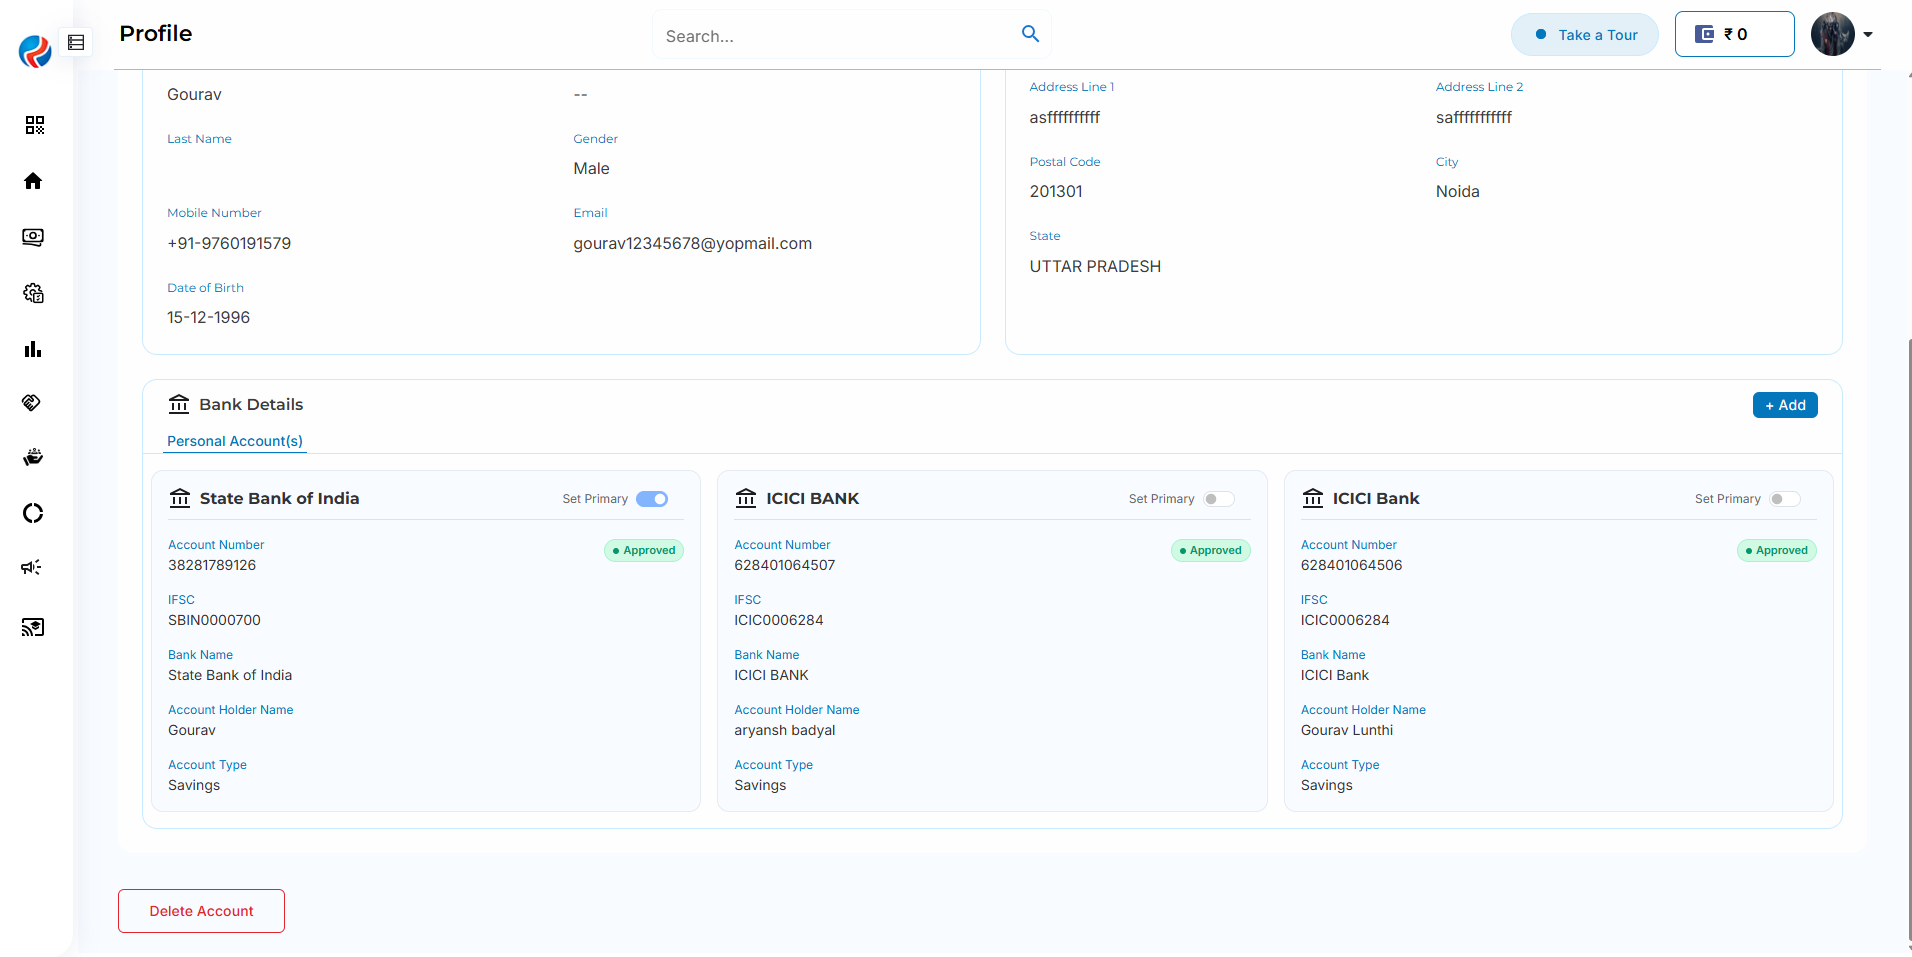
For a DSA registered as a company owner, the Bank Details section shows two separate tabs:
* **Individual**: Bank accounts belonging to the DSA in their personal capacity.
* **Company**: Bank accounts belonging to the registered company.
Each tab maintains its **own independent set of up to 3 approved accounts**, and its own independent Primary/Secondary designation. Selecting a tab shows only the accounts relevant to that entity, and the **Add** button applies to whichever tab is currently active.
## Step 4: Individual and Company Tabs
For a DSA registered as a company owner, the Bank Details section shows two separate tabs:
* **Individual**: Bank accounts belonging to the DSA in their personal capacity.
* **Company**: Bank accounts belonging to the registered company.
Each tab maintains its **own independent set of up to 3 approved accounts**, and its own independent Primary/Secondary designation. Selecting a tab shows only the accounts relevant to that entity, and the **Add** button applies to whichever tab is currently active.
 ## Step 5: Add a Bank Account
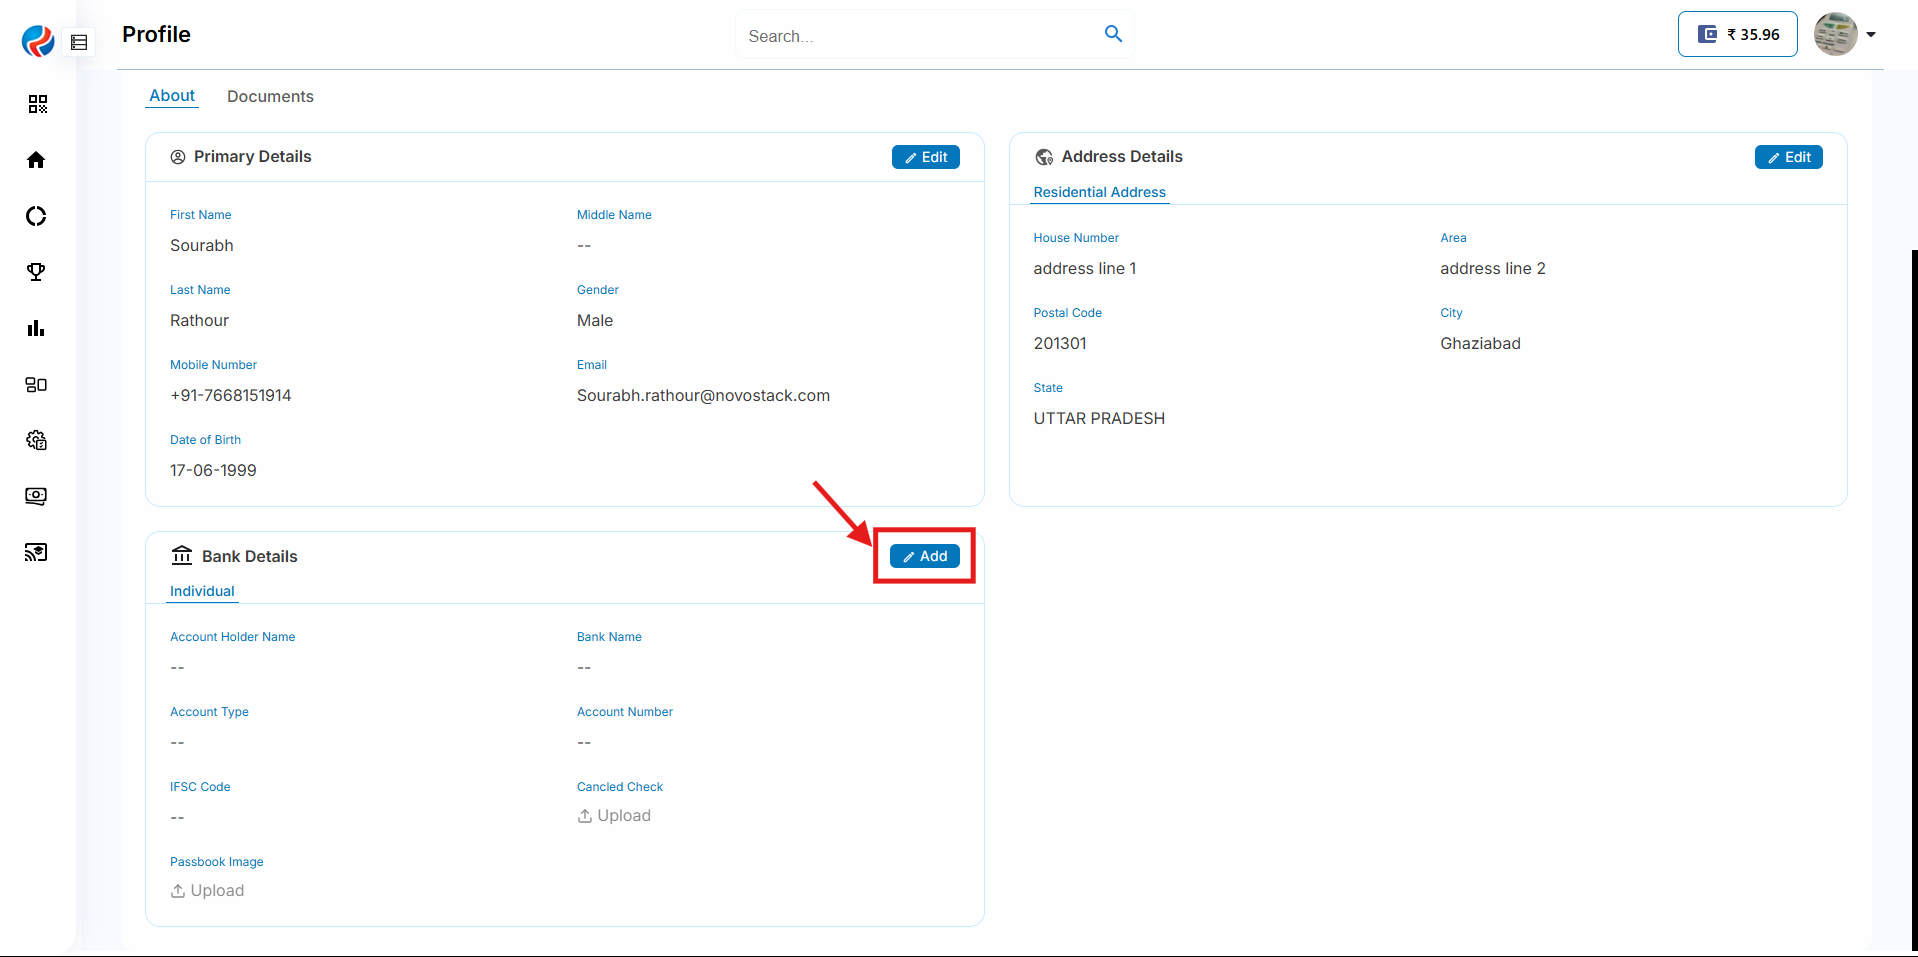
1. Select the **Individual** or **Company** tab depending on which entity the account belongs to.
2. Click on the **Add** button in the Bank Details section.
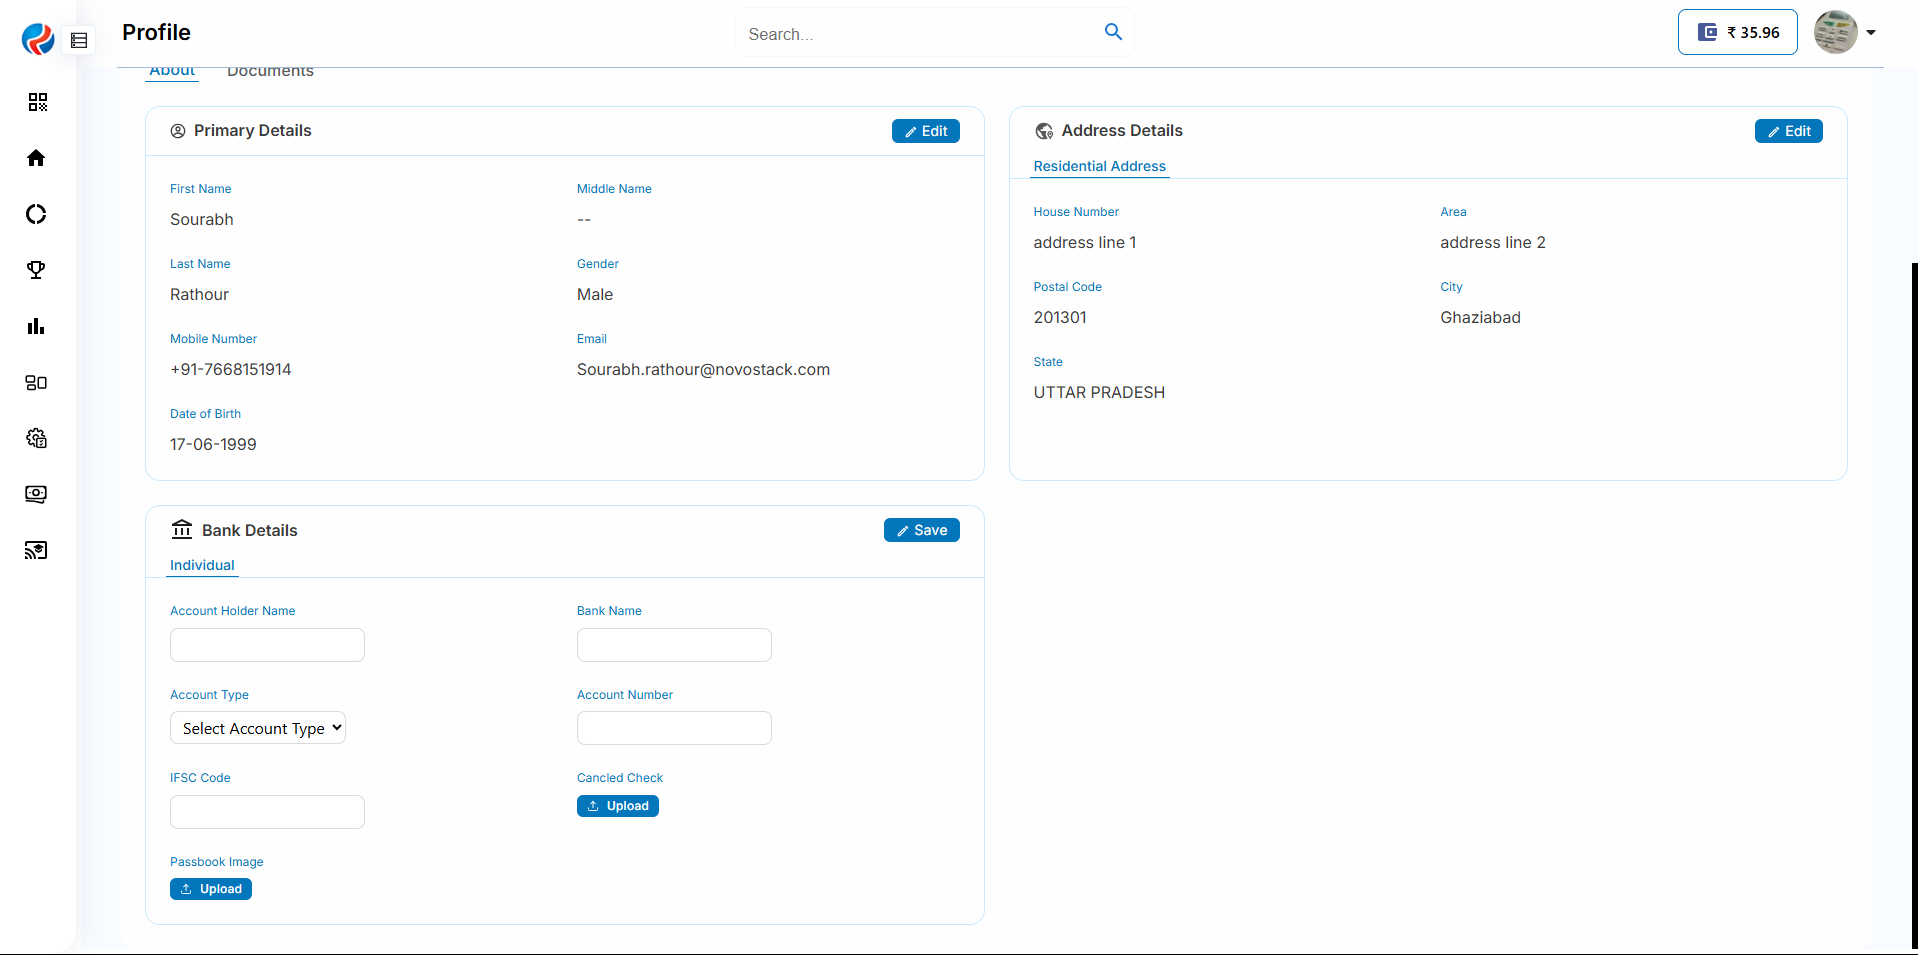
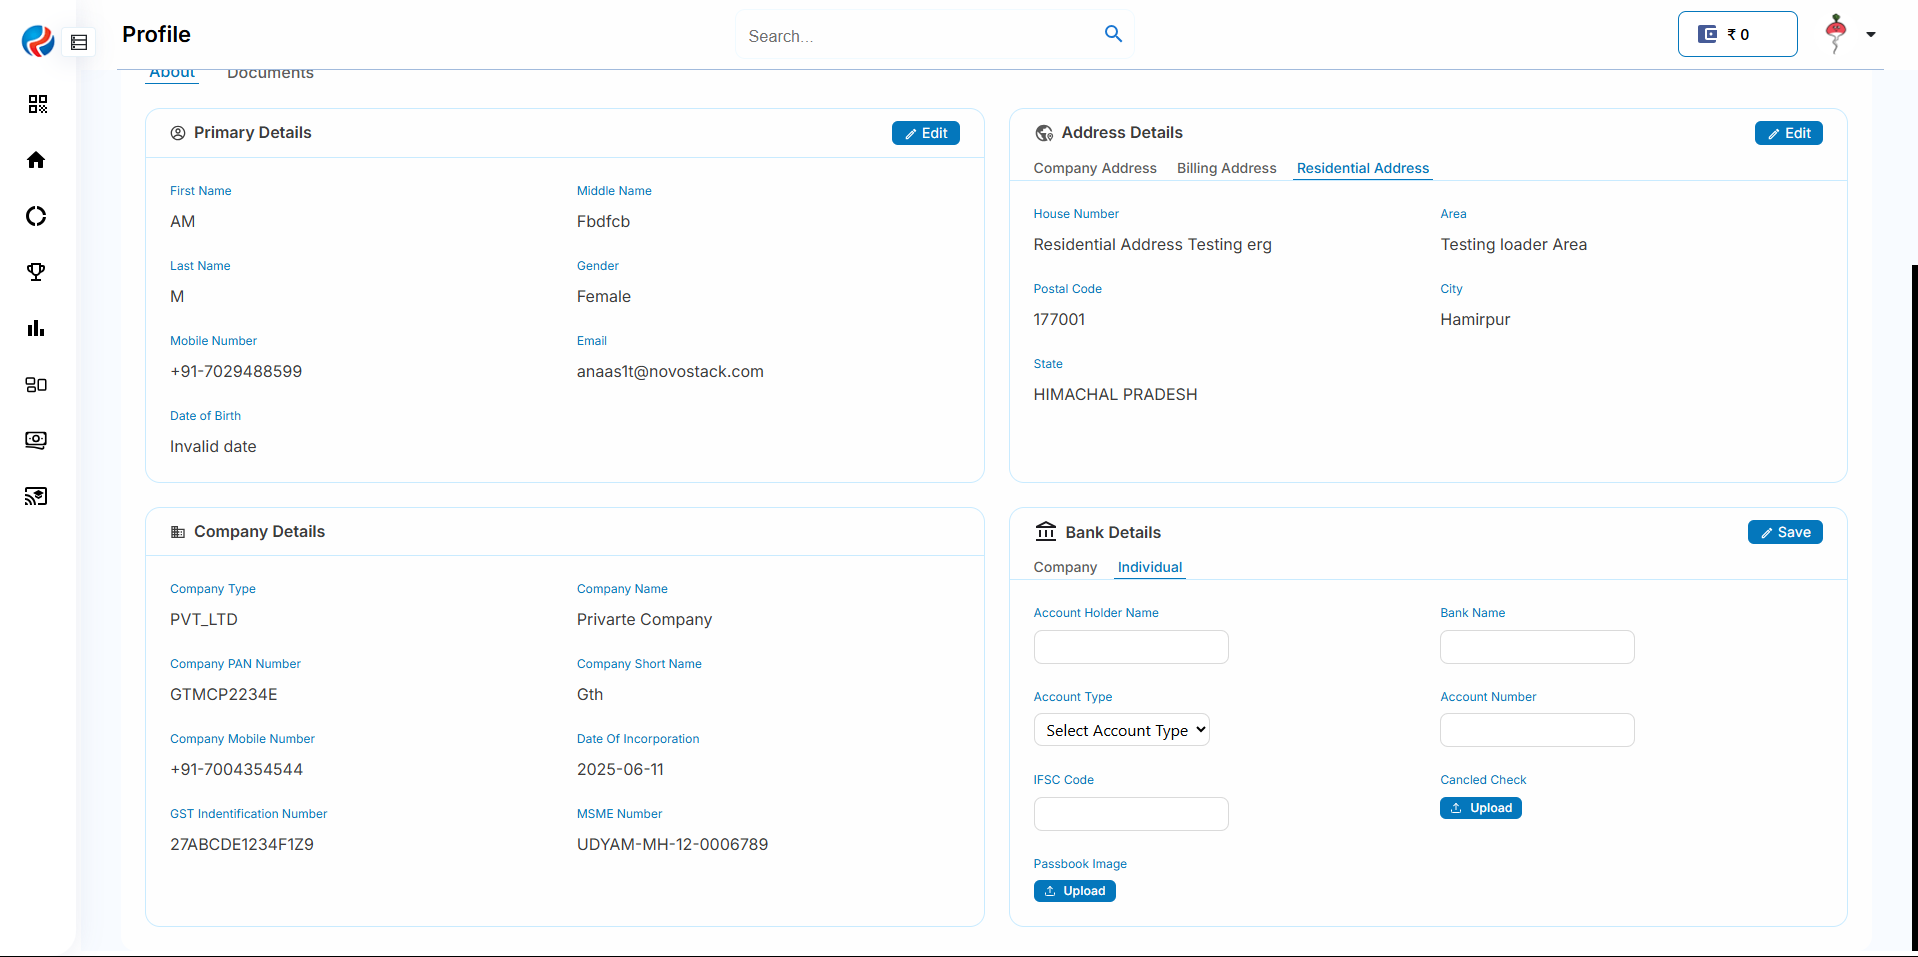
3. Fill in all the necessary mandatory details for the bank account (account holder name, account number, IFSC code, bank name, branch, etc.). For the Company tab, ensure the account holder name matches the registered company name.
4. Click on the **Save** button.
5. The newly added account moves to **Pending Approval** status until it is verified and approved.
## Step 5: Add a Bank Account
1. Select the **Individual** or **Company** tab depending on which entity the account belongs to.
2. Click on the **Add** button in the Bank Details section.
3. Fill in all the necessary mandatory details for the bank account (account holder name, account number, IFSC code, bank name, branch, etc.). For the Company tab, ensure the account holder name matches the registered company name.
4. Click on the **Save** button.
5. The newly added account moves to **Pending Approval** status until it is verified and approved.
 ### Note: The 3-Account Limit
* Each tab (**Individual** and **Company**) allows a **maximum of 3 approved bank accounts**.
* Once 3 accounts are approved within a tab, the **Add** button for that tab is disabled and a message is shown indicating the limit has been reached.
* The limit is tracked separately per tab — reaching the limit on the Individual tab does not affect the ability to add accounts on the Company tab, and vice versa.
* To add a new account after reaching the limit on a tab, an existing account within that same tab must first be removed.
* Accounts that are still pending approval do not count toward the limit being enforced for adding, but a new account cannot be submitted within a tab if 3 approved accounts already exist for it.
## Step 6: Designate Primary and Secondary Accounts
1. Within each tab (Individual or Company), the first approved bank account is automatically set as **Primary**.
2. Every subsequent approved account within that same tab is automatically set as **Secondary**.
3. Each account in the list displays a tag: **Primary** or **Secondary**.
4. Individual and Company tabs each have their own Primary account — for example, the DSA can have one Primary Individual account and one Primary Company account at the same time.
### Note: The 3-Account Limit
* Each tab (**Individual** and **Company**) allows a **maximum of 3 approved bank accounts**.
* Once 3 accounts are approved within a tab, the **Add** button for that tab is disabled and a message is shown indicating the limit has been reached.
* The limit is tracked separately per tab — reaching the limit on the Individual tab does not affect the ability to add accounts on the Company tab, and vice versa.
* To add a new account after reaching the limit on a tab, an existing account within that same tab must first be removed.
* Accounts that are still pending approval do not count toward the limit being enforced for adding, but a new account cannot be submitted within a tab if 3 approved accounts already exist for it.
## Step 6: Designate Primary and Secondary Accounts
1. Within each tab (Individual or Company), the first approved bank account is automatically set as **Primary**.
2. Every subsequent approved account within that same tab is automatically set as **Secondary**.
3. Each account in the list displays a tag: **Primary** or **Secondary**.
4. Individual and Company tabs each have their own Primary account — for example, the DSA can have one Primary Individual account and one Primary Company account at the same time.
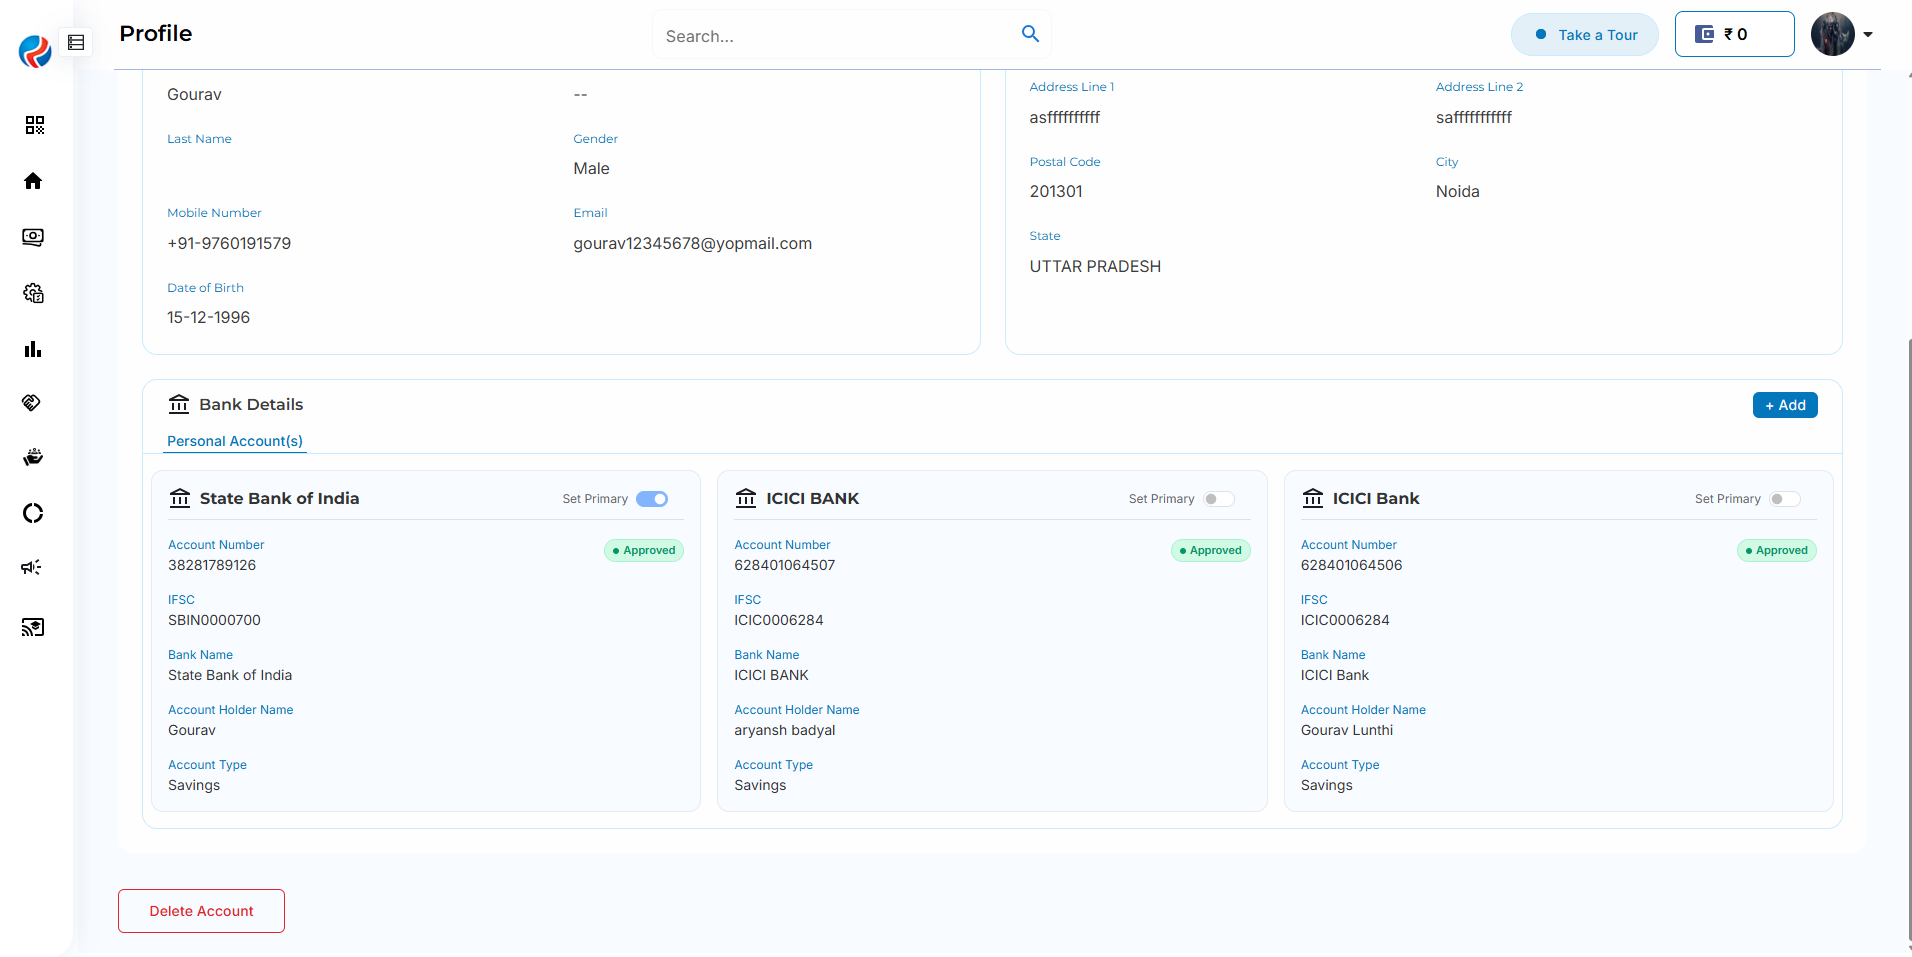 ## Step 7: Switch Primary and Secondary Bank Accounts
1. Select the **Individual** or **Company** tab.
2. Navigate to the Bank Details section showing all approved accounts for that tab.
3. Click on the **Set as Primary** option next to any Secondary account.
4. Confirm the switch when prompted.
5. Once confirmed:
* The selected account is updated to **Primary**.
* The account that was previously Primary (within that same tab) is automatically updated to **Secondary**.
### Note
* Only **one account per tab can be Primary** at any time.
* All payouts/disbursals for a DSA are processed to the **Primary** account of the relevant tab (Individual or Company) by default.
* A Secondary account cannot be deleted directly if it's the only remaining Secondary account and business rules require at least one active account — refer to in-app messaging for account removal eligibility.
## Step 8: View Bank Details Overview
1. The Bank Details section lists all approved accounts under each tab (Individual and Company) along with their **Primary/Secondary** status.
2. Pending accounts are shown separately under an **Approval Pending** state, within the relevant tab.
## Step 7: Switch Primary and Secondary Bank Accounts
1. Select the **Individual** or **Company** tab.
2. Navigate to the Bank Details section showing all approved accounts for that tab.
3. Click on the **Set as Primary** option next to any Secondary account.
4. Confirm the switch when prompted.
5. Once confirmed:
* The selected account is updated to **Primary**.
* The account that was previously Primary (within that same tab) is automatically updated to **Secondary**.
### Note
* Only **one account per tab can be Primary** at any time.
* All payouts/disbursals for a DSA are processed to the **Primary** account of the relevant tab (Individual or Company) by default.
* A Secondary account cannot be deleted directly if it's the only remaining Secondary account and business rules require at least one active account — refer to in-app messaging for account removal eligibility.
## Step 8: View Bank Details Overview
1. The Bank Details section lists all approved accounts under each tab (Individual and Company) along with their **Primary/Secondary** status.
2. Pending accounts are shown separately under an **Approval Pending** state, within the relevant tab.
 ***
***