Step 1: Access the RuConnect Platform**
Open the RuConnect platform at https://ruconnect.in/Step 2: Navigate to the Dashboard
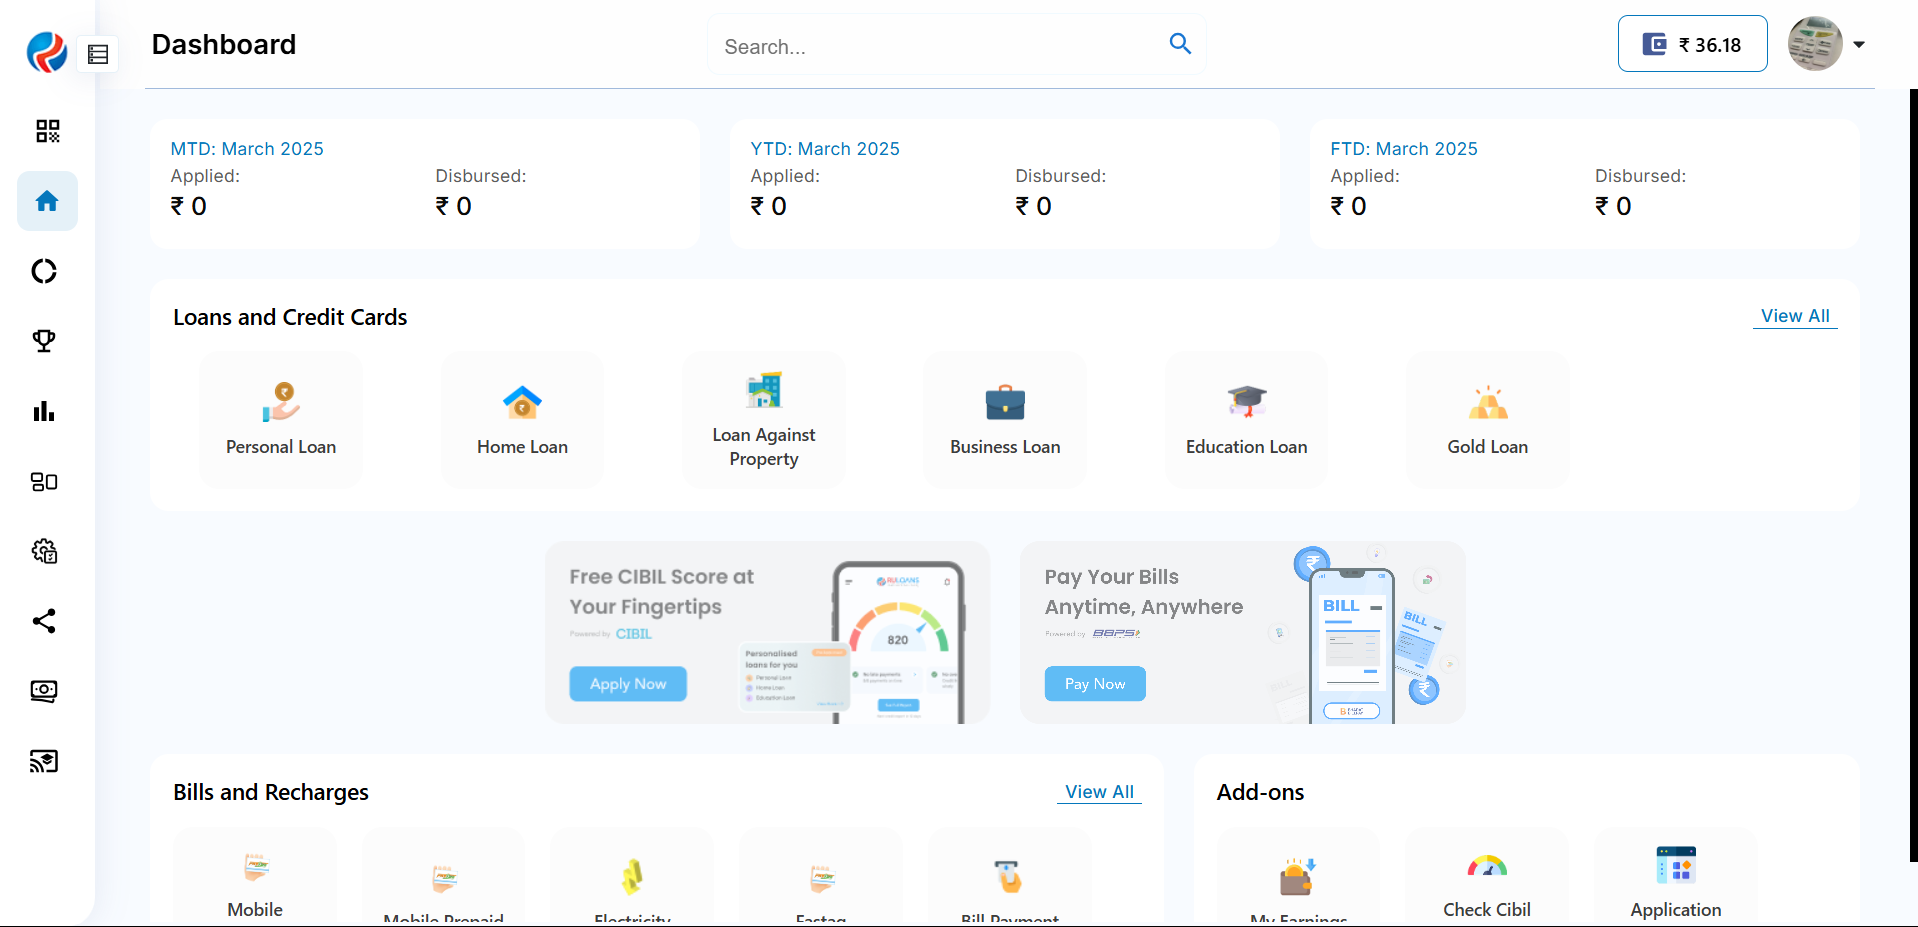
- After successful login, you will land on the Dashboard.
- The Dashboard provides:
- Quick Access Links: Links to personal loans, home loans, and other products.
- Status Overview: Displays details of ongoing or past applications
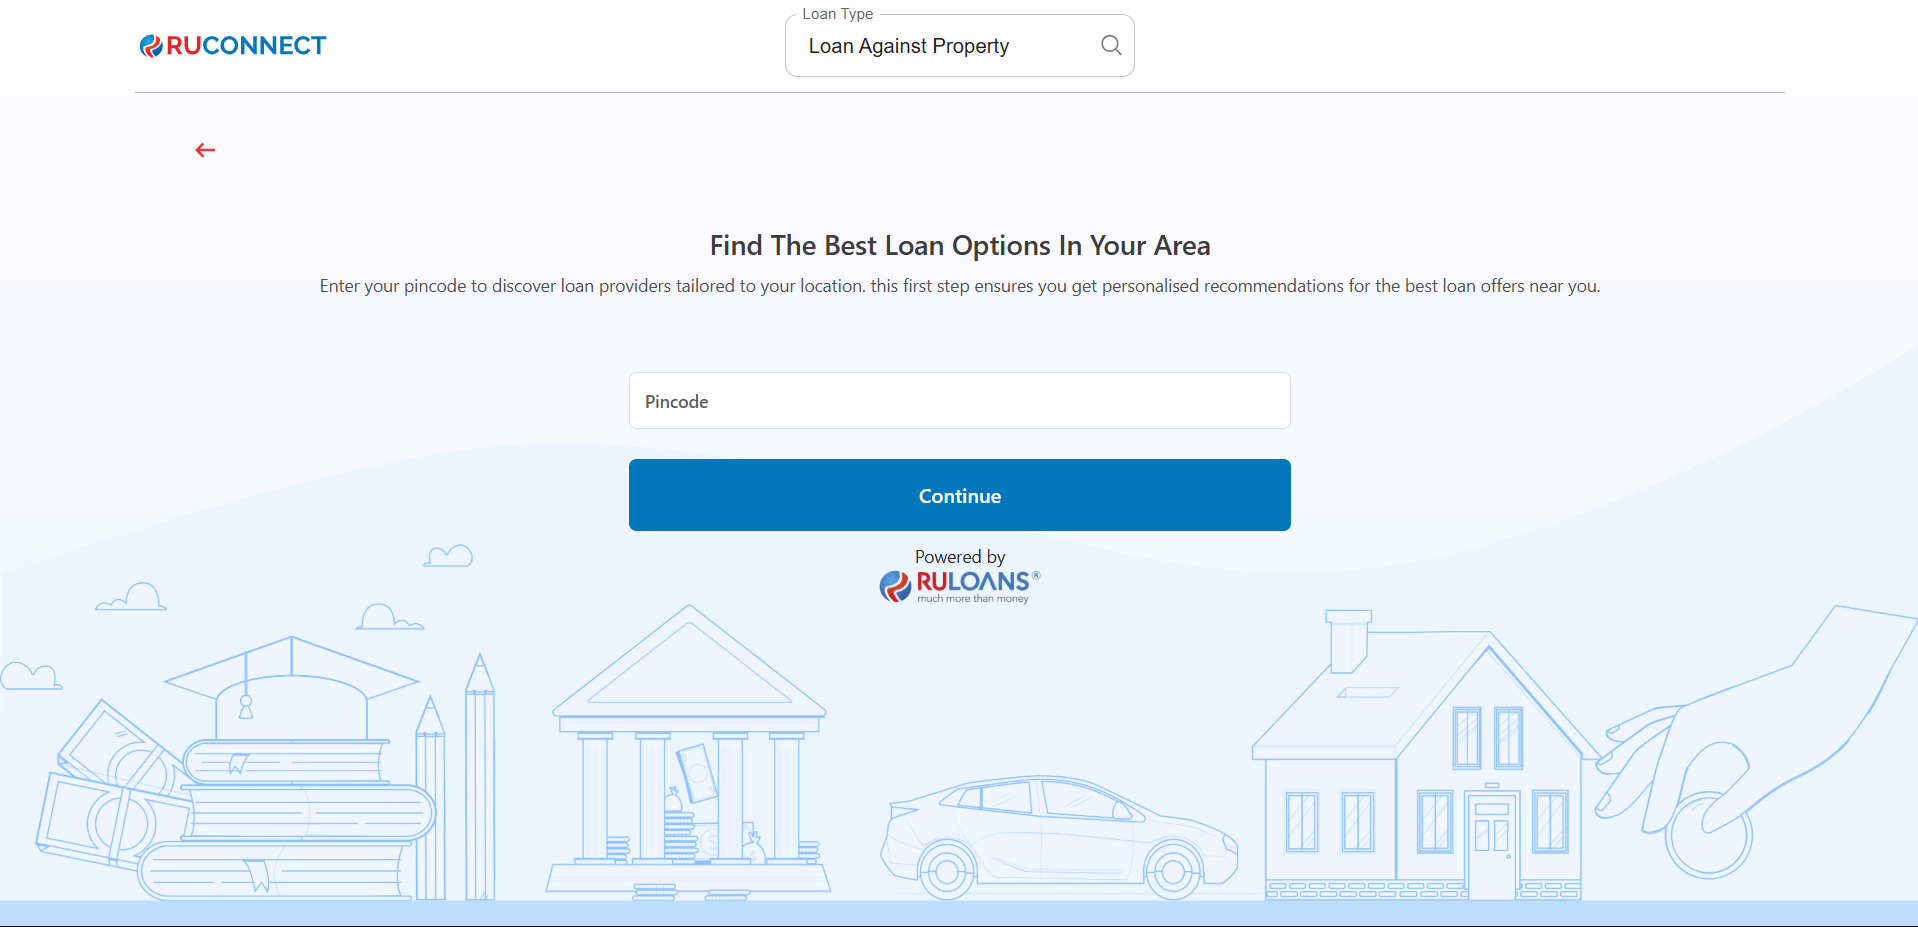
Step 3: Enter Your Pincode
- Pincode: Enter the 6-digit postal code of your residence or business address.
This helps us verify your location and show eligible offers. - Tap Continue.
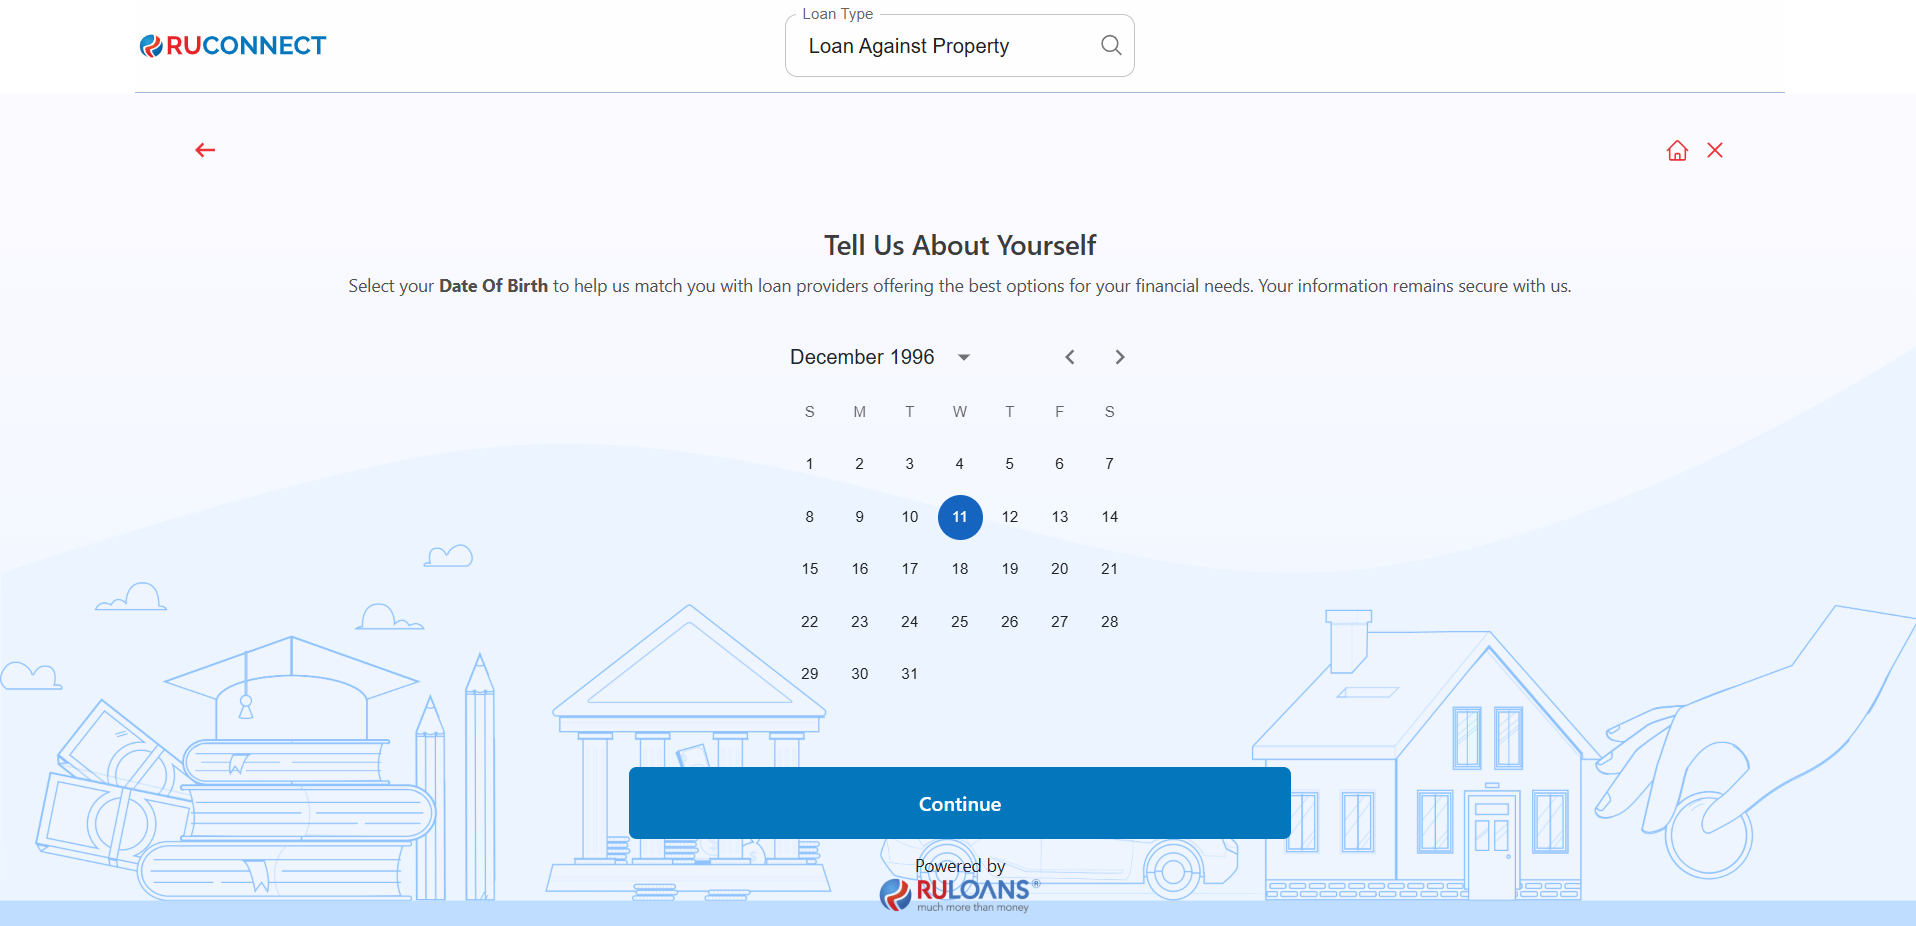
Step 4: Enter Your Date of Birth
- Date of Birth: Select your date of birth using the calendar picker.
This helps determine your eligibility and age-based offers. - Tap Continue.
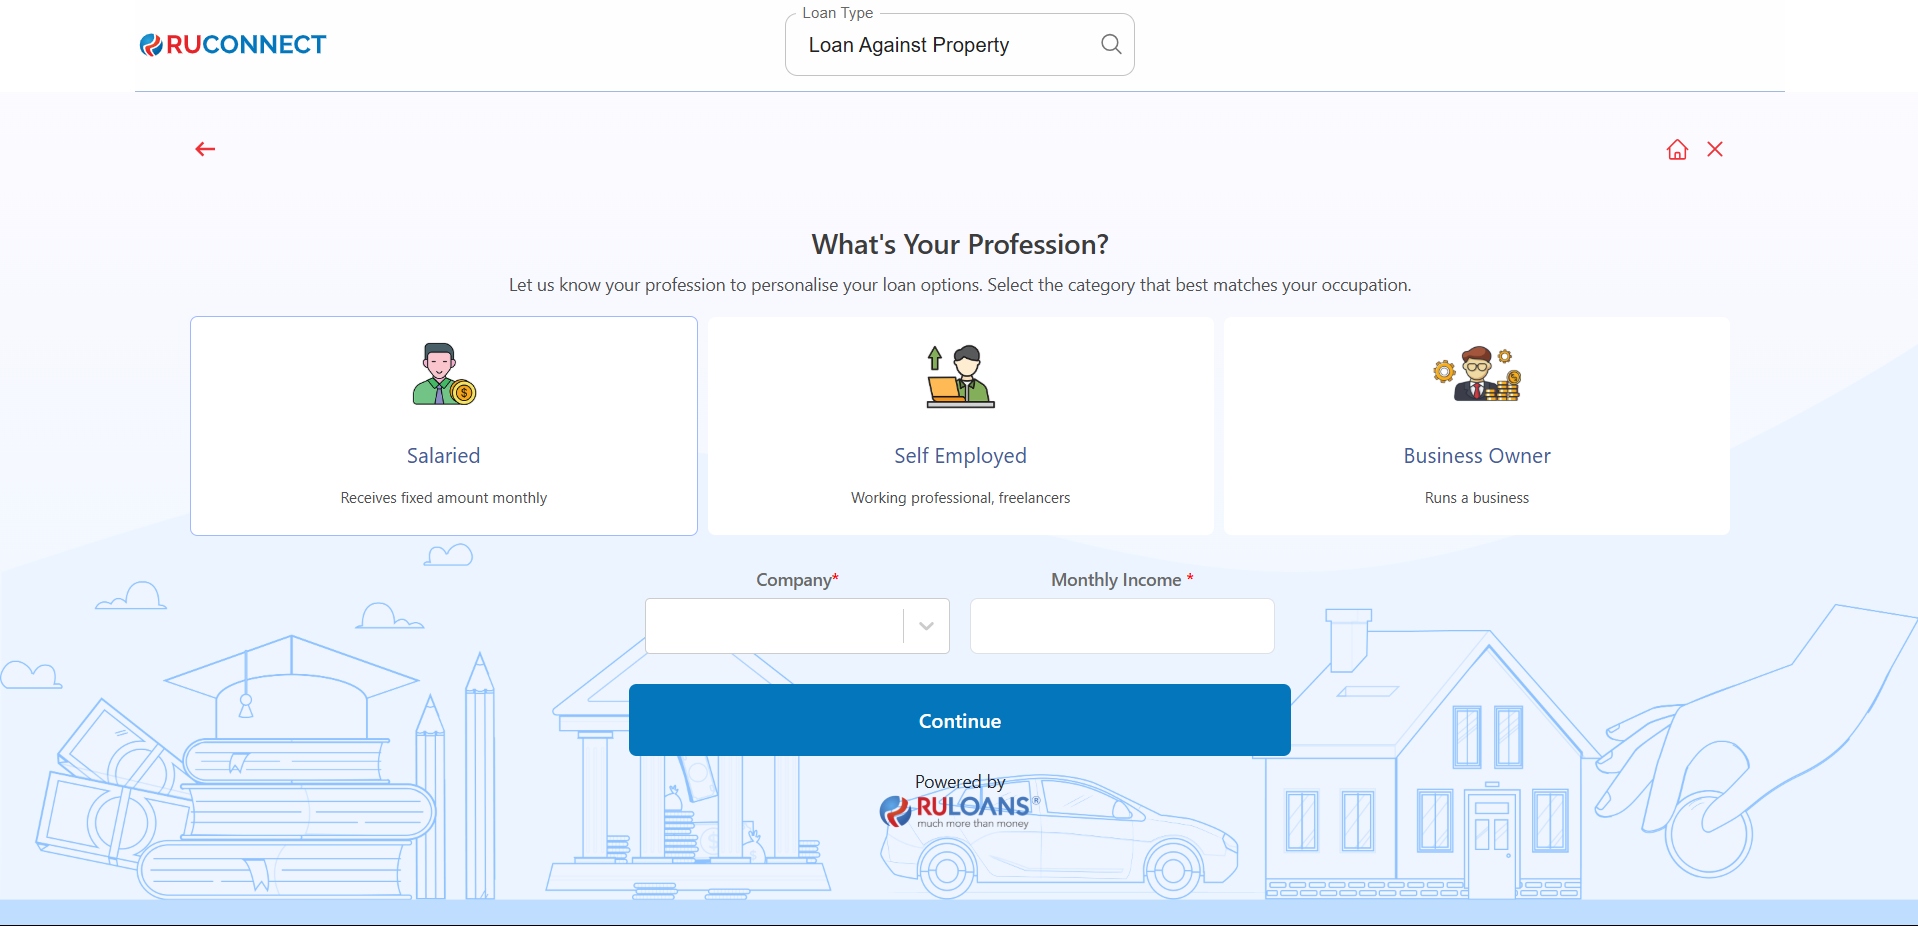
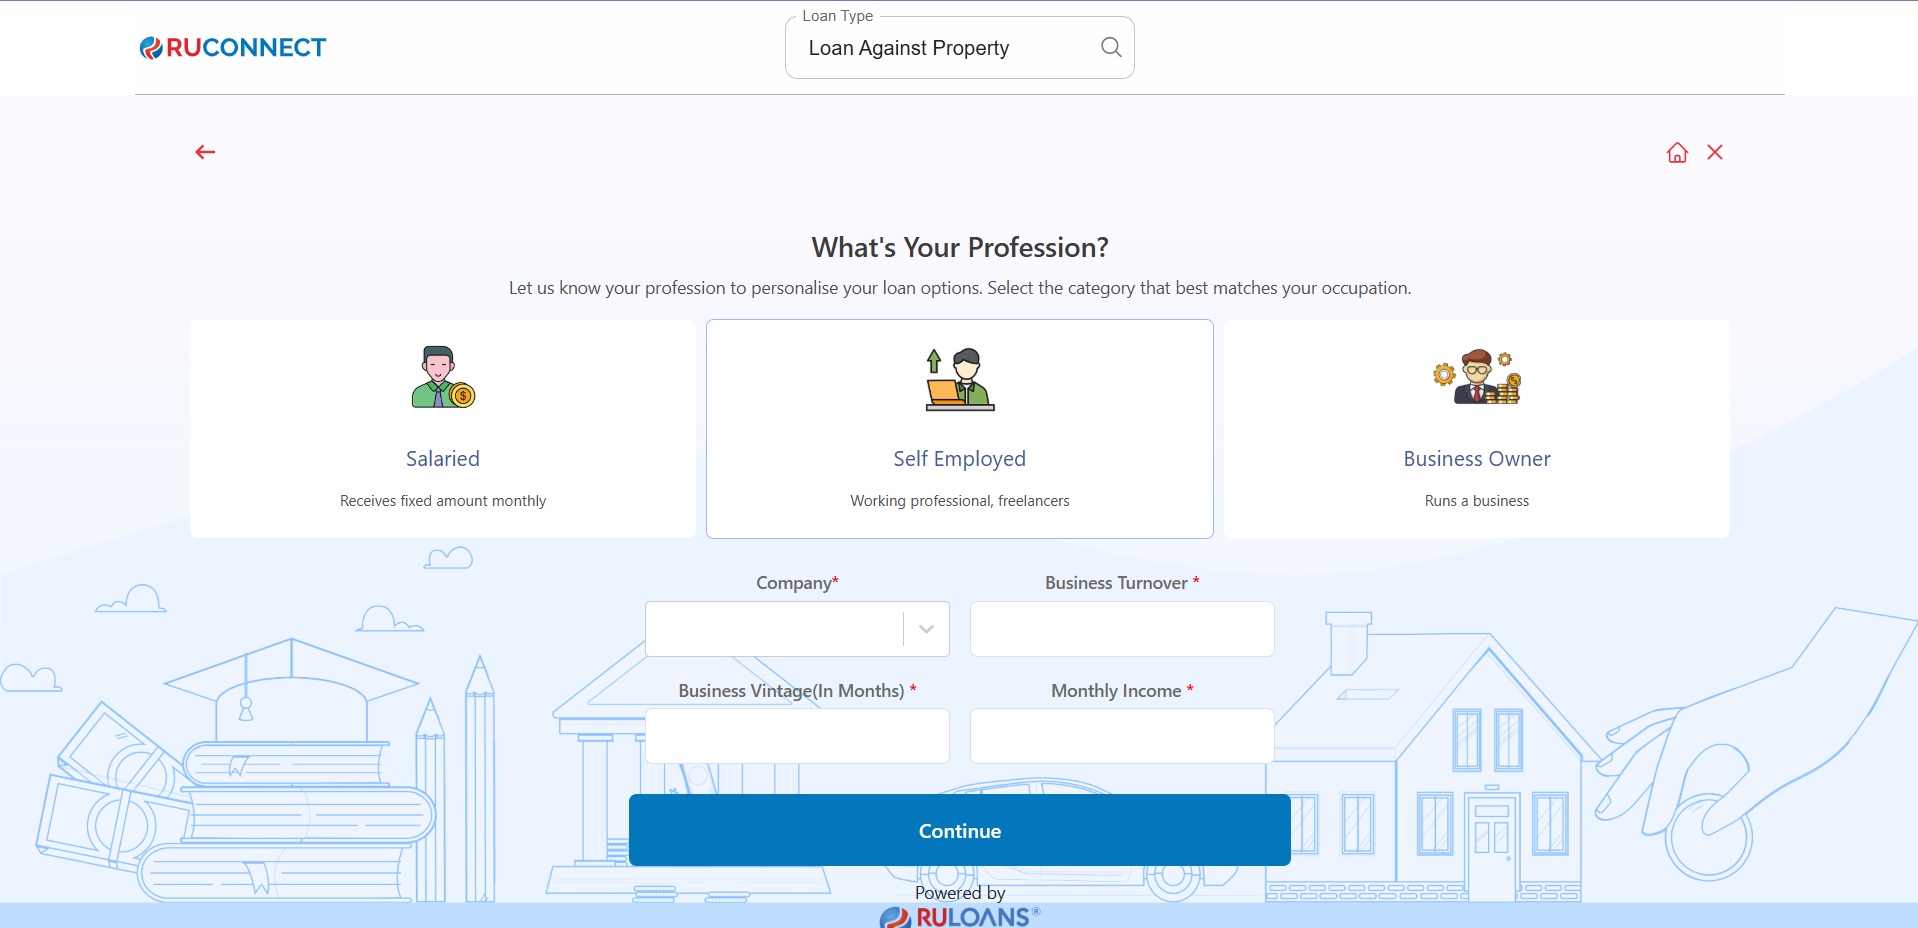
Step 5: Choose Your Profession
Select the category that best describes your employment type:- Salaried - If you work for a company or organization.
- Self-Employed - If you are a freelancer, consultant, or professional.
- Business Owner - If you run a business, either registered or informal.
If Salaried:
- Company Name: Name of your employer.
- Monthly Income: Your average take-home salary each month.
If Self-Employed or Business Owner:
- Business Name / Company Name: Name of your business or profession.
- Business Turnover: Approximate annual income from your business/profession.
- Business Vintage (in months): How long you’ve been running it.
- Monthly Income: Your average net income per month.
- Tap Continue.
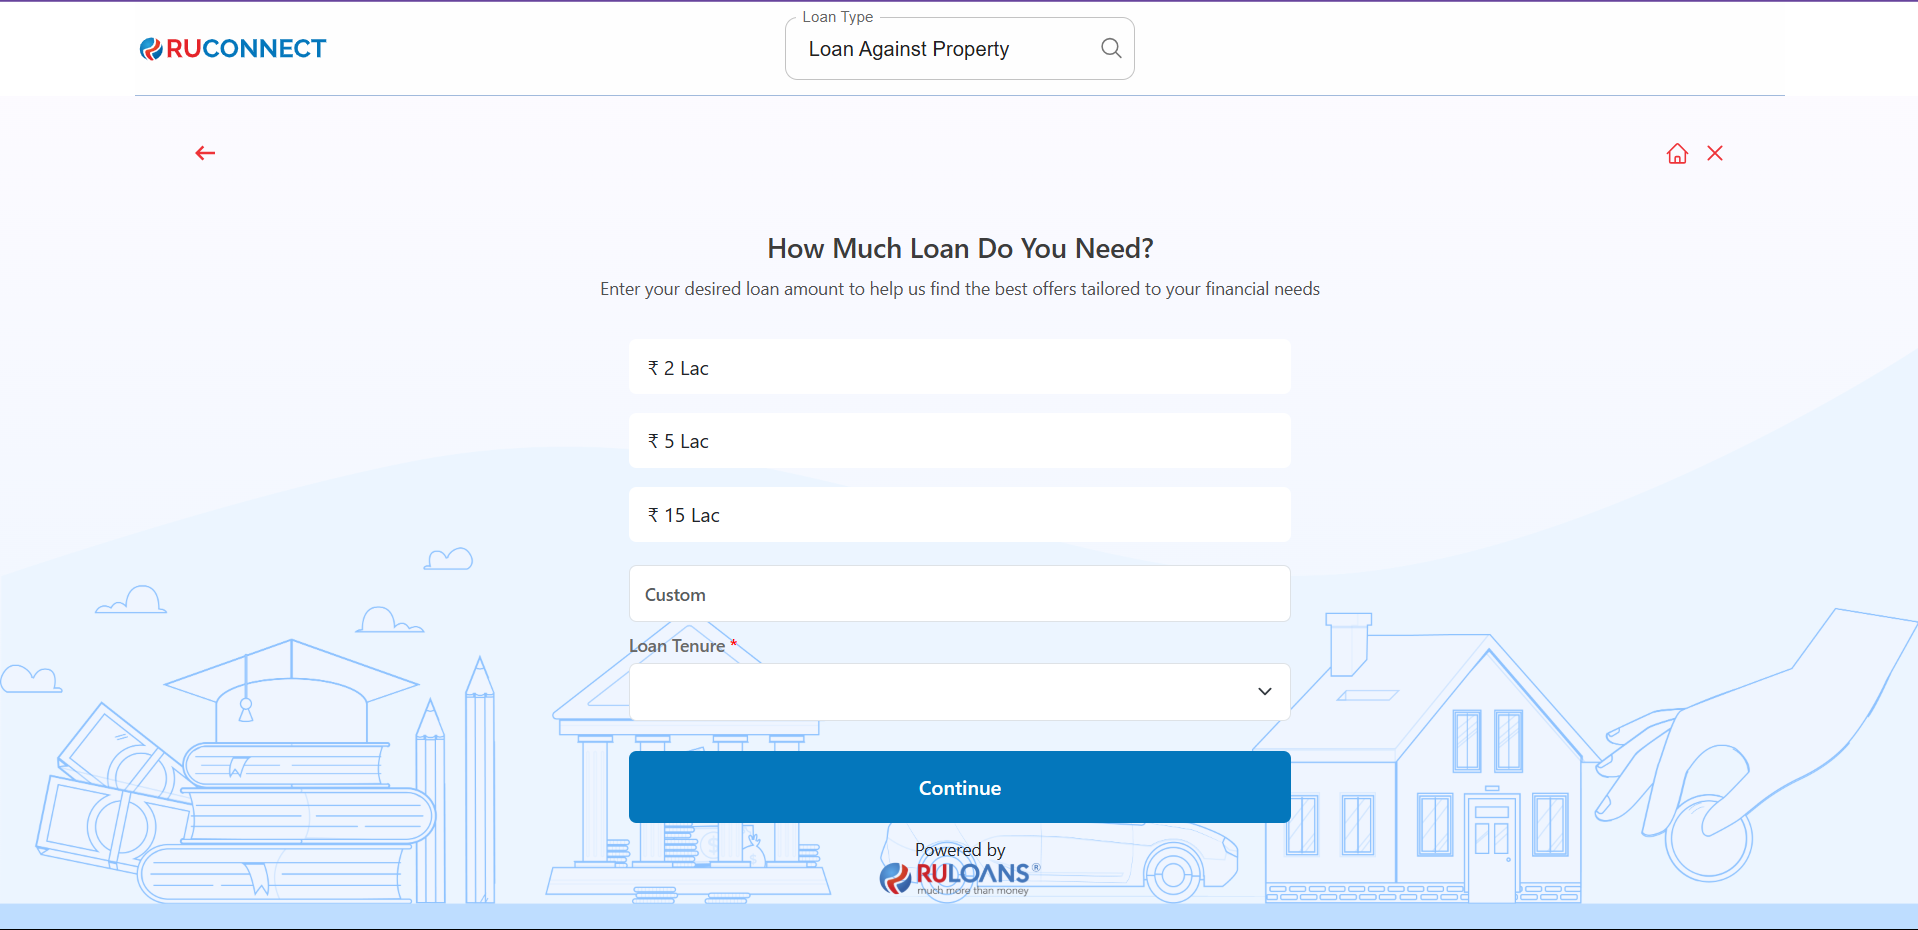
Step 6: Select Loan Amount & Duration
- Loan Amount: Choose a preset amount (e.g., ₹ 2L / ₹ 5L / ₹ 15L) or enter a Custom Amount.
- Loan Tenure: Choose the repayment period (in years).
- Tap Continue.
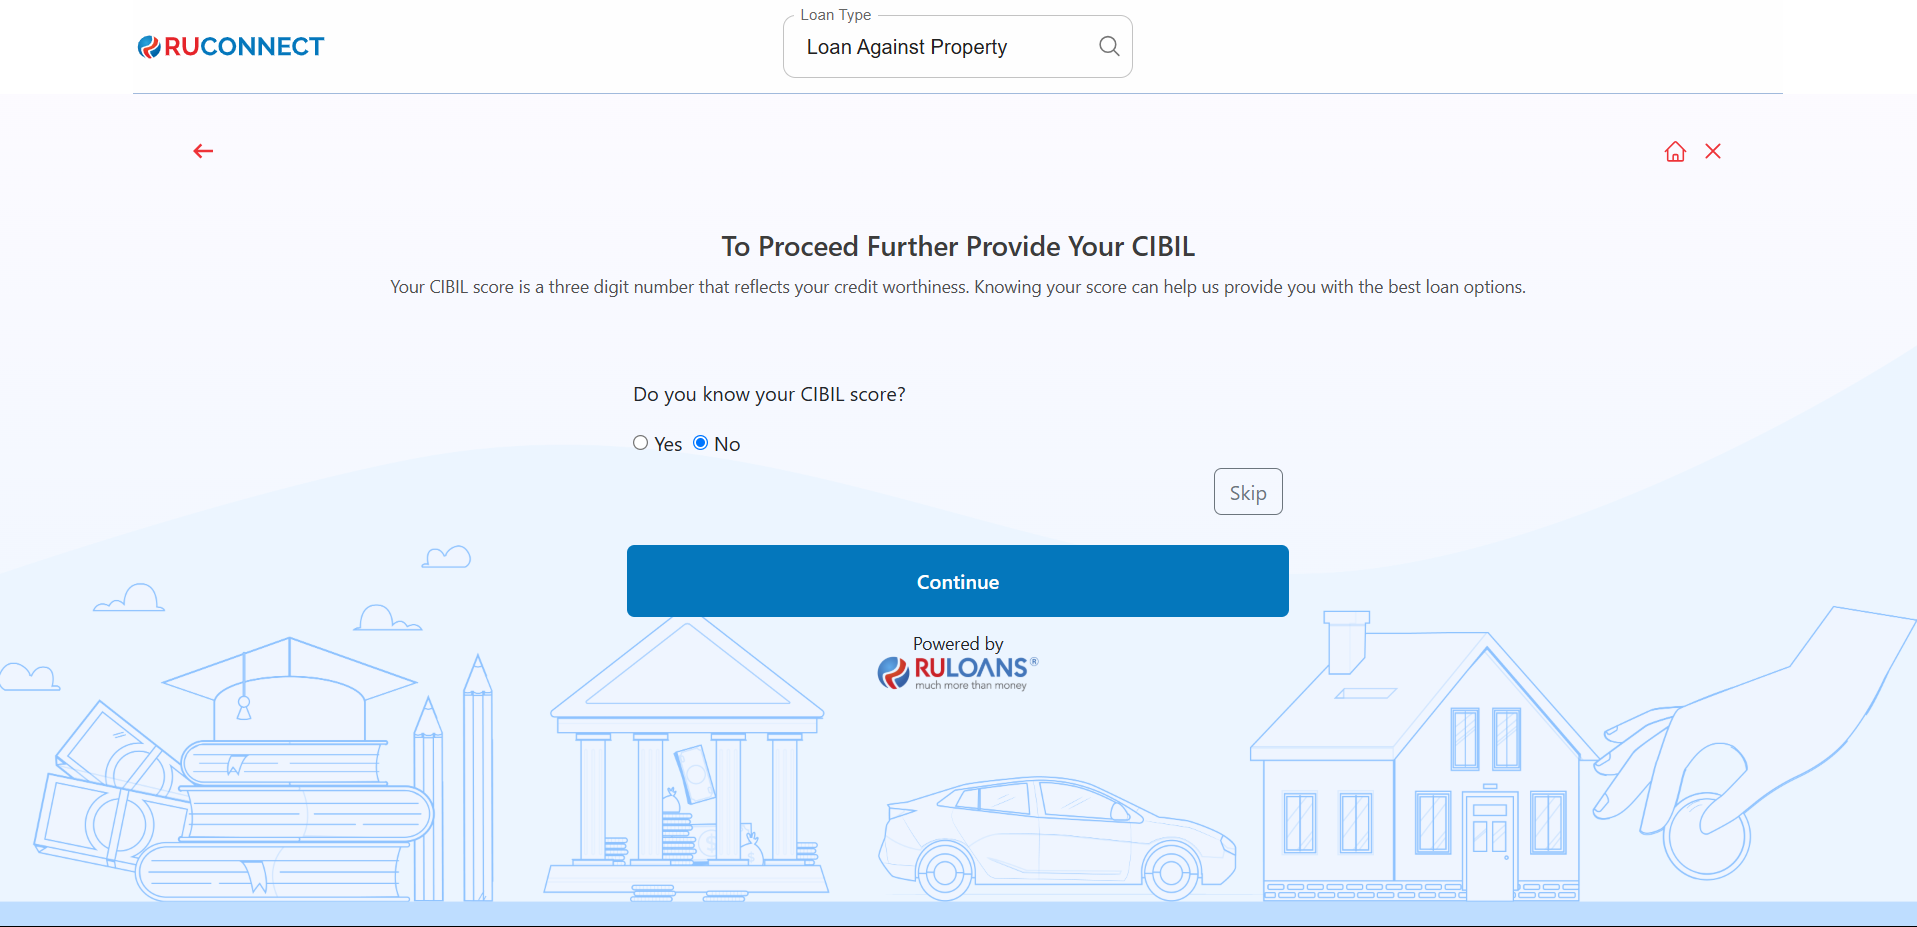
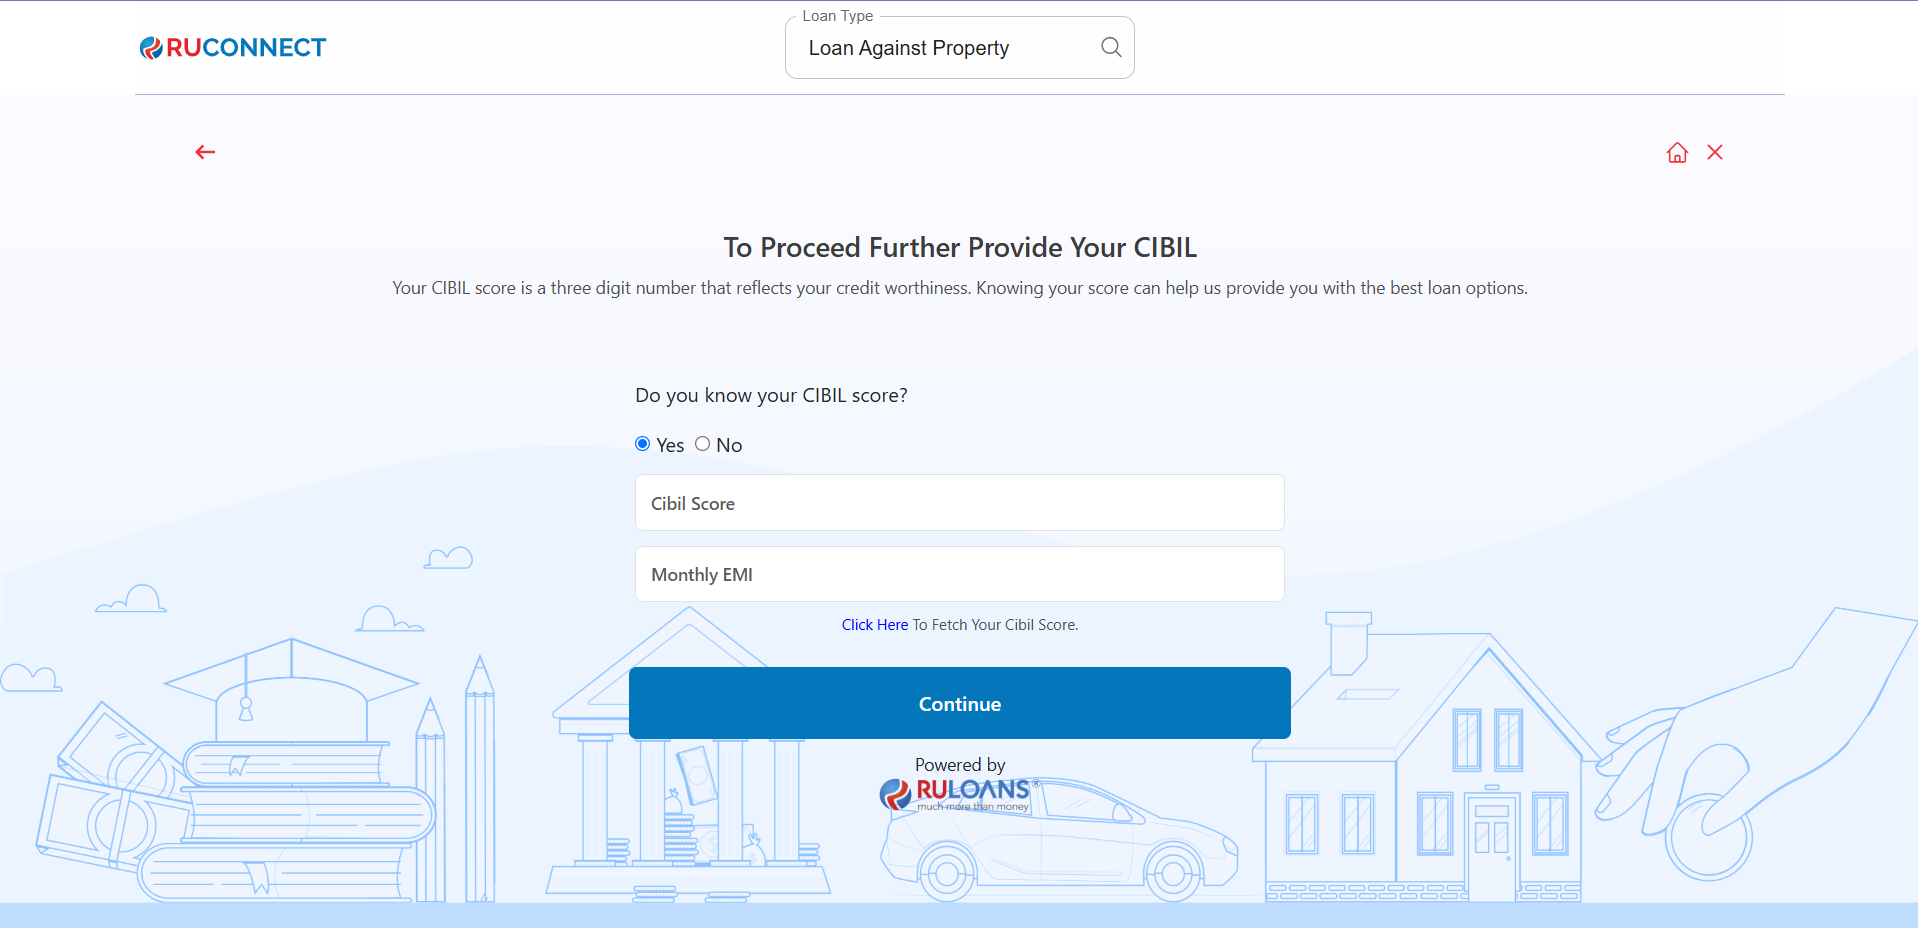
Step 7: Know Your CIBIL Score?
-
If you select Yes:
- CIBIL Score: Enter your 3-digit credit score (e.g., 750).
- Monthly EMI: Total of all active loan EMIs you’re paying.
- If you select No: User will be redirected to Step 8.
- If you Tap Skip: User will be redirected to Step 10.
- Tap Continue.
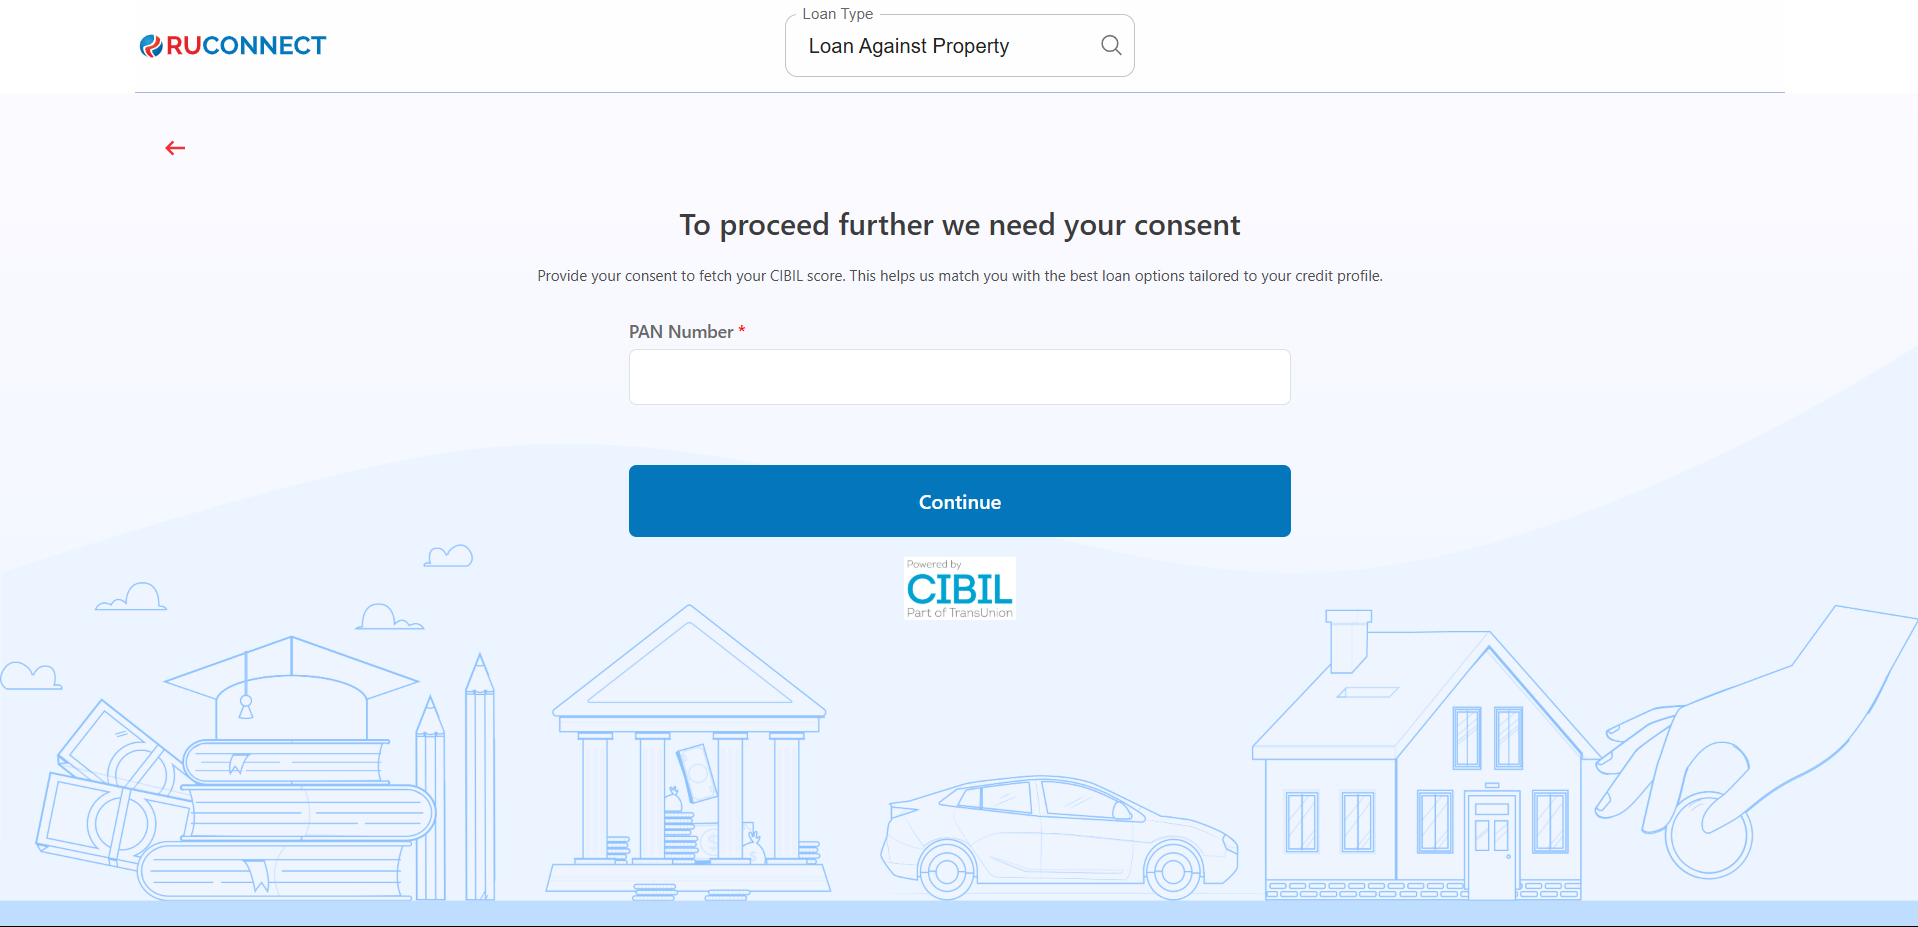
Step 8: Enter PAN Number & Give Consent
- PAN Number: Enter your 10-character PAN (e.g., ABCDE1234F).
Required to verify your credit score and match loan offers. - Tap Continue.
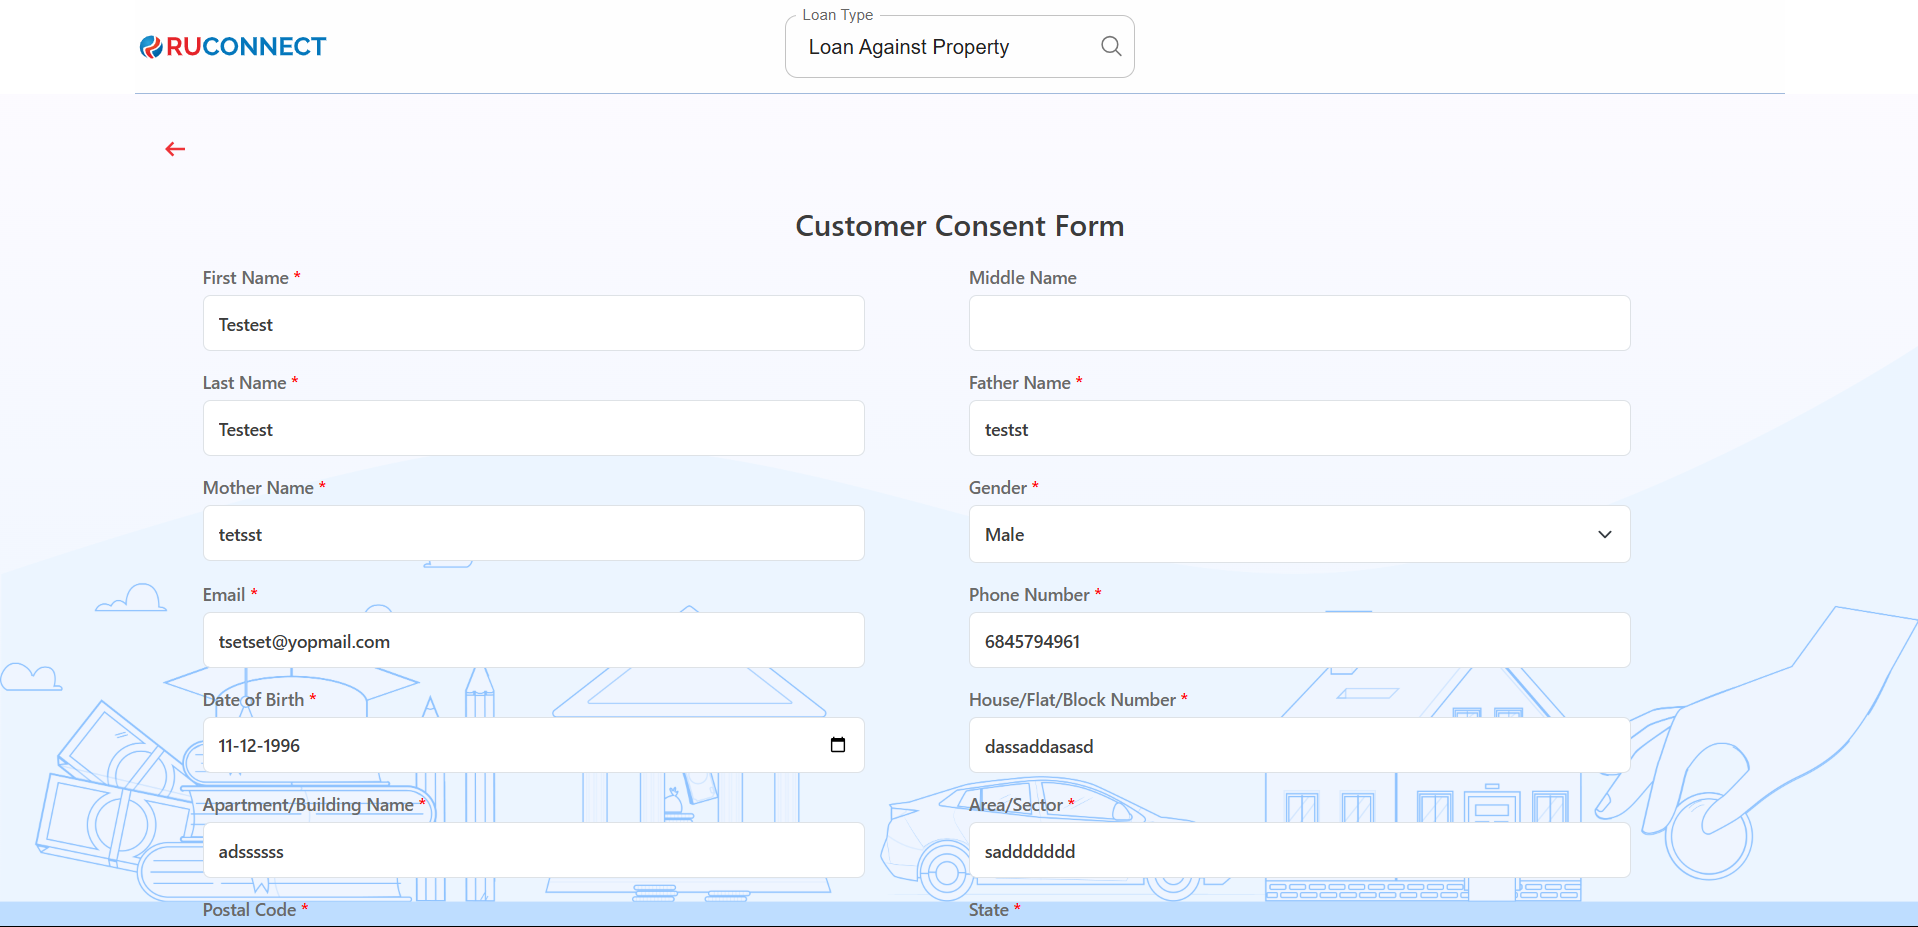
Step 9: Fill Personal & Address Details for CIBIL
Personal Details- First Name: Enter your First name.
- Middle Name: Enter your Middle name (optional).
- Last Name: Enter your Last name.
- Father’s Name: Enter your Father’s full name.
- Mother’s Name: Enter your Mother’s full name.
- Gender: Select your gender from the dropdown.
- Email ID: Enter your email ID.
- Mobile Number: Enter your mobile number.
- Date of Birth: Enter your date of birth.
- House / Flat / Block Number: Enter the house/flat/block number of the address.
- Building / Apartment Name: Enter the building/apartment name of the address.
- Area / Sector: Enter the area/sector of the address.
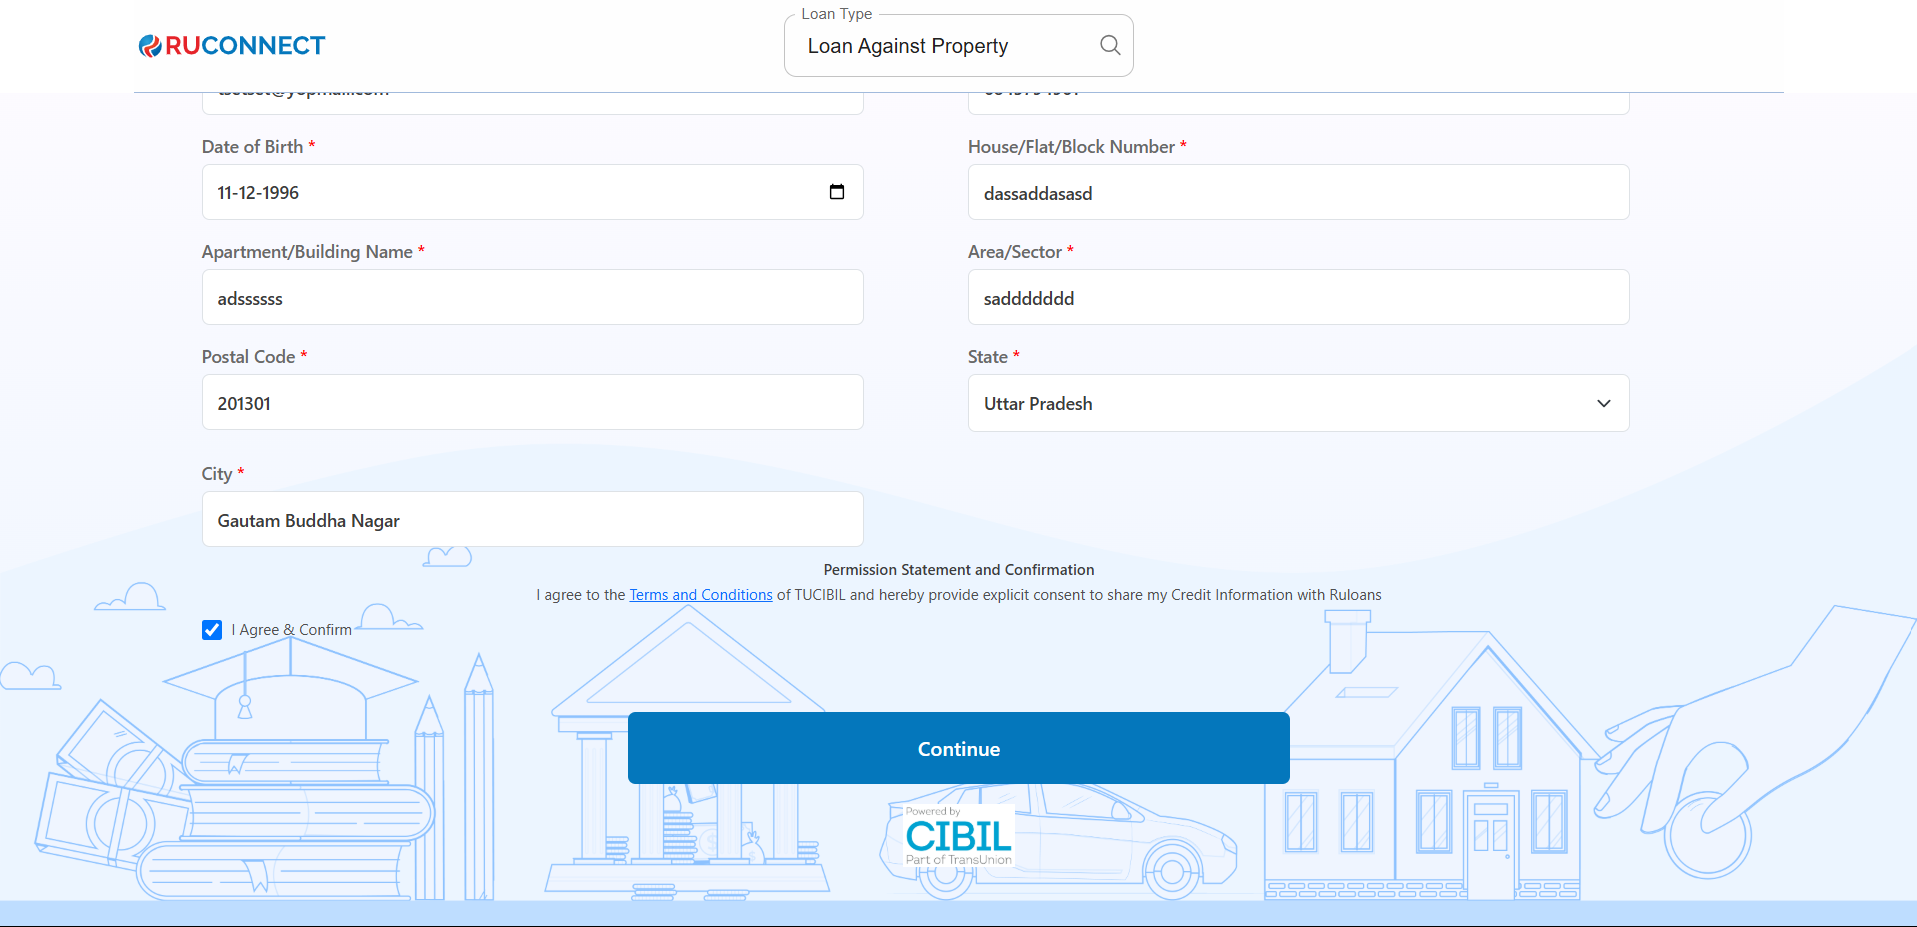
- Pincode: Enter the pincode of the address.
- City: Select the city from the dropdown.
- State: Select the state from the dropdown.
You may review the Terms & Conditions.
Tap Continue
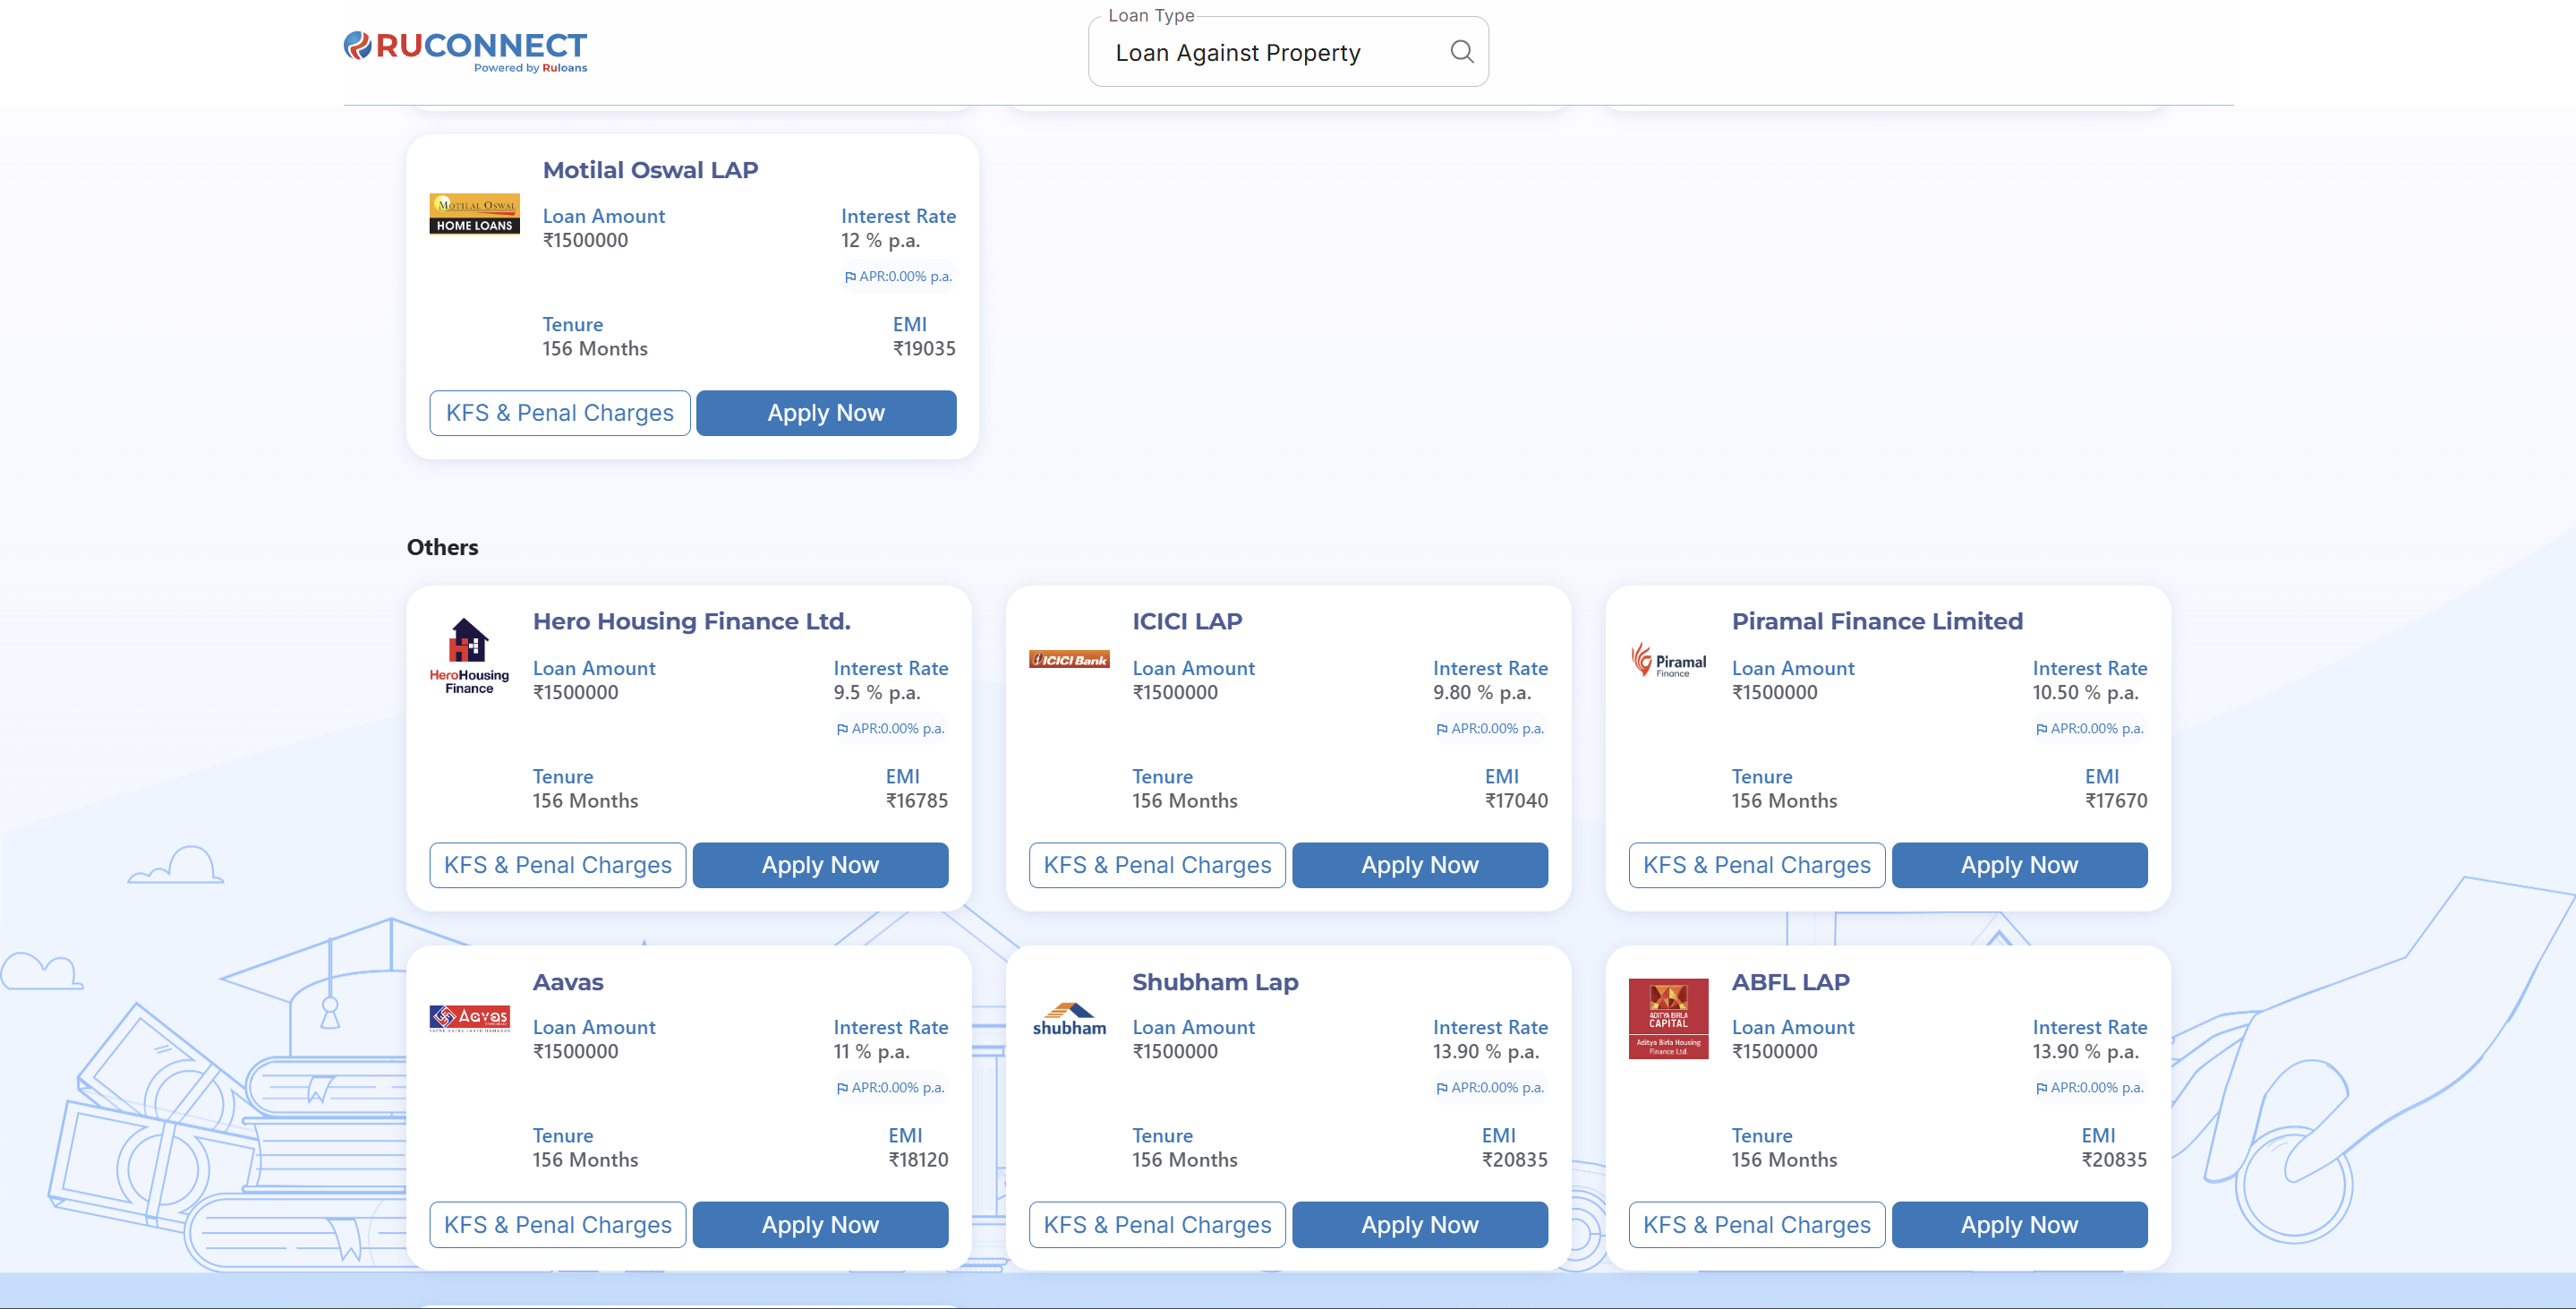
Step 10: Get Your Recommended Offers
- Based on your details, view loan offers from lenders like:
- ABFL, Sunadaram, Piramal Finance, DMI, and more.
Step 11: Customer PAN & Mobile Number Entry
This screen is used to collect the customer’s mobile number and PAN (Permanent Account Number), which are essential for identity verification and loan processing.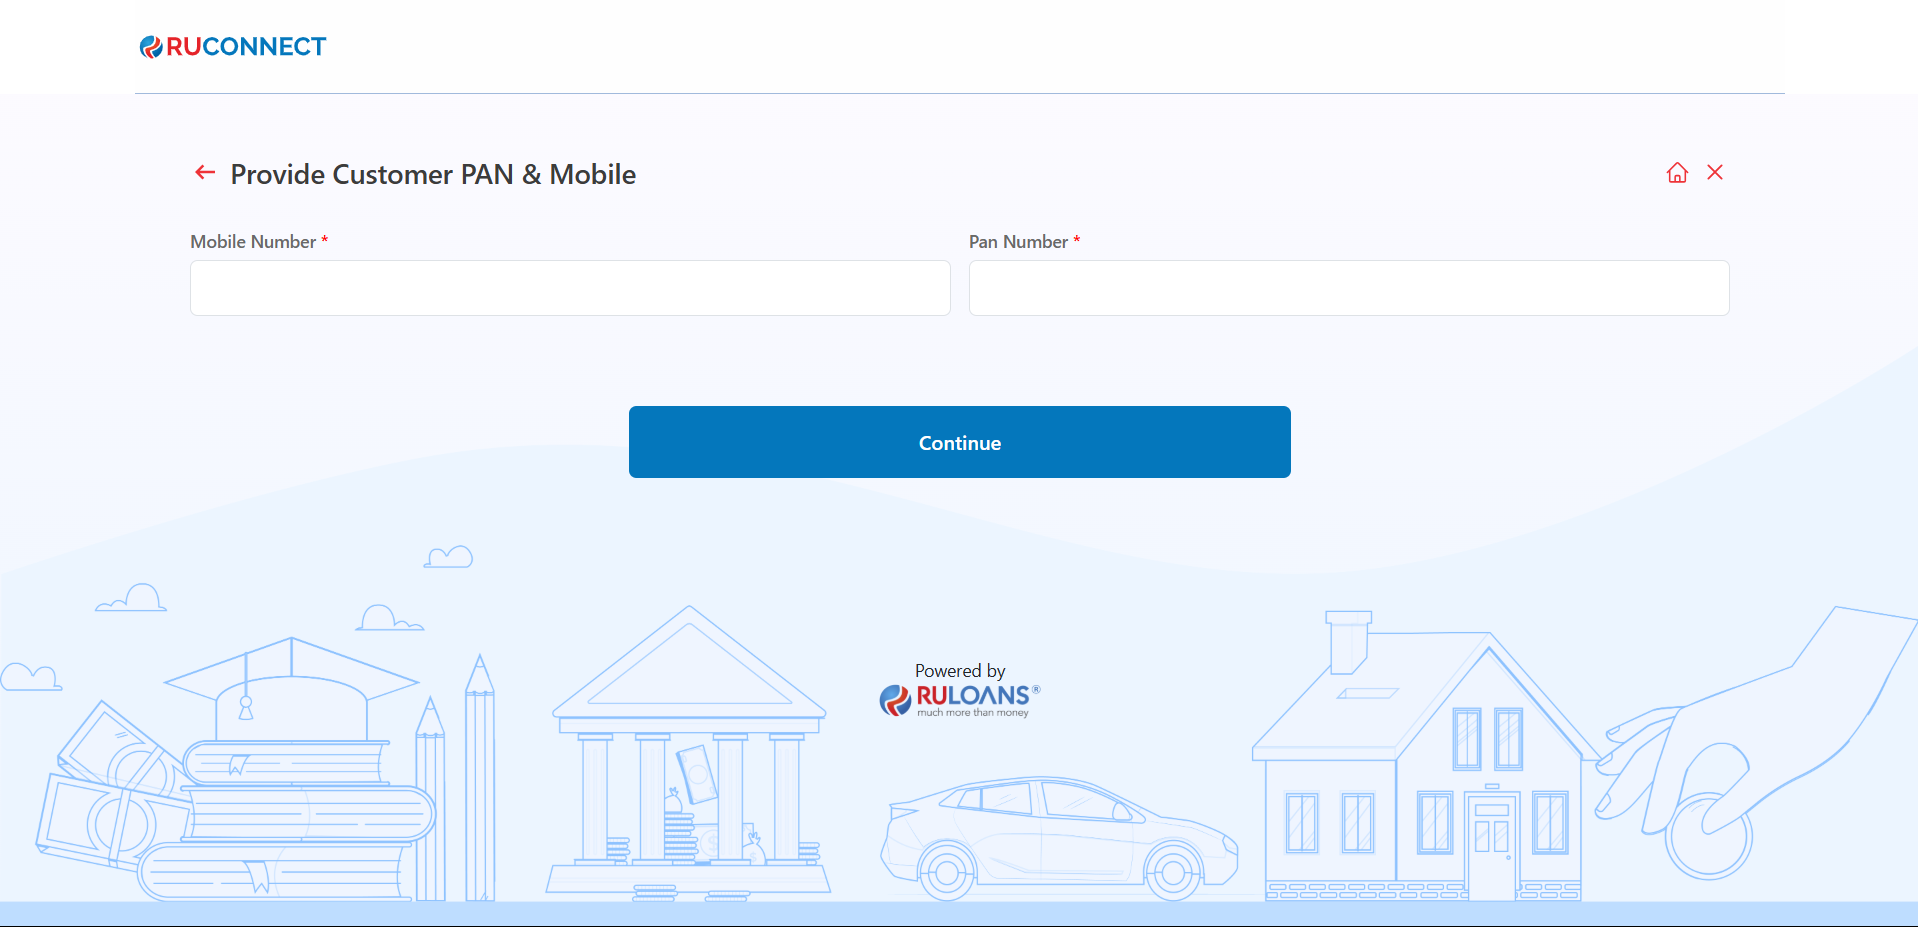
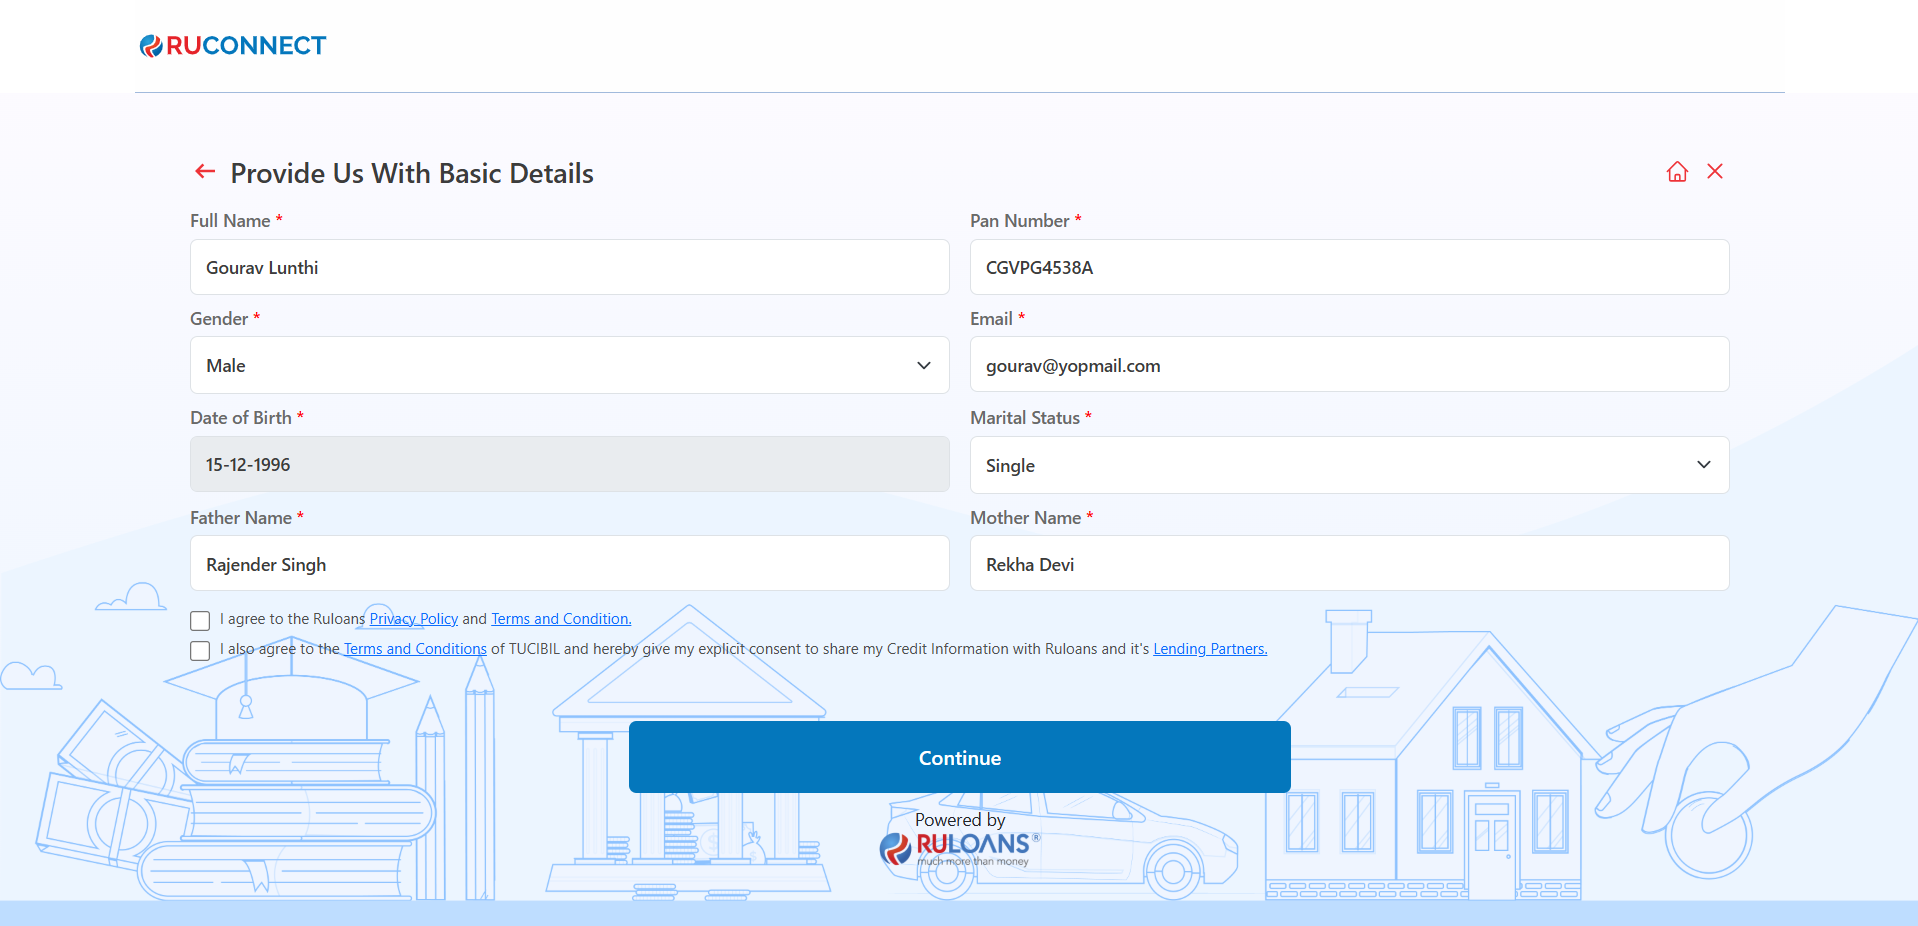
Step 12: Provide Basic Details
- Mandatory Fields:
- Full Name, PAN Number, Gender, Email, Date of Birth, Marital Status, Father’s Name, and Mother’s Name.
- Consent:
- Select checkboxes for Privacy Policy and Credit Information consent.
- Action:
- Click Continue to proceed.
Step 13: OTP Verification
Enter the One-Time Password (OTP) sent to the registered mobile number for verification.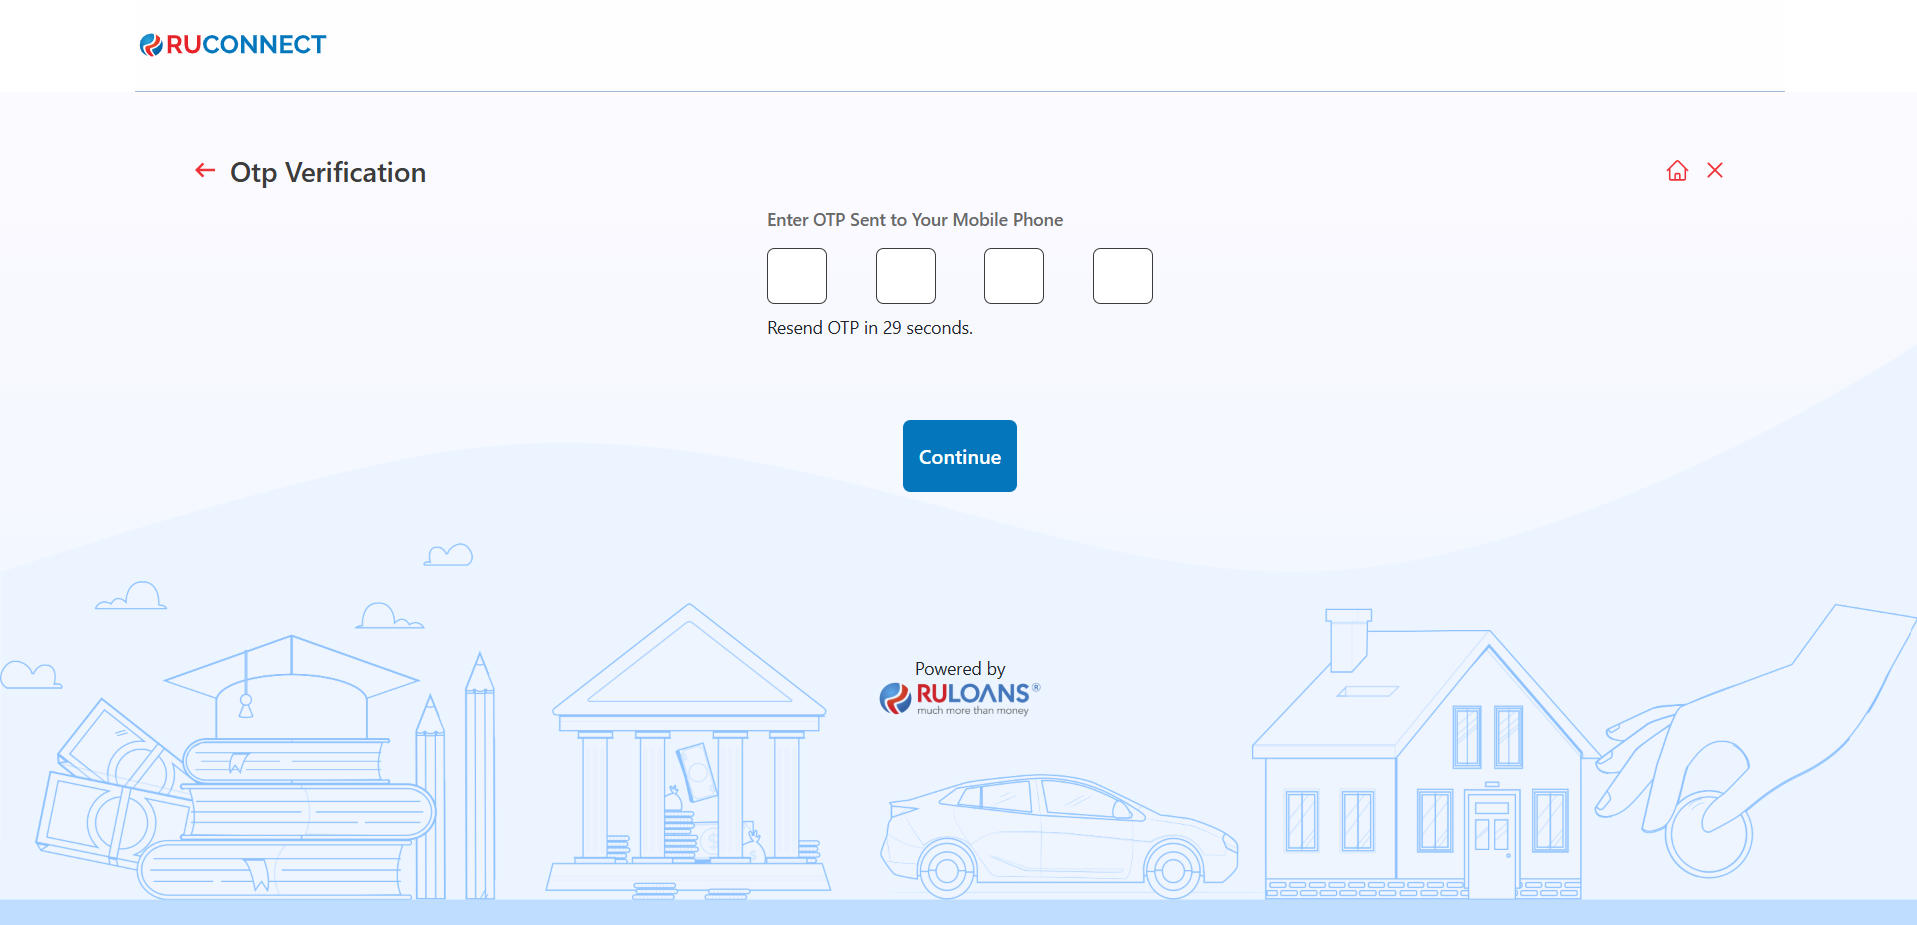
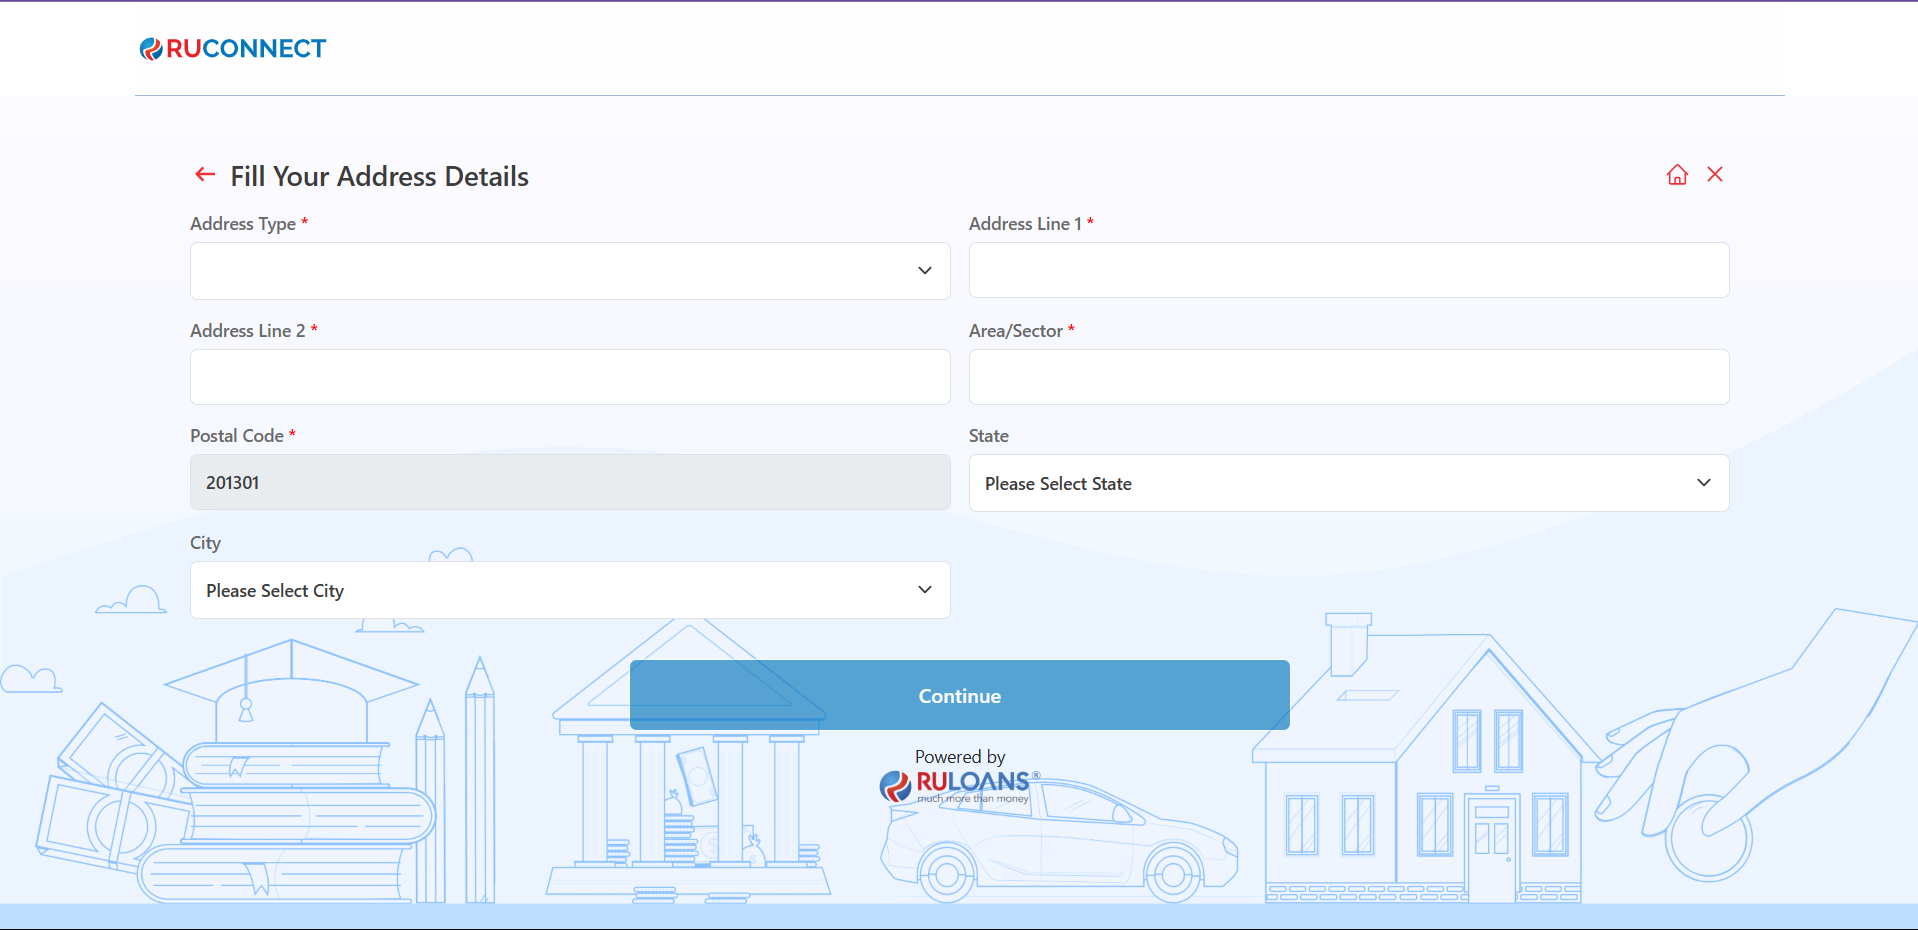
Step 14: Enter Address Details
- Provide your residential address:
- Address Type (Mandatory)
- Address Line 1 (Mandatory)
- Address Line 2 (Mandatory)
- Area/Sector (Mandatory)
- Postal Code (Mandatory)
- City & State (Auto fetched)
- If applicable, enter the address already saved (Optional).
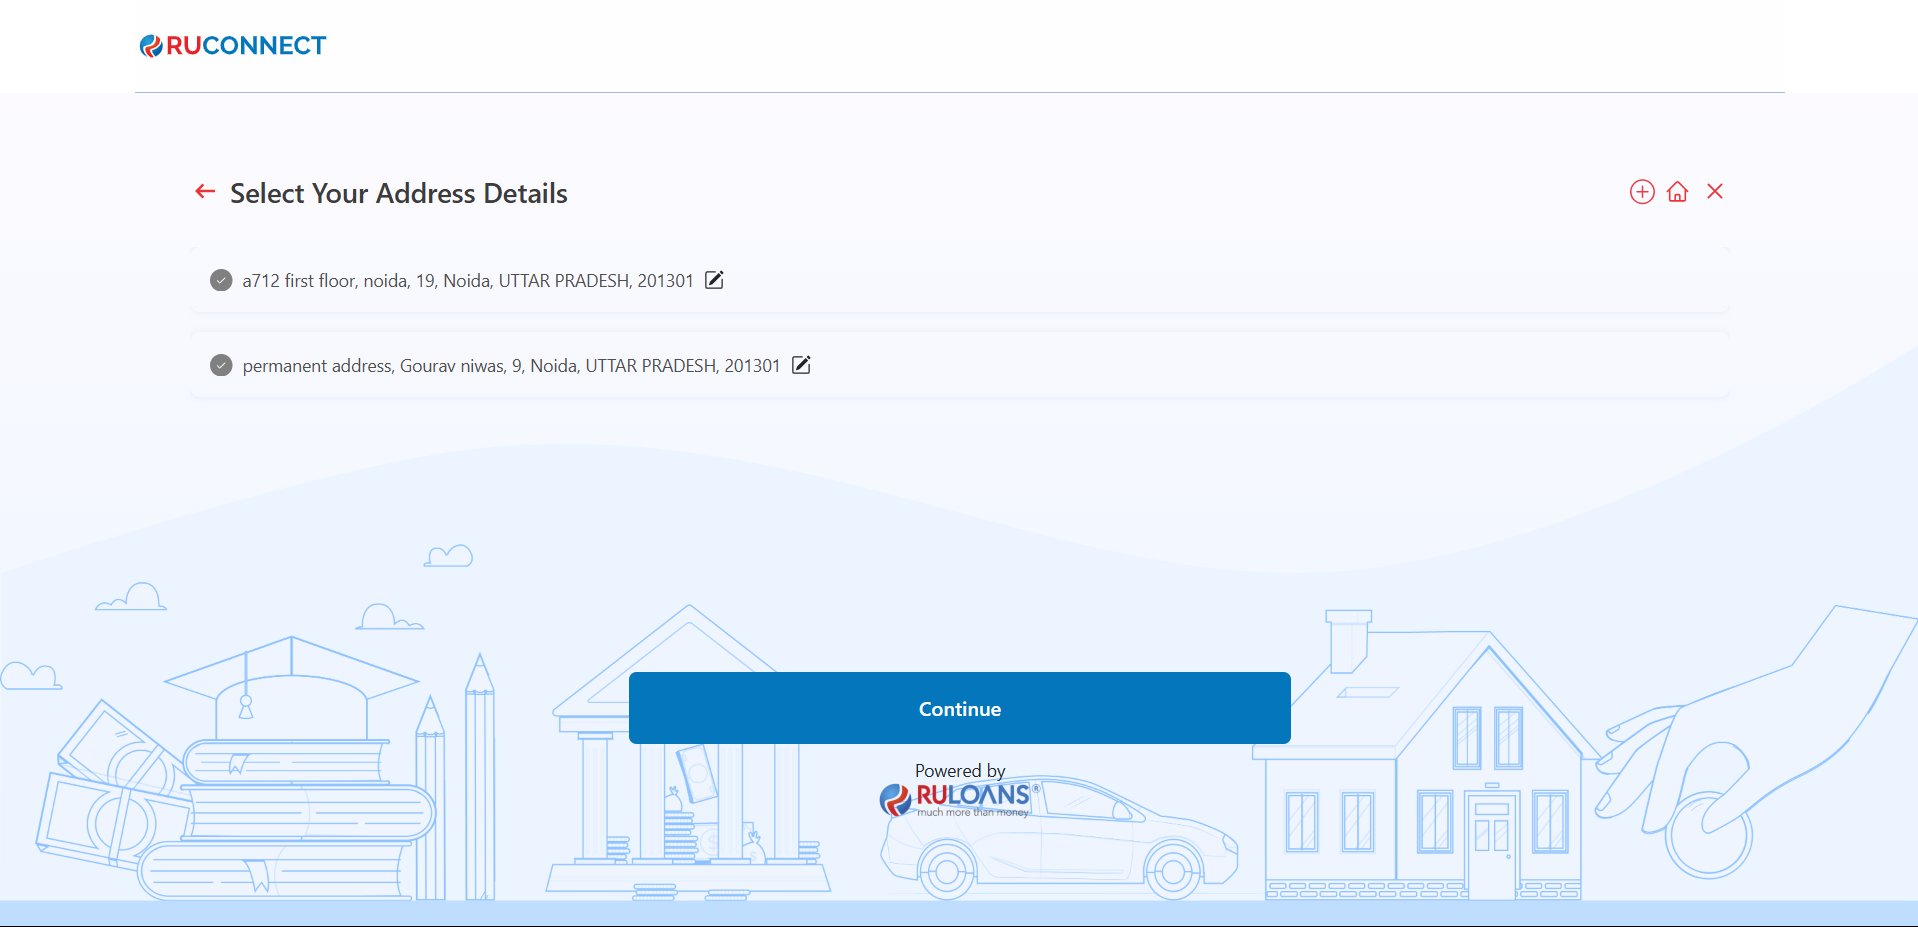
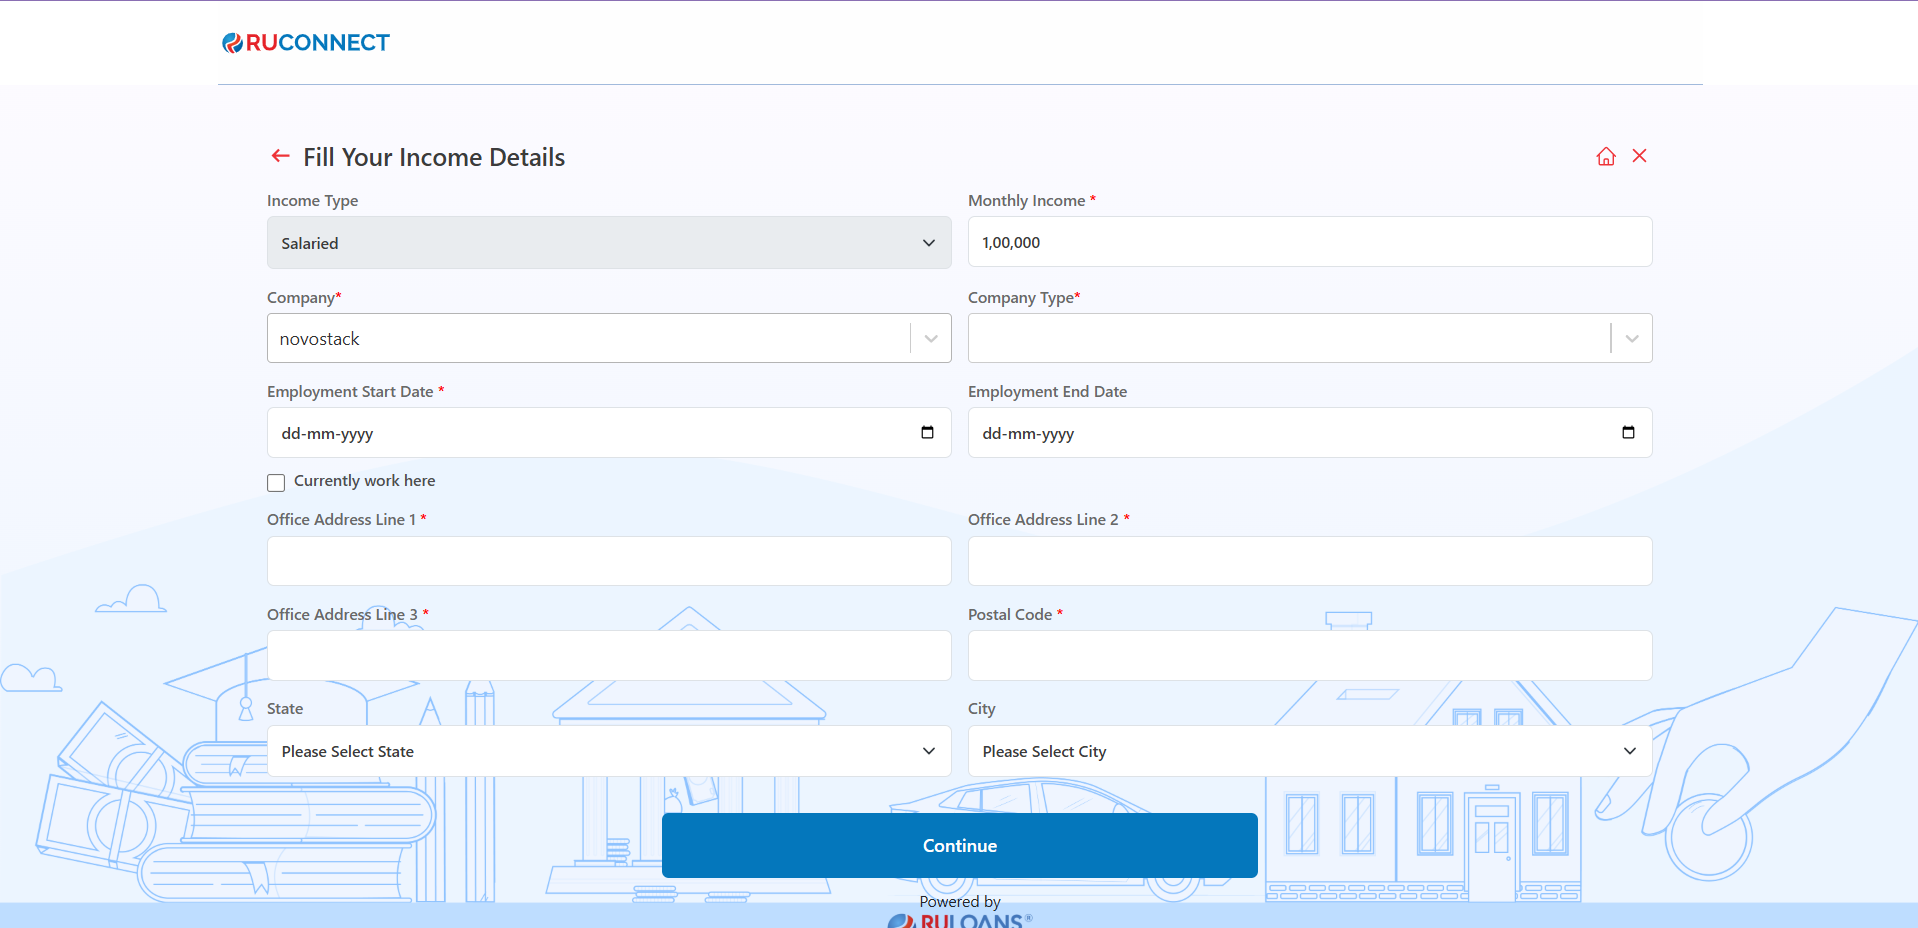
Step 14: Fill Your Income Details
- Purpose: The form collects details about the applicant’s income and employment information to assess their financial stability.
- Fields to Fill:
- Income Type: Choose between options like salaried, self-employed, etc.
- Monthly Income: Enter the monthly income in numeric value.
- Company: Specify the name of the employer.
- Company Type: Choose the type of company (e.g., private, government, etc.).
- Employment Start and End Dates: Input the tenure of employment.
- Option to mark “Currently Work Here” for ongoing employment.
- Office Address: Enter the detailed office address (Line 1, Line 2, Line 3, Postal Code).
- State and City: Select the state and city from dropdown menus.
- Action Button: Continue - Once all fields are filled, the user proceeds to the next step.
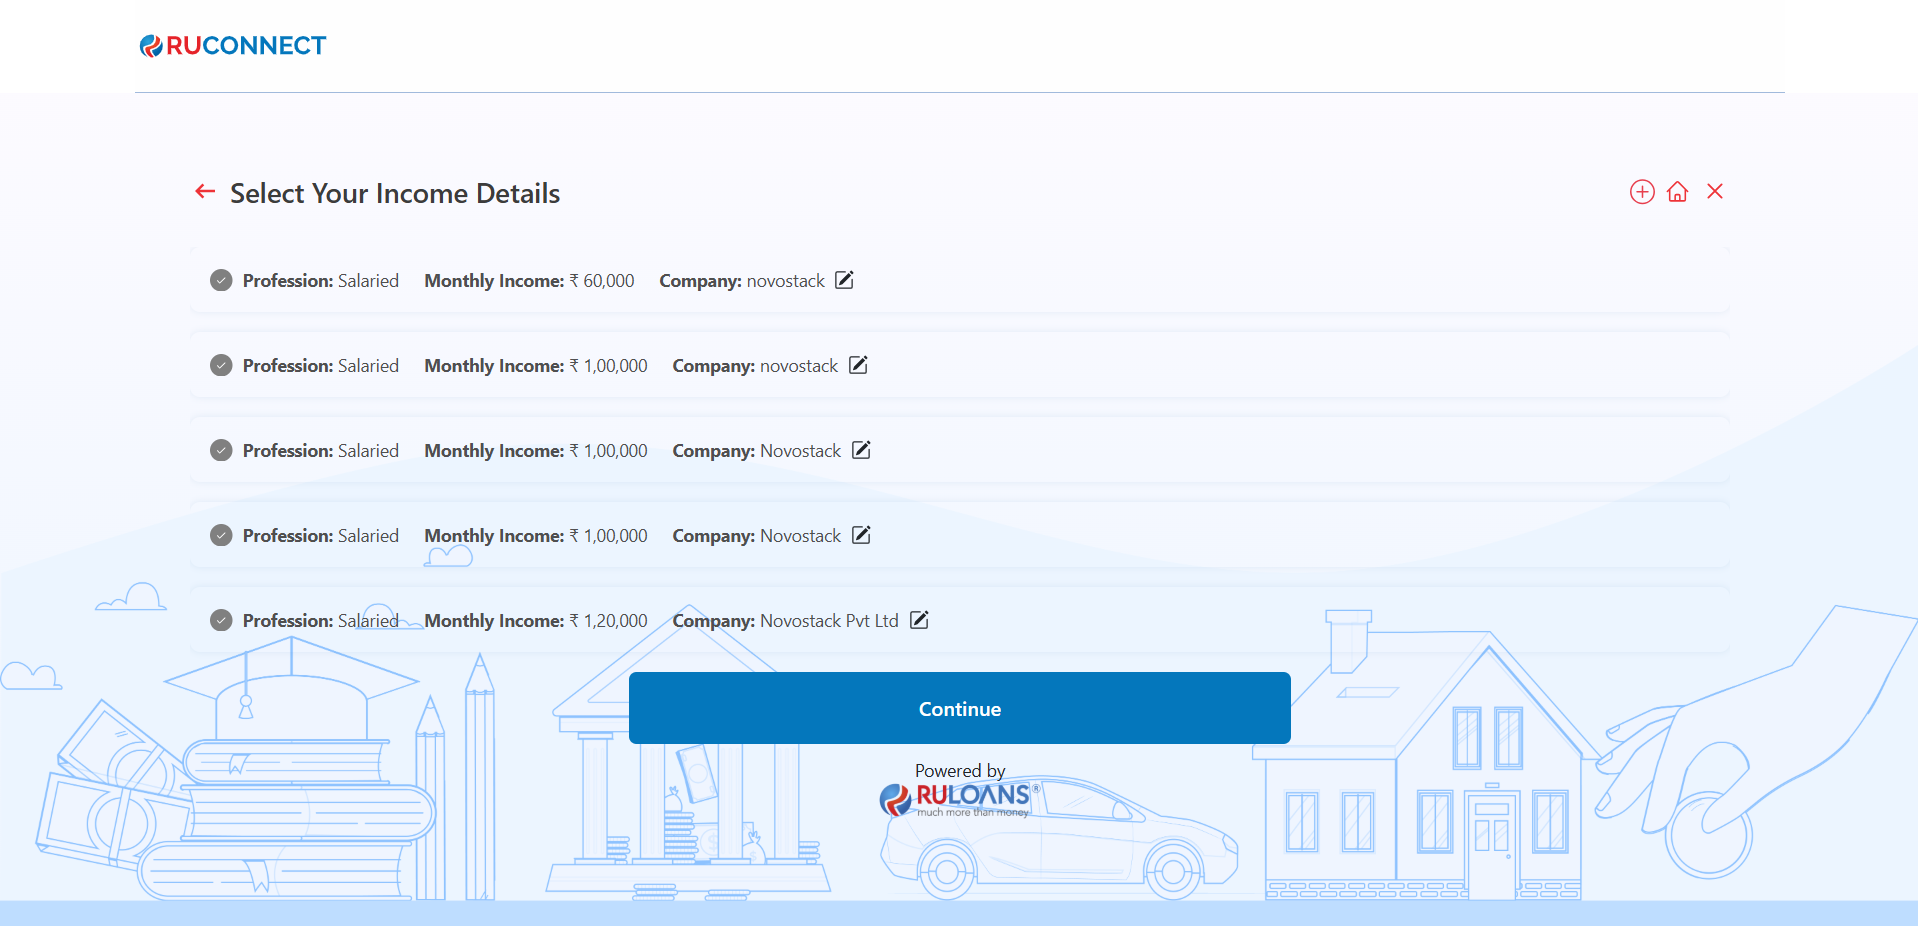
Step 15: Verify Income Details
- Select the appropriate profession that matches your employment status.
- Click on the Continue button to proceed to the next step.
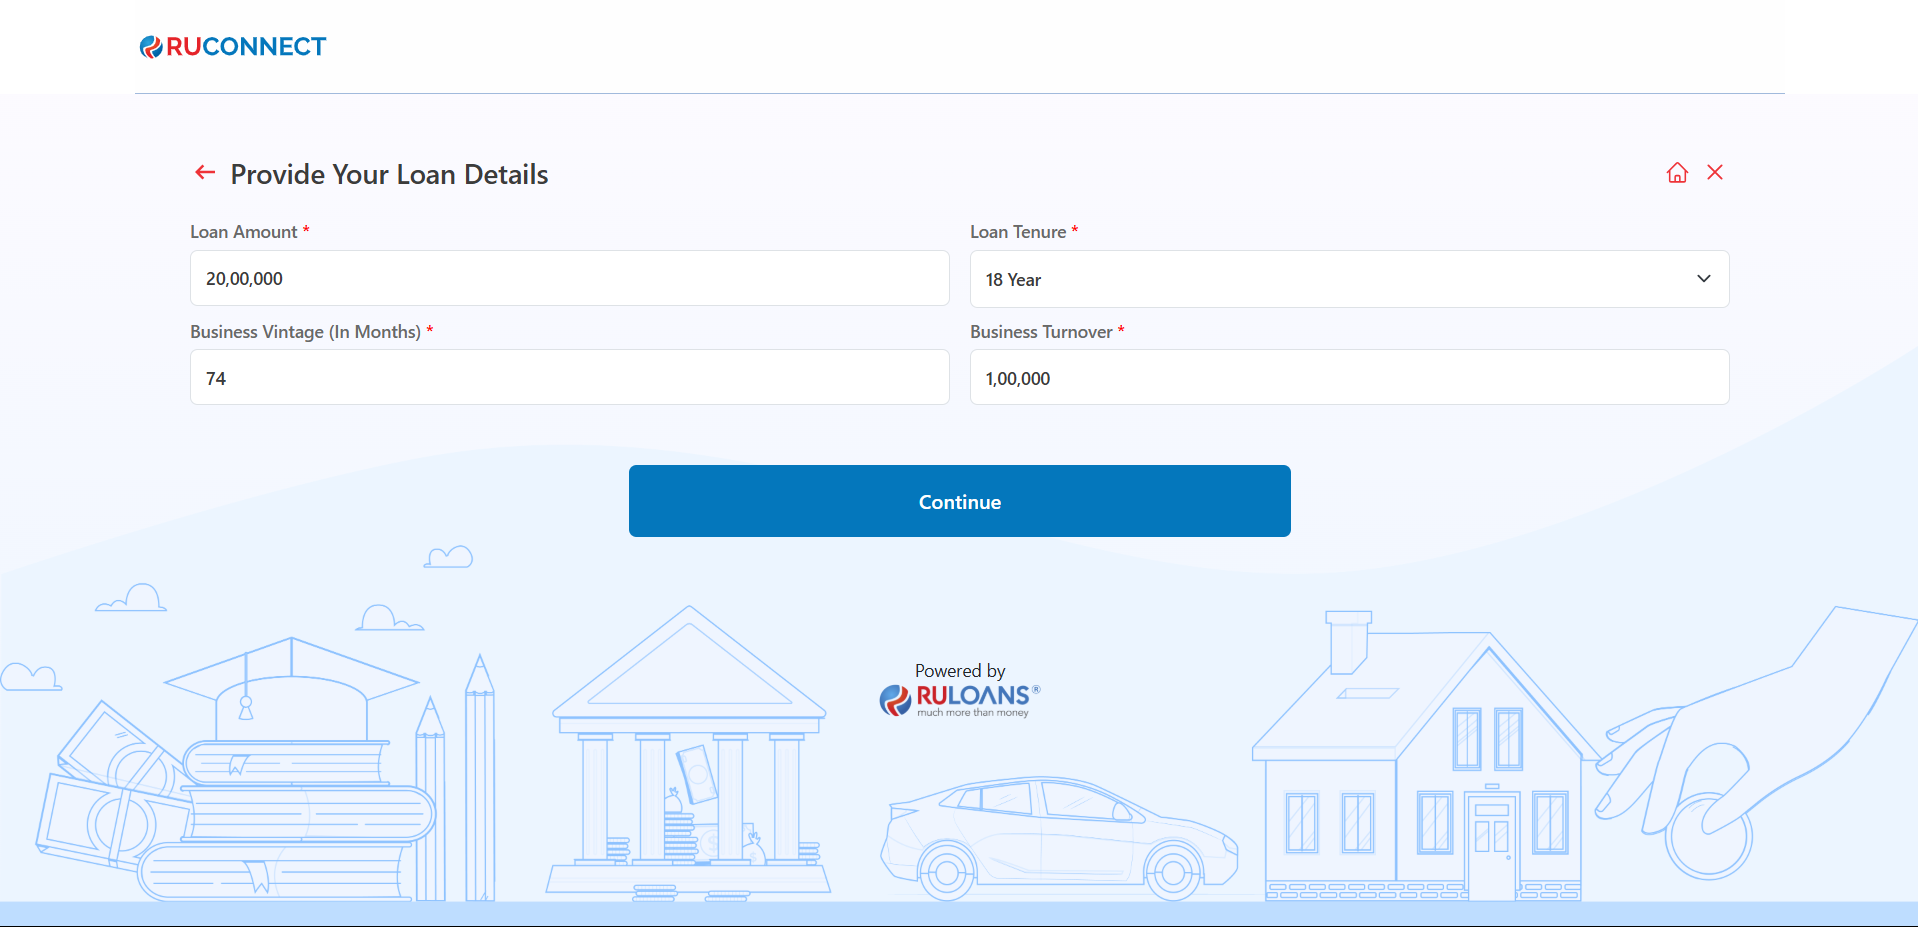
Step 16: Provide Loan Details
-
Loan Amount:
- Enter the desired loan amount in the input field (Mandatory).
-
Loan Tenure:
- Choose the loan tenure from the dropdown menu (e.g., 2 Years, 3 Years) (Mandatory).
-
Business Vintage (in Months):
- Provide the duration of your business operation in months (Optional, if applicable).
-
Business Turnover:
- Specify your business’s annual turnover (Mandatory).
- After completing the fields, click on the Continue button to proceed to the next step.
- For Salaried Users
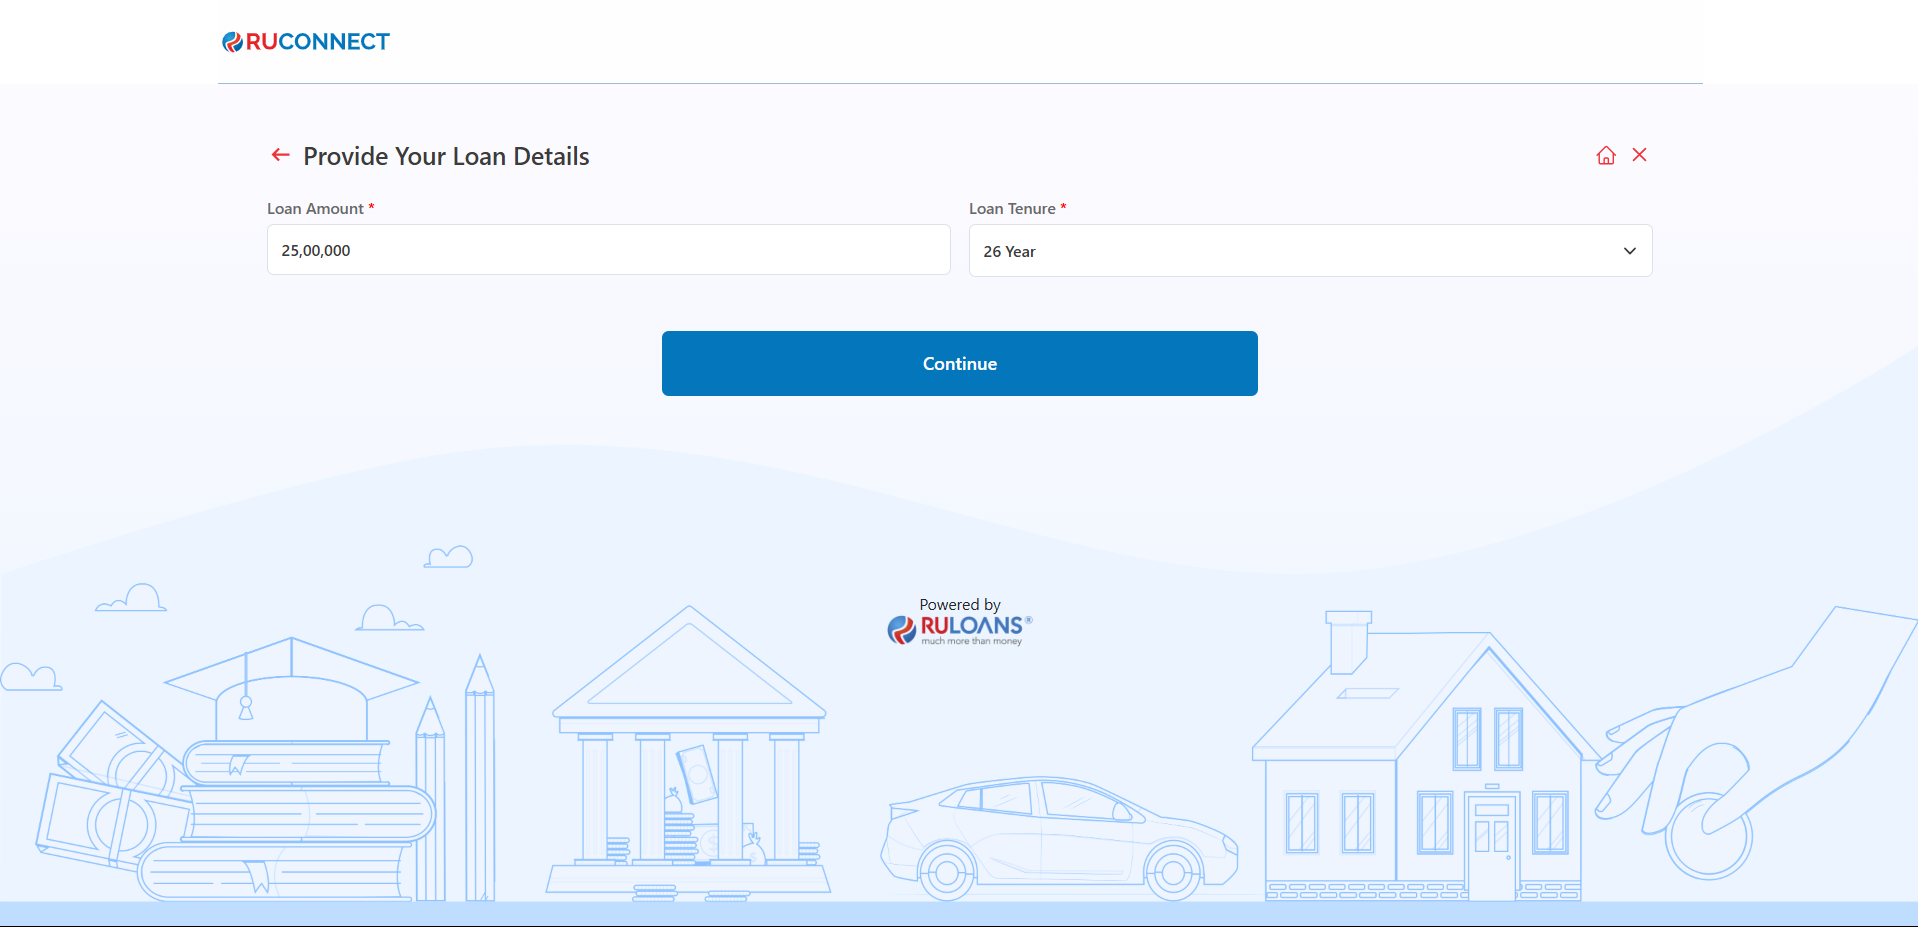 NOTE: The Fields Business Vintage and Business Turnover is only applicable for Self Employed Customers
- For Self Employed Professional Users
- For Self Employed Non Professional Users
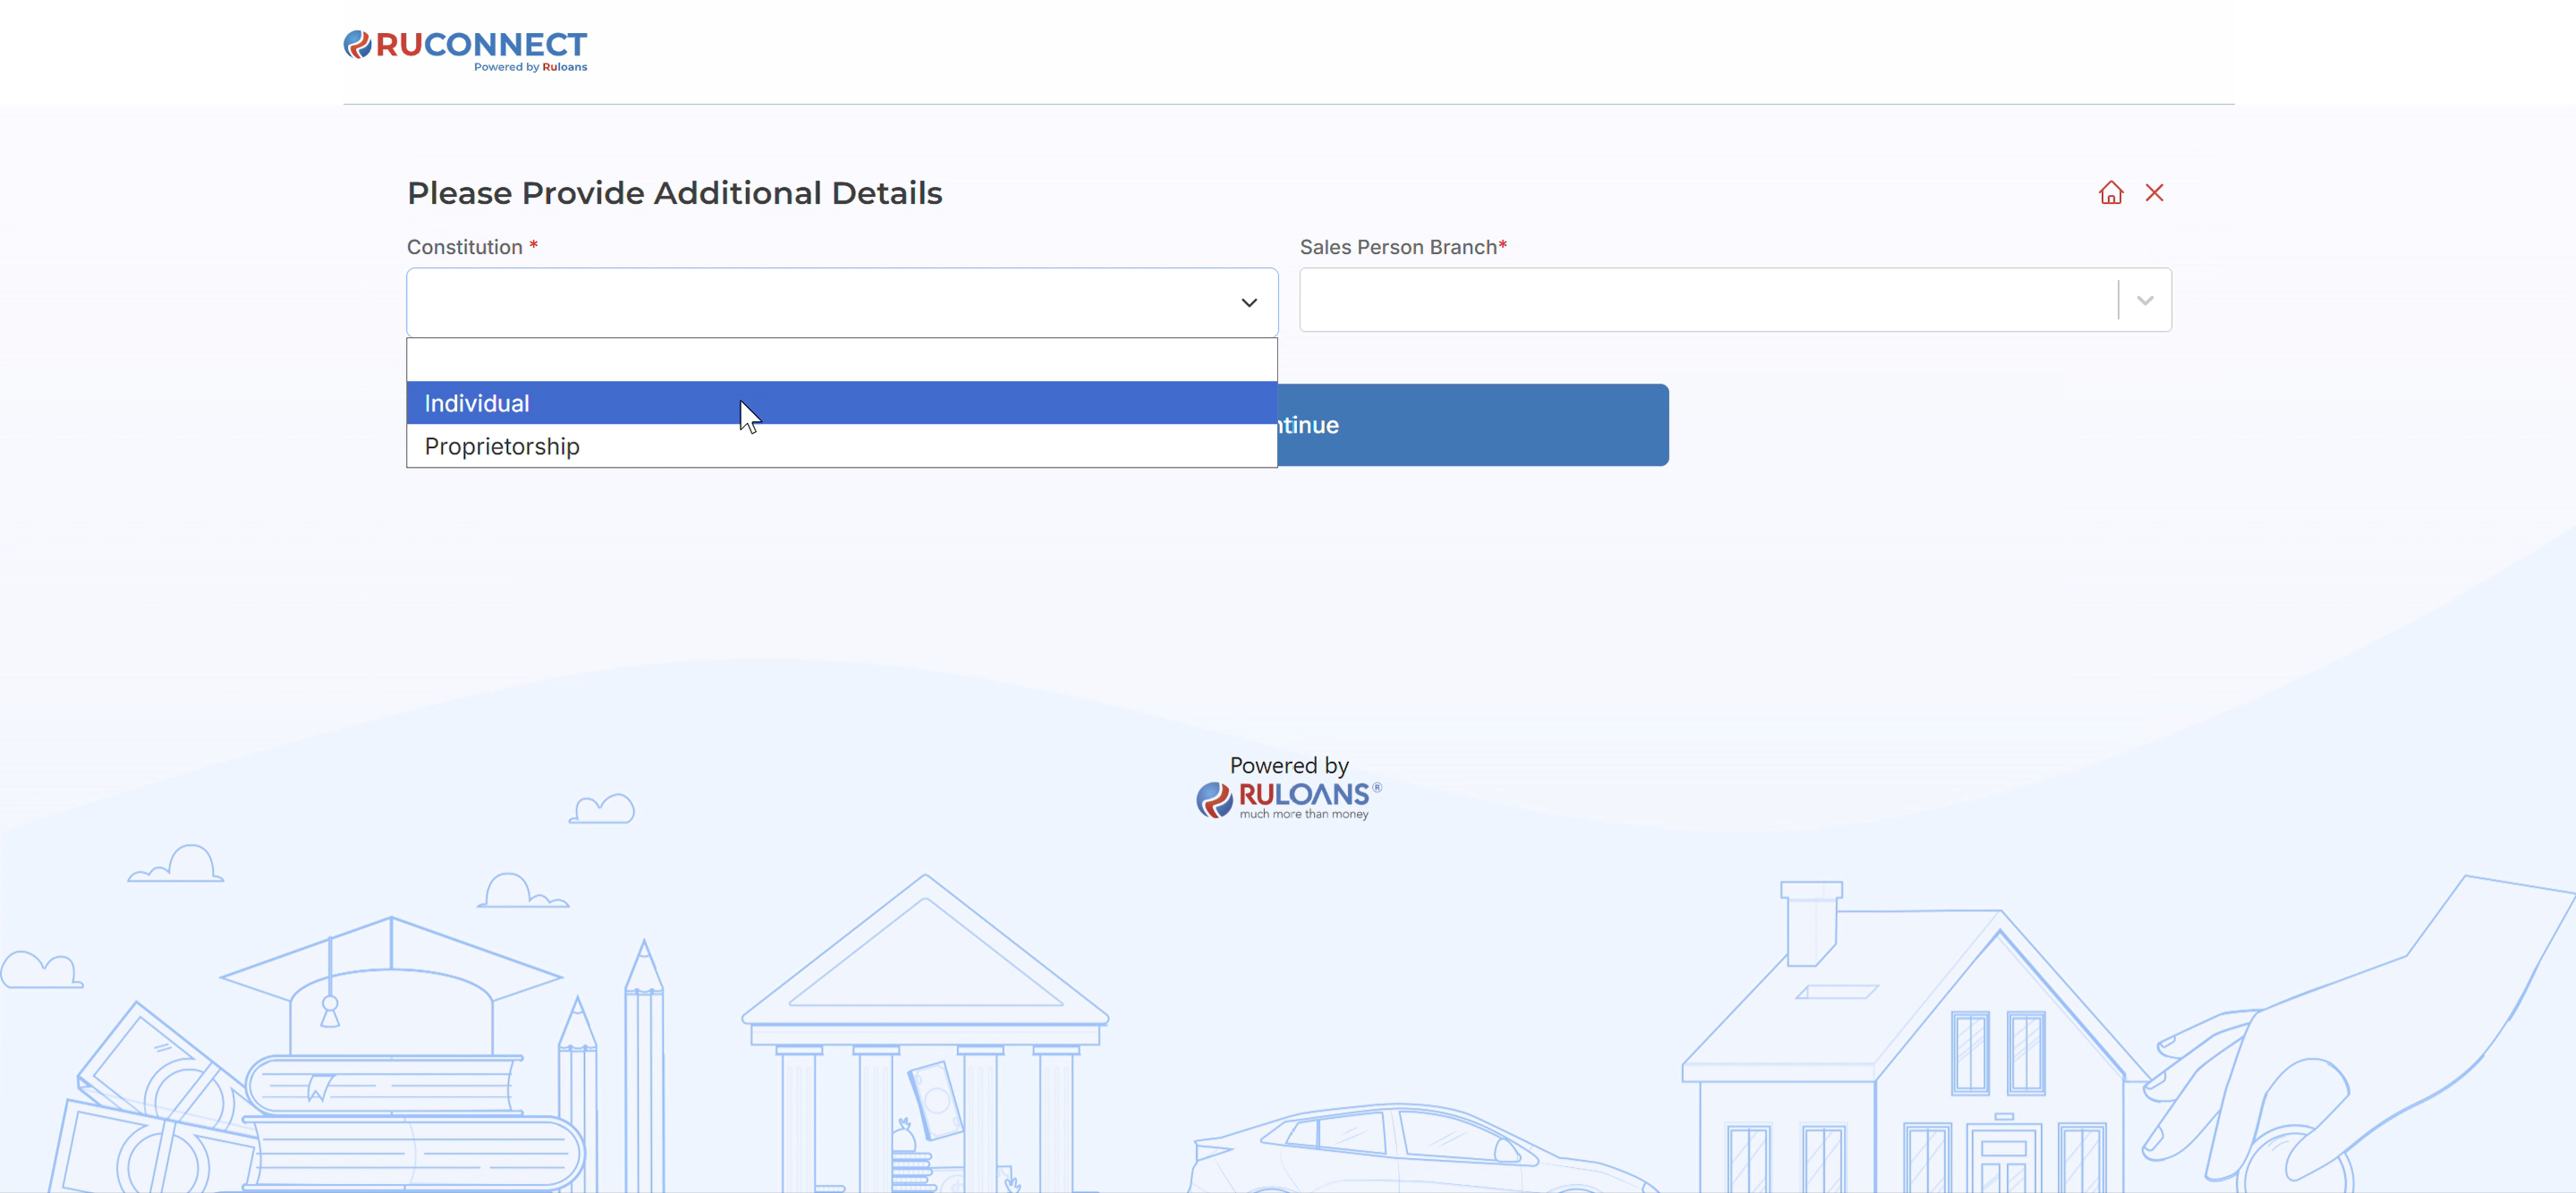
Step 17: Provide Additional Details
-
Select Constitution:
- Select the constition from the drop-down menu (e.g., Individual, Proprietorship) (Mandatory).
-
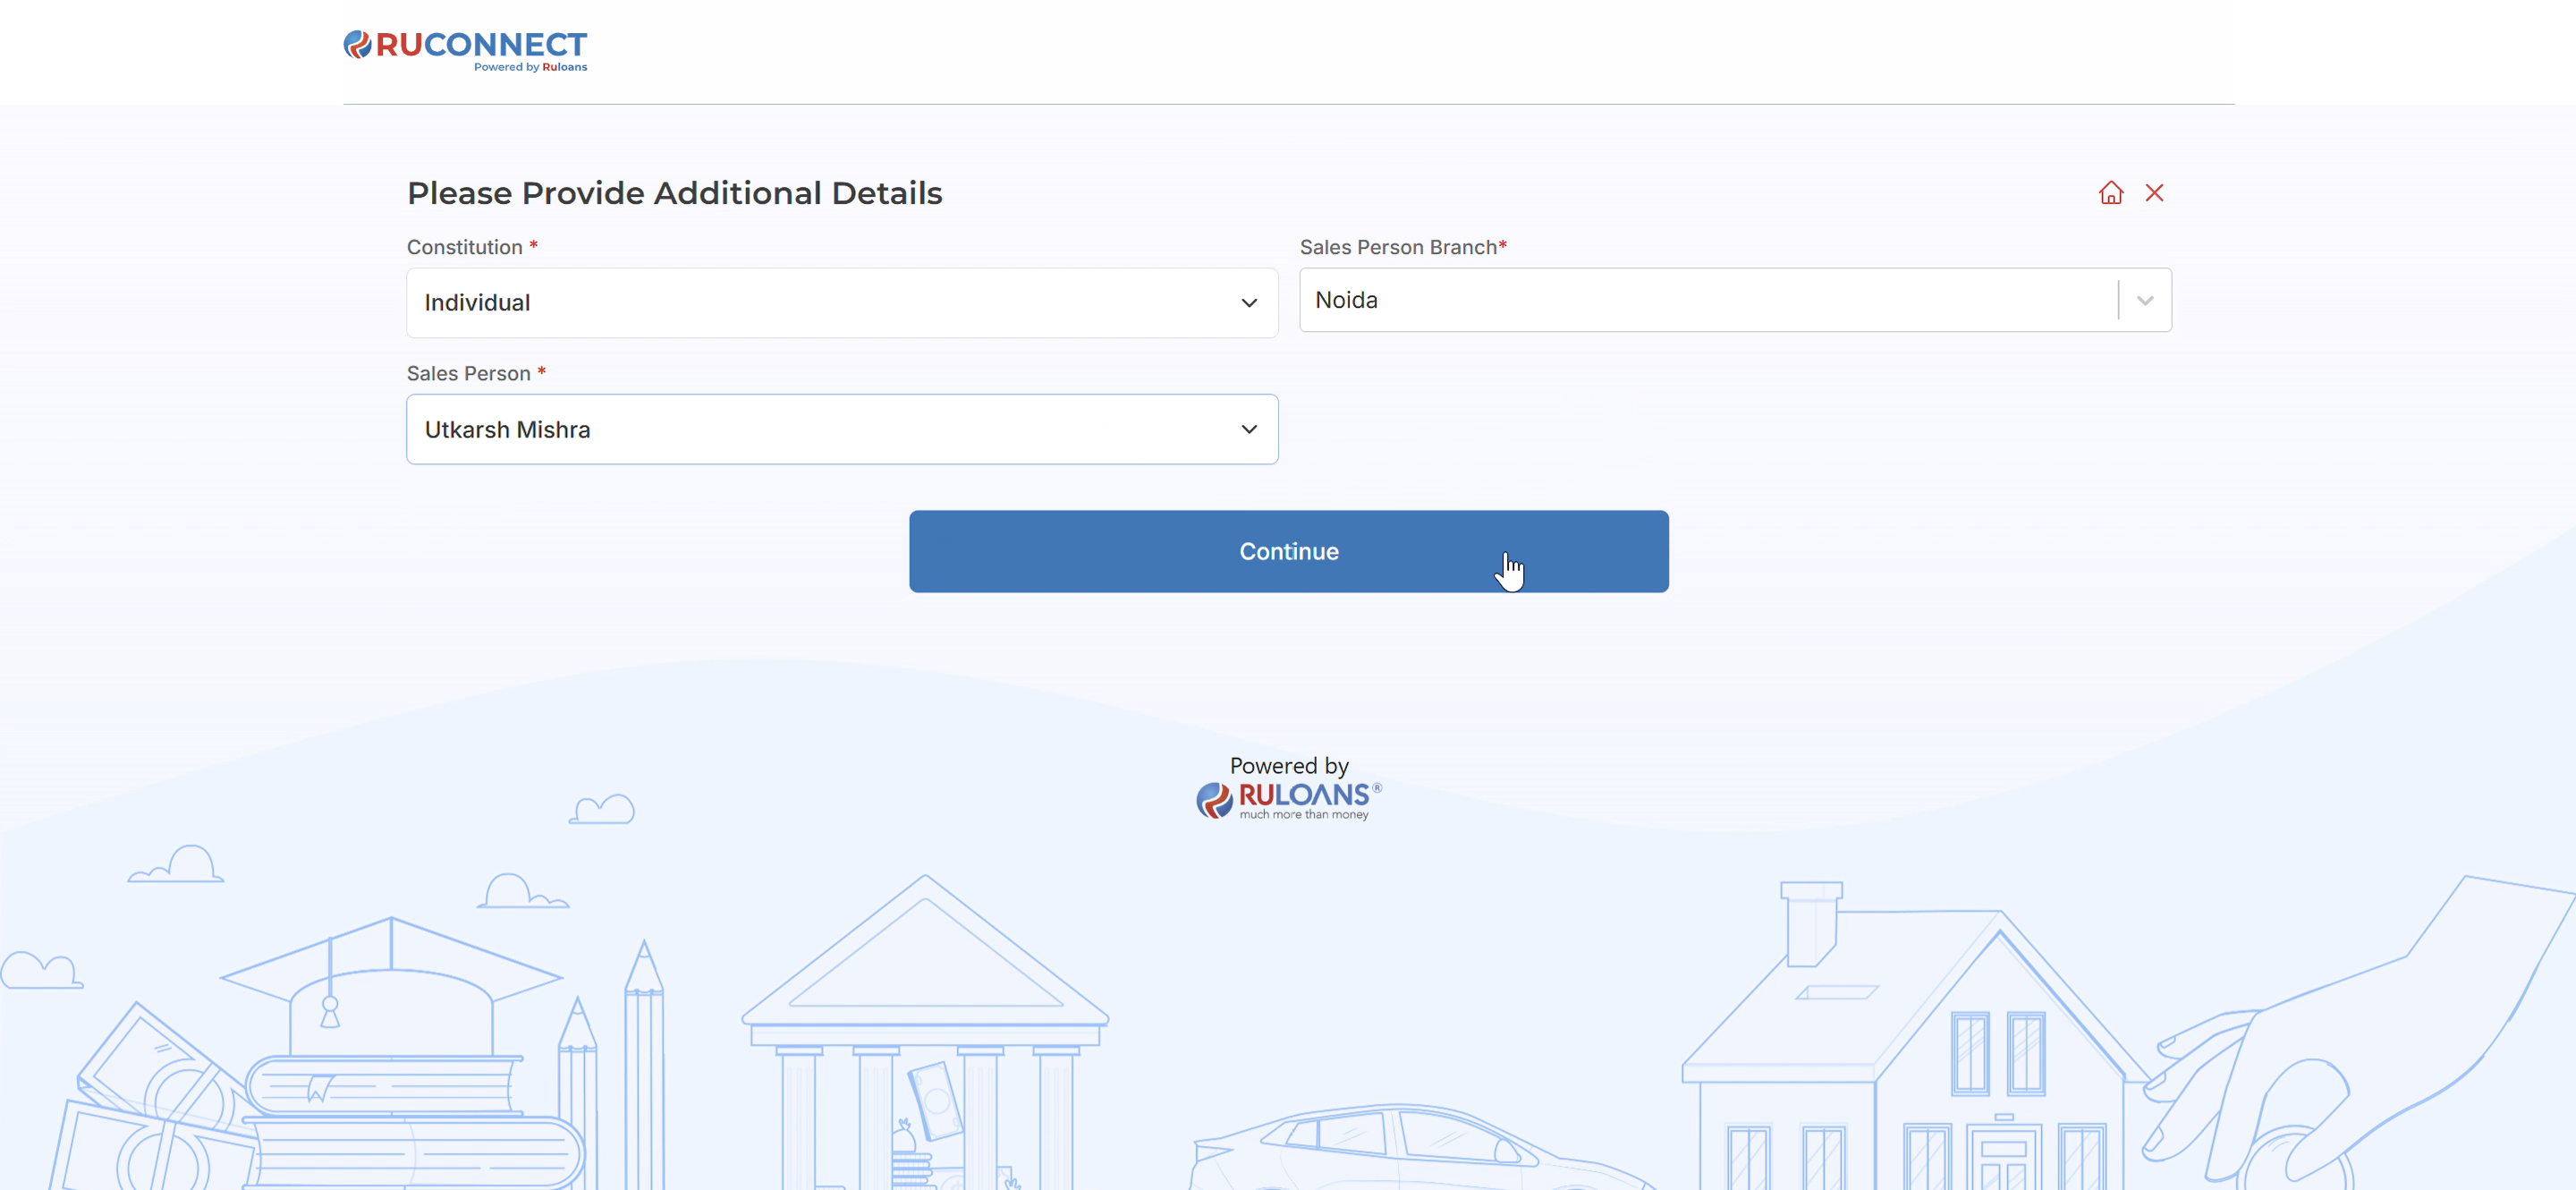
Select Sales Person Branch:
- Select the sales person branch from the drop-down menu (Mandatory).
-
Select Sales Person:
- Select the respective sales person from the drop-down menu according to the branch selected by the dsa (Mandatory).
- After completing the fields, click on the Continue button to proceed to the next step.
Step 18: Application Submission Confirmation
Description: This step displays a confirmation message after the loan application is successfully submitted. Key Information Displayed:- External Lead ID: A unique identifier (e.g., ABCLMLAP-091222) is generated for tracking the application status.
- Support Information: The user is informed that a support executive will contact them within 24 to 48 hours.
- Contact Details: Provides the customer service number 1800 266 7576 and support email [email protected] for any assistance.
- Copy External Lead ID: A button is provided to easily copy the External Lead ID for future reference.
- Navigation: A “Home” button is available to return to the main page.
- Details: A “View” button is available to view further application details.