
1. Overview
The Autonomous Approval flow allows a user to configure autonomous payment settings for a vendor/partner and submit the change for approval. The system records the request status and configuration changes in Autonomous Req Logs for audit and tracking.2. Autonomous Payment Settings
From the vendor/partner profile, the user opens the Autonomous Payment Settings option. The following information is entered or reviewed before submitting the change: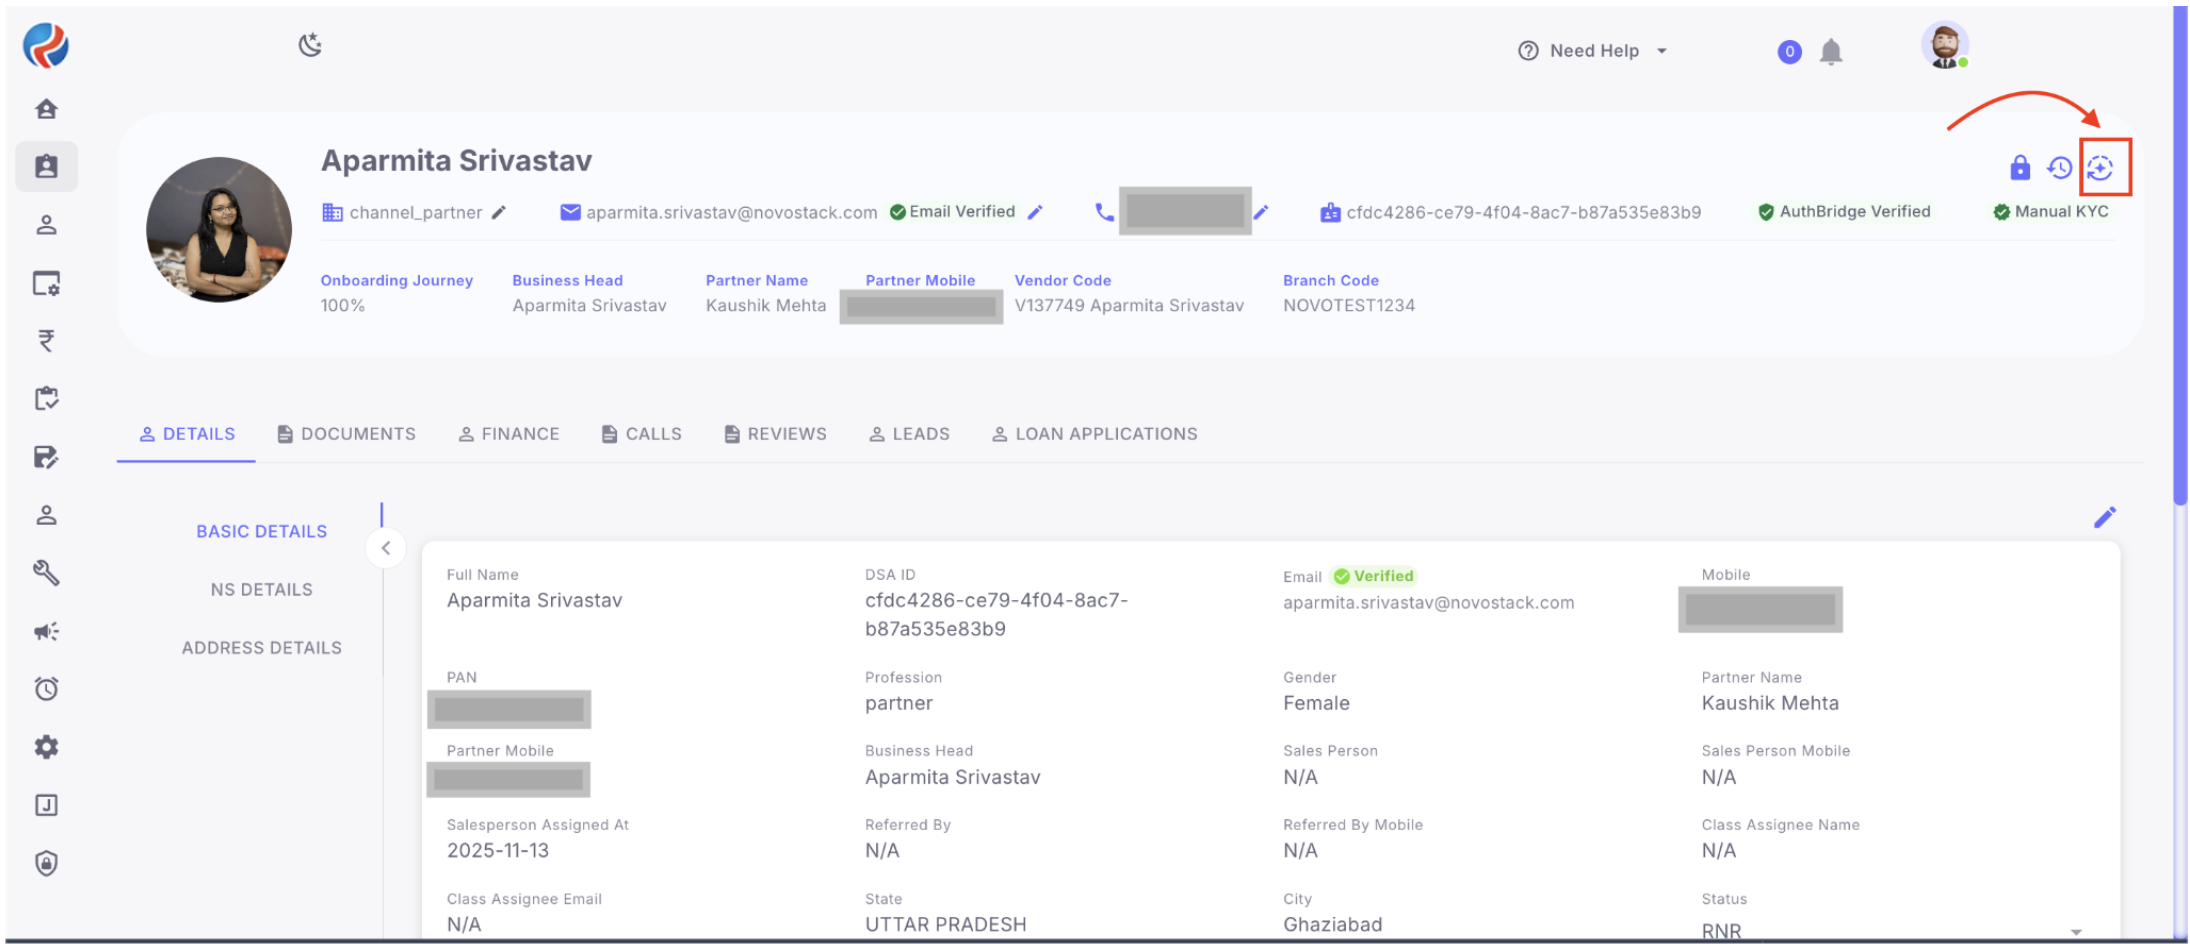 Figure 1
- Unsecured Payout – autonomous payout rate for unsecured cases.
- Secured Payout – autonomous payout rate for secured cases.
- Start Date – date from which the configuration is applicable.
- End Date (optional) – date until which the configuration remains applicable.
- Acknowledgement checkbox – confirms that changing the global autonomous settings will update the master payout autonomous configuration, including rate, ratio, and dates.
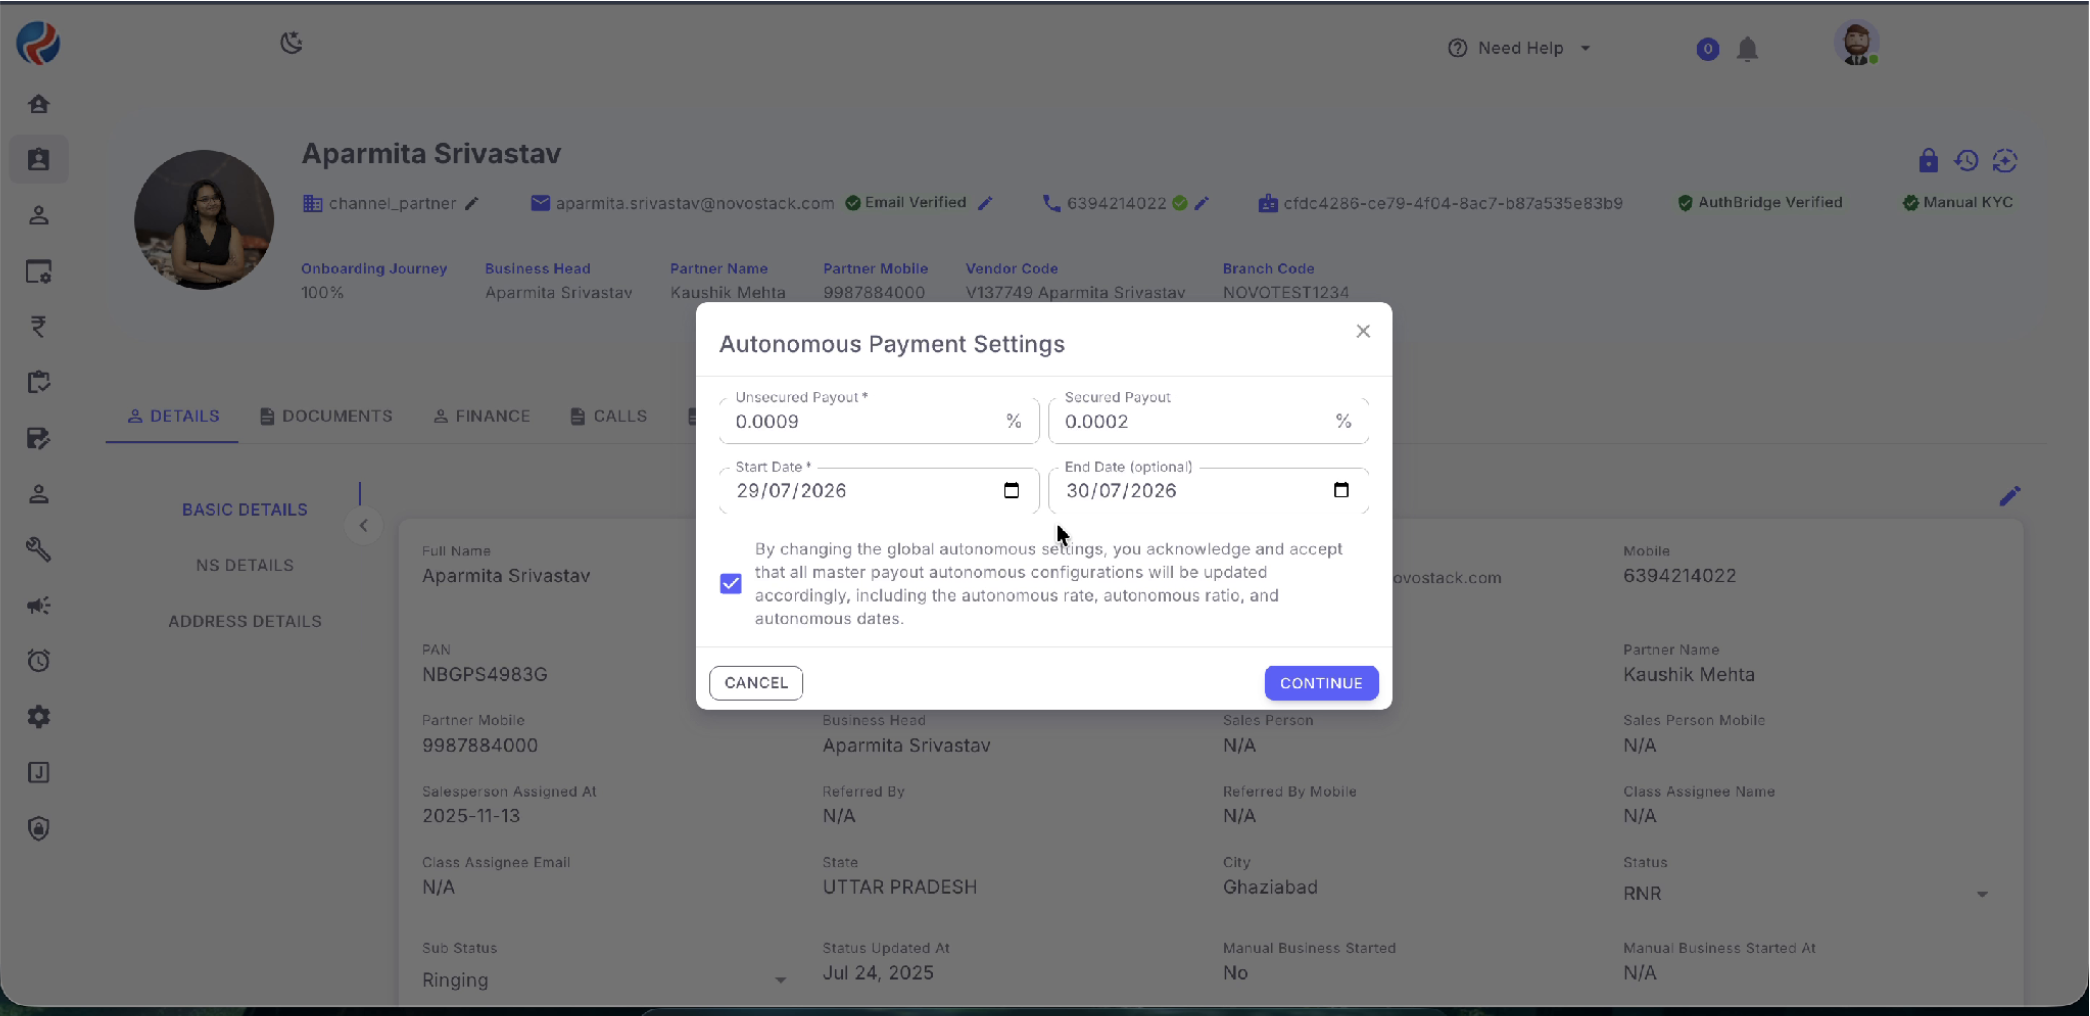 Figure 2 – Autonomous Payment Settings
3. Submit Configuration for Approval
1. Enter/verify the Secured Payout and Unsecured Payout values. 2. Select the Start Date and, if required, the End Date. 3. Review the acknowledgement statement and select the checkbox. 4. Click Continue. 5. The system opens the Approval Required dialog because the action requires approval.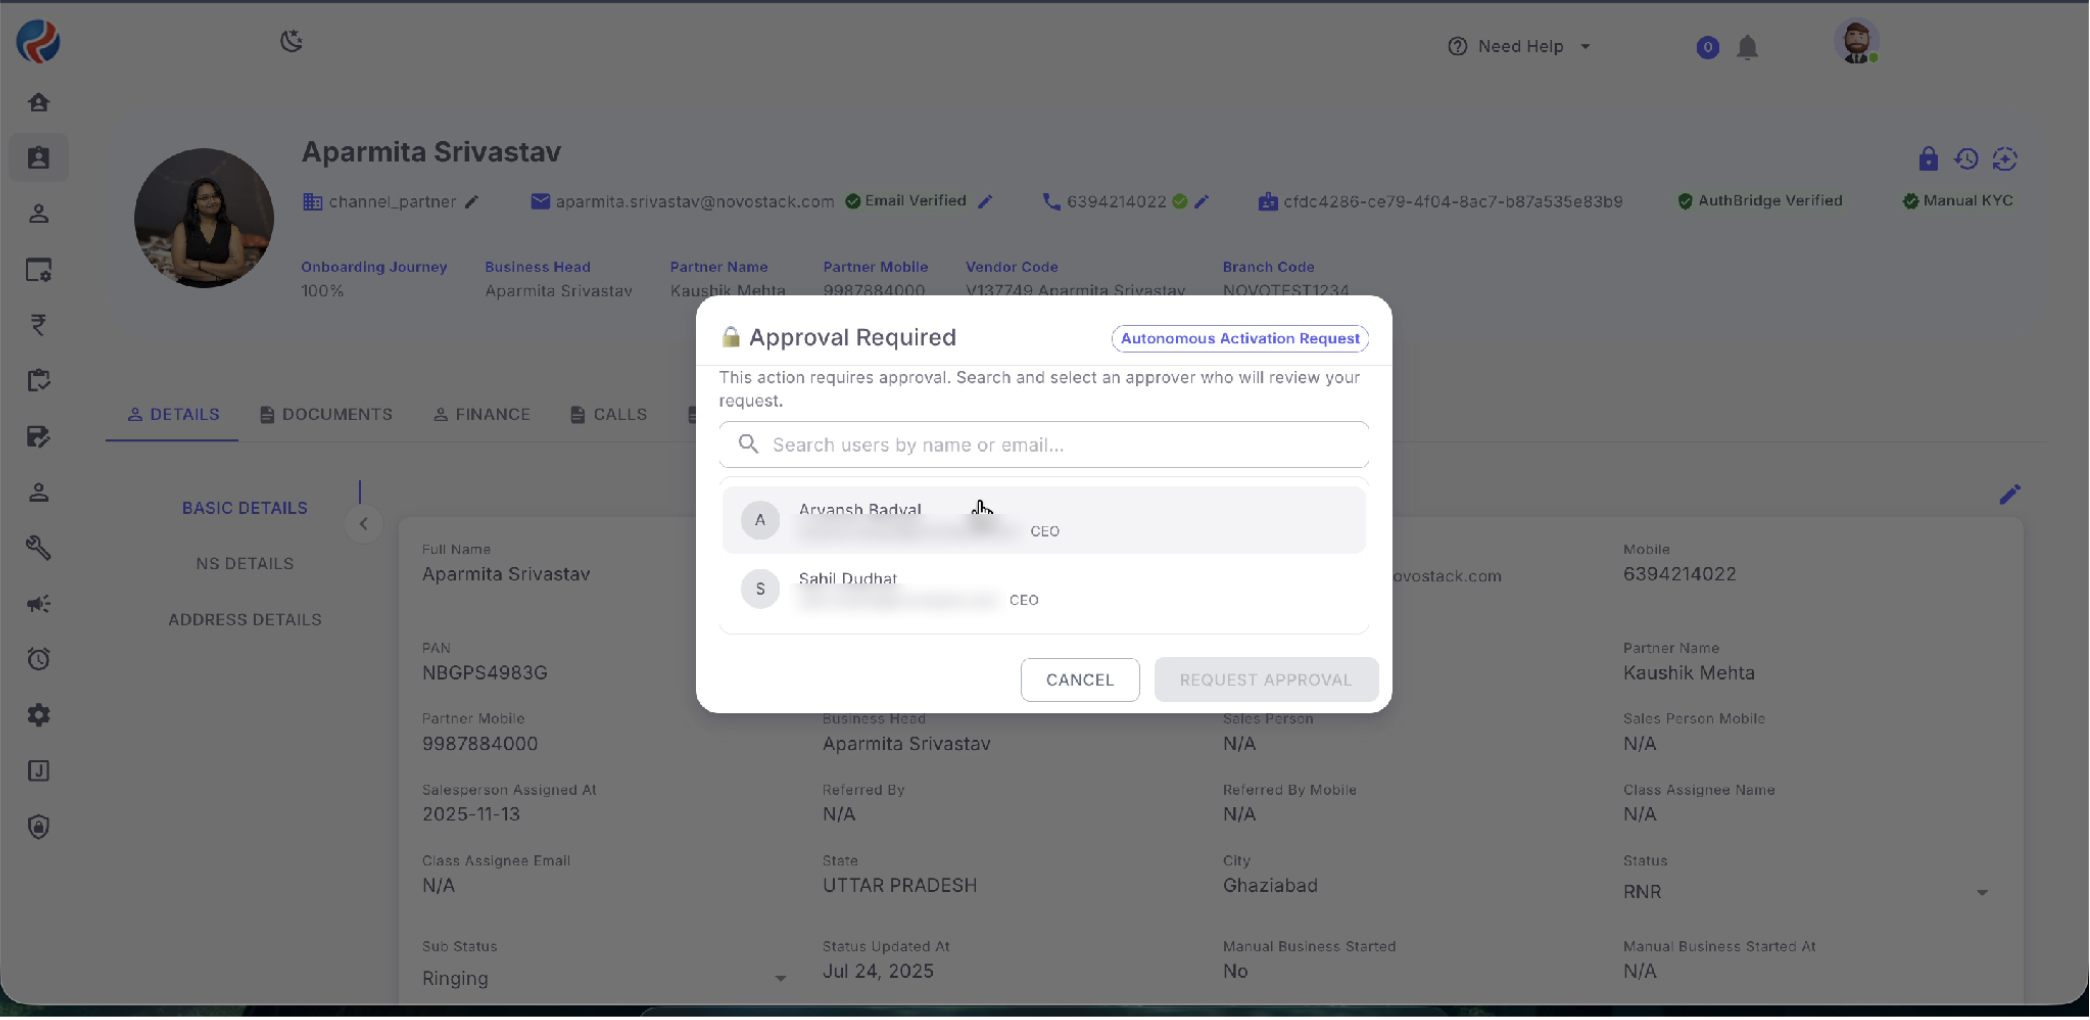 Figure 3 – Approval Required dialog
4. Approver Selection & Approval Request
The Approval Required dialog displays the Autonomous Activation Request and asks the requester to select an approver who will review the request.- Search for an approver by name or email.
- Select the required approver from the available users.
- Click Request Approval.
- The request is then submitted for review.
5. Request Status After Submission
After the request is submitted, the vendor/partner profile can show an approval-pending state. In the recording, the status notification displayed is “APPROVAL_PENDING”, indicating that the request has been raised and is awaiting the required approval.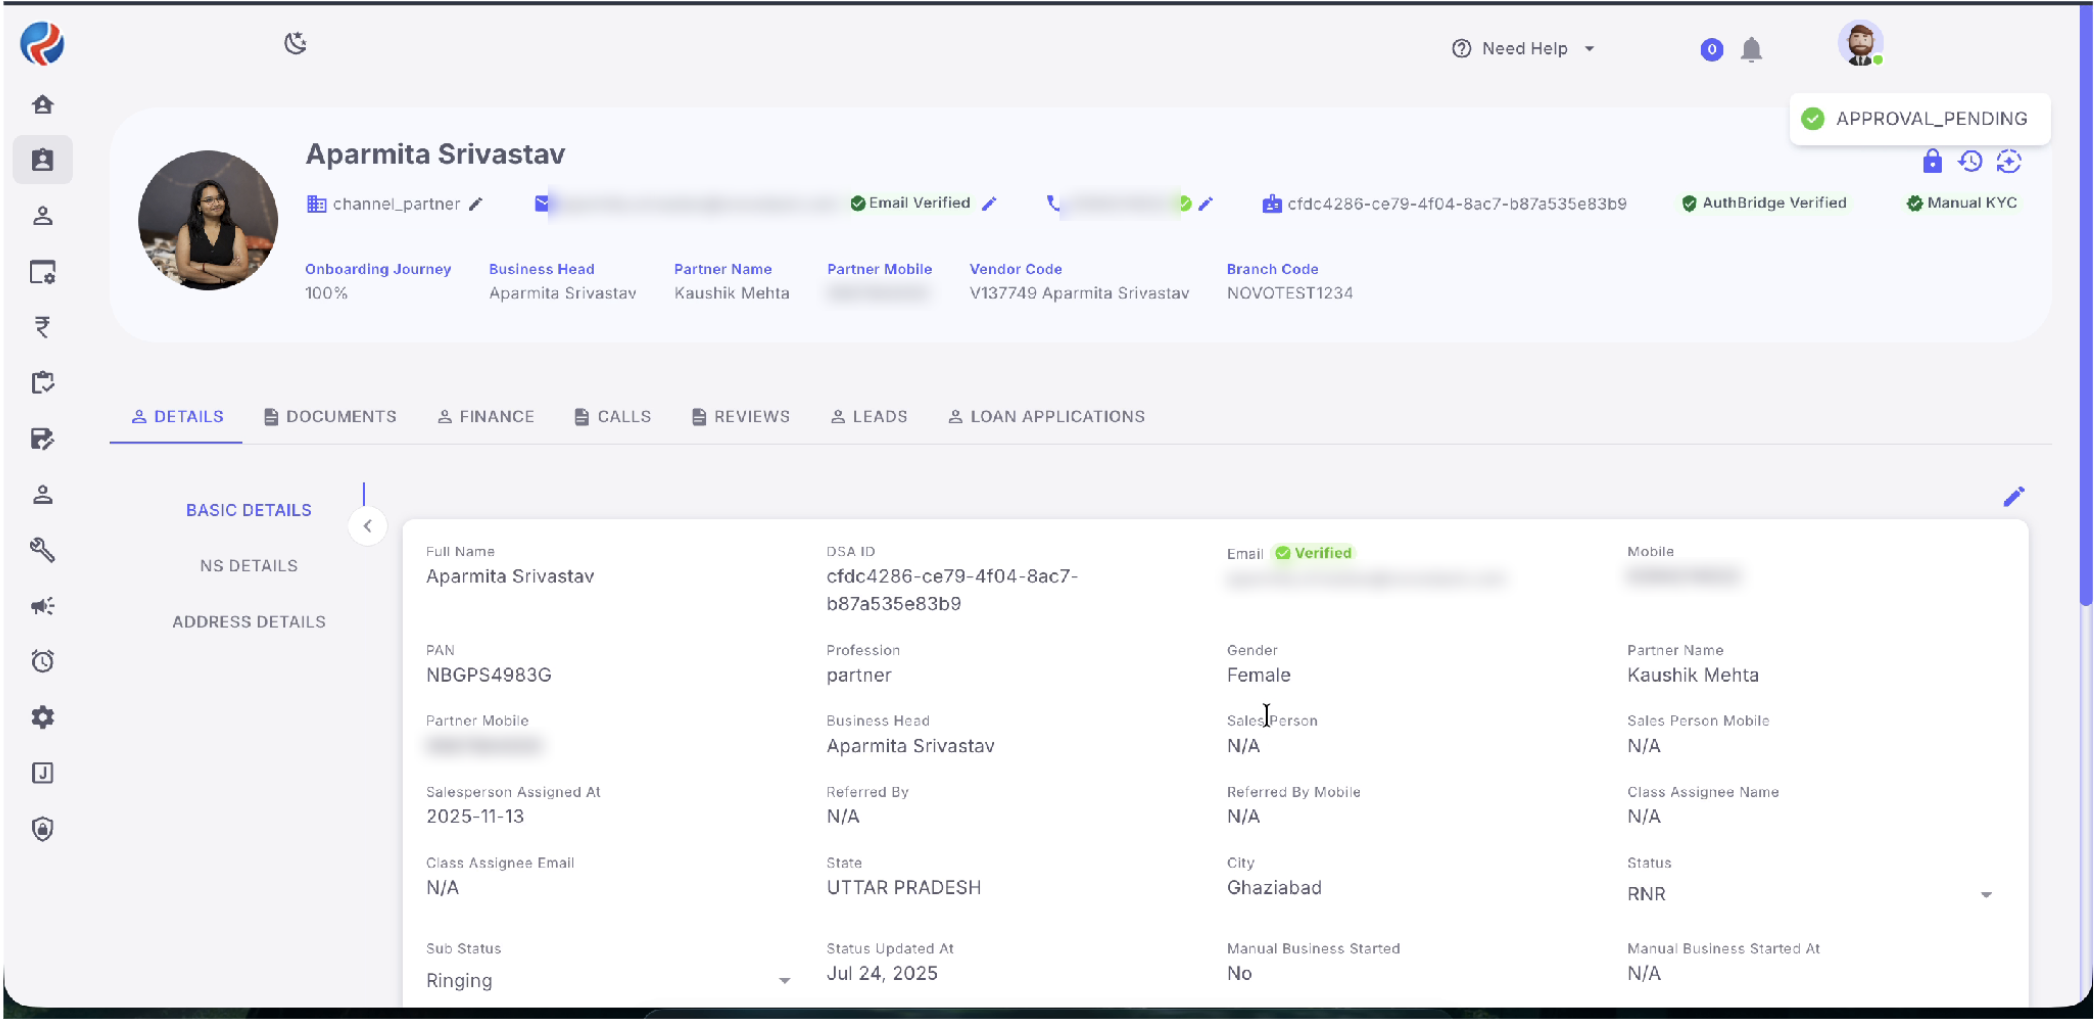 Figure 4 – Approval Pending status
6. Autonomous Request Logs
The Autonomous Req Logs tab provides the audit trail of autonomous activation requests. Each request is listed with its current status and the users involved in raising, approving/rejecting, and updating the request.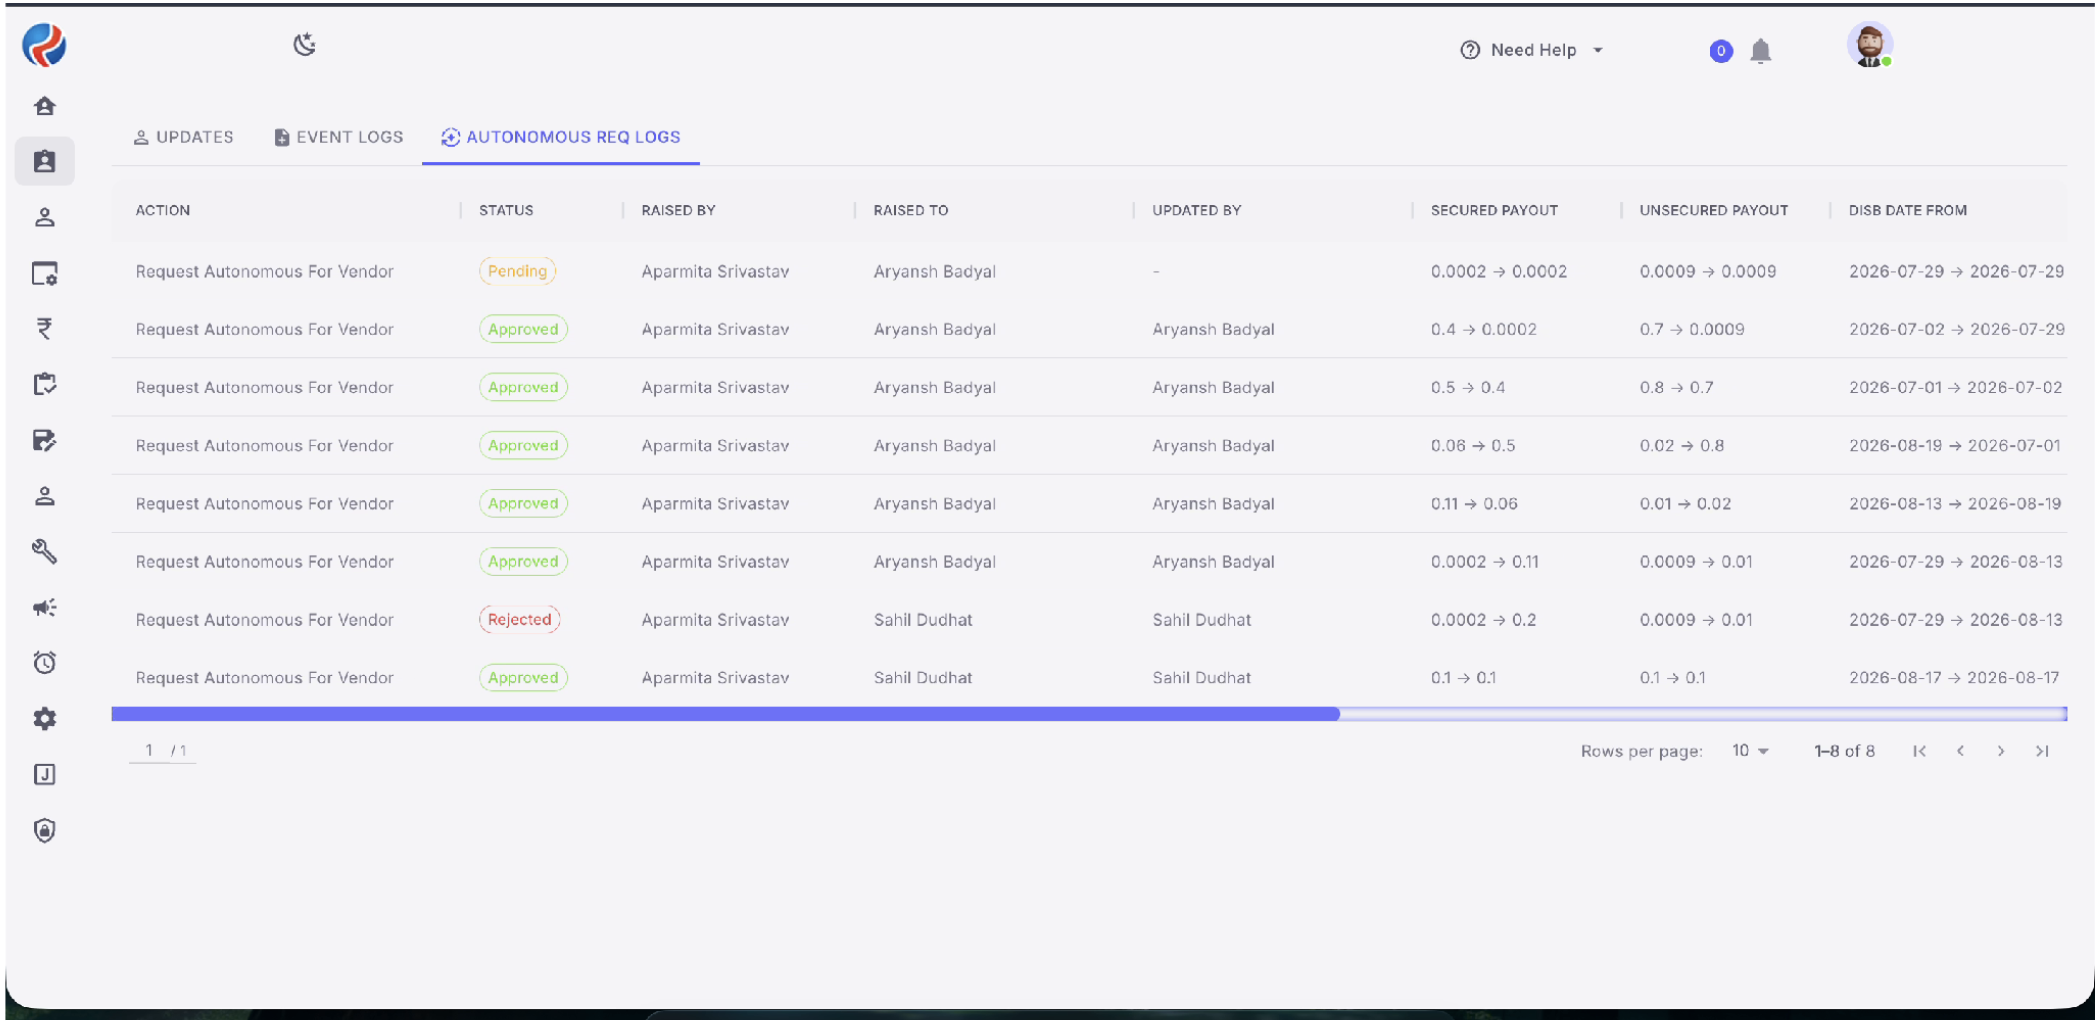 Figure 5 – Autonomous Req Logs
7. Log Fields
8. Status Interpretation
9. End-to-End Flow
1. Open Vendor/Partner Profile 2. Open Autonomous Payment Settings 3. Enter/Update payout rates and applicable dates 4. Accept acknowledgement 5. Click Continue 6. Select Approver 7. Click Request Approval 8. Request moves to Approval Pending 9. Approver reviews request 10. Request is Approved / Rejected 11. Autonomous Req Logs retain the request and configuration change history10. Audit & Tracking
The Autonomous Req Logs provide traceability by retaining the request action, status, requester, approver, updater, payout value changes, and effective date changes. This enables the team to verify who initiated a configuration change, who was responsible for approval, what values changed, and the resulting approval status.11. Approver Workflow – Autonomous Approval
Once the requester submits the Autonomous Activation Request, the selected approver can review and approve the request from the Approval Center.11.1 Open Approval Center
1. Log in with the user account selected as the approver. 2. Navigate to Home → Approvals. 3. The Approval Center opens with the list of approval requests. 4. Use the Status filter and select Pending to view requests awaiting approval. 5. Open the Requests For Me tab to view requests assigned to the logged-in approver.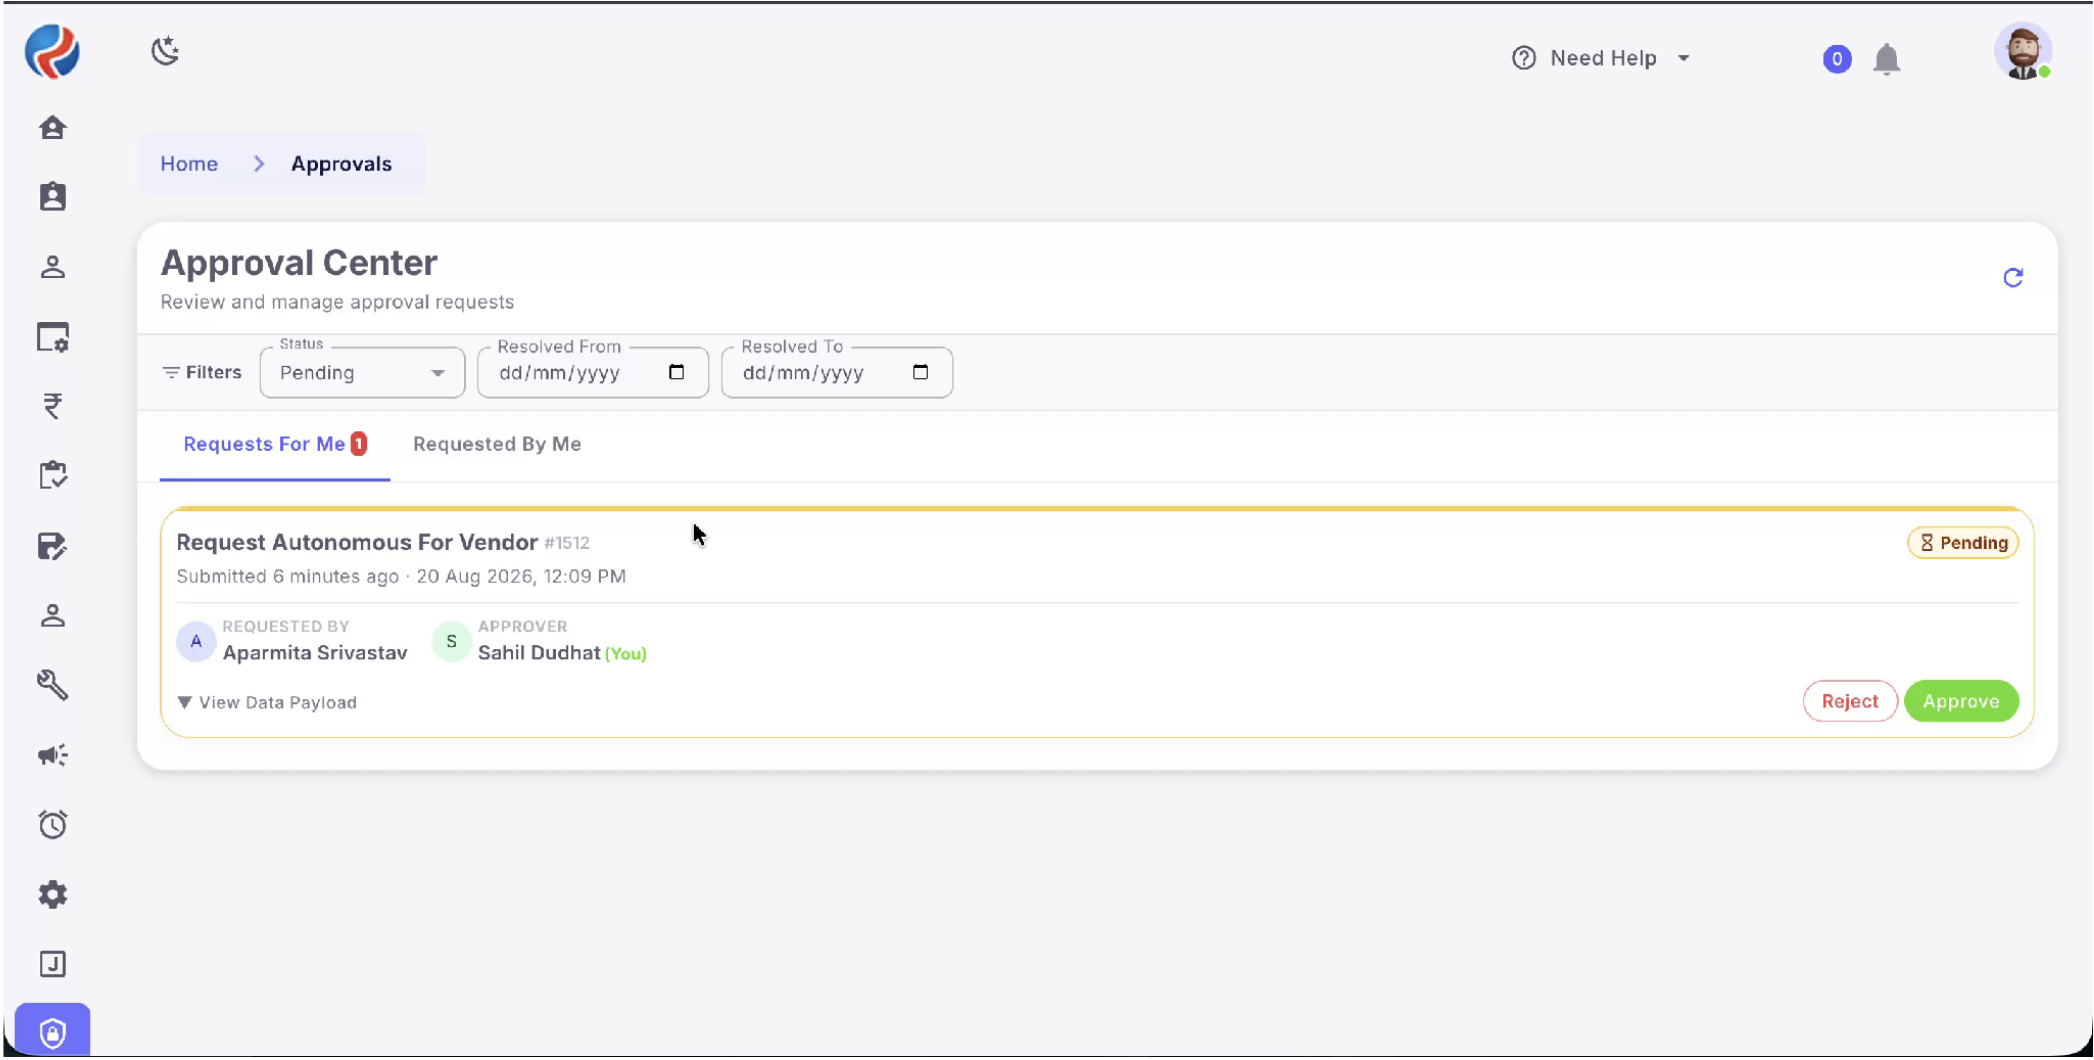 Figure 6 – Approval Center with pending Autonomous Request
11.2 Review the Autonomous Request
The request card displays the request type, request number, submission time, requester, assigned approver, current status, and available actions.- Request Type: Request Autonomous For Vendor.
- Request status: Pending.
- Requested By: user who raised the request.
- Approver: user currently logged in and responsible for approval.
- View Data Payload: expands the request payload so the approver can verify the submitted configuration values.
- Available actions: Reject and Approve.
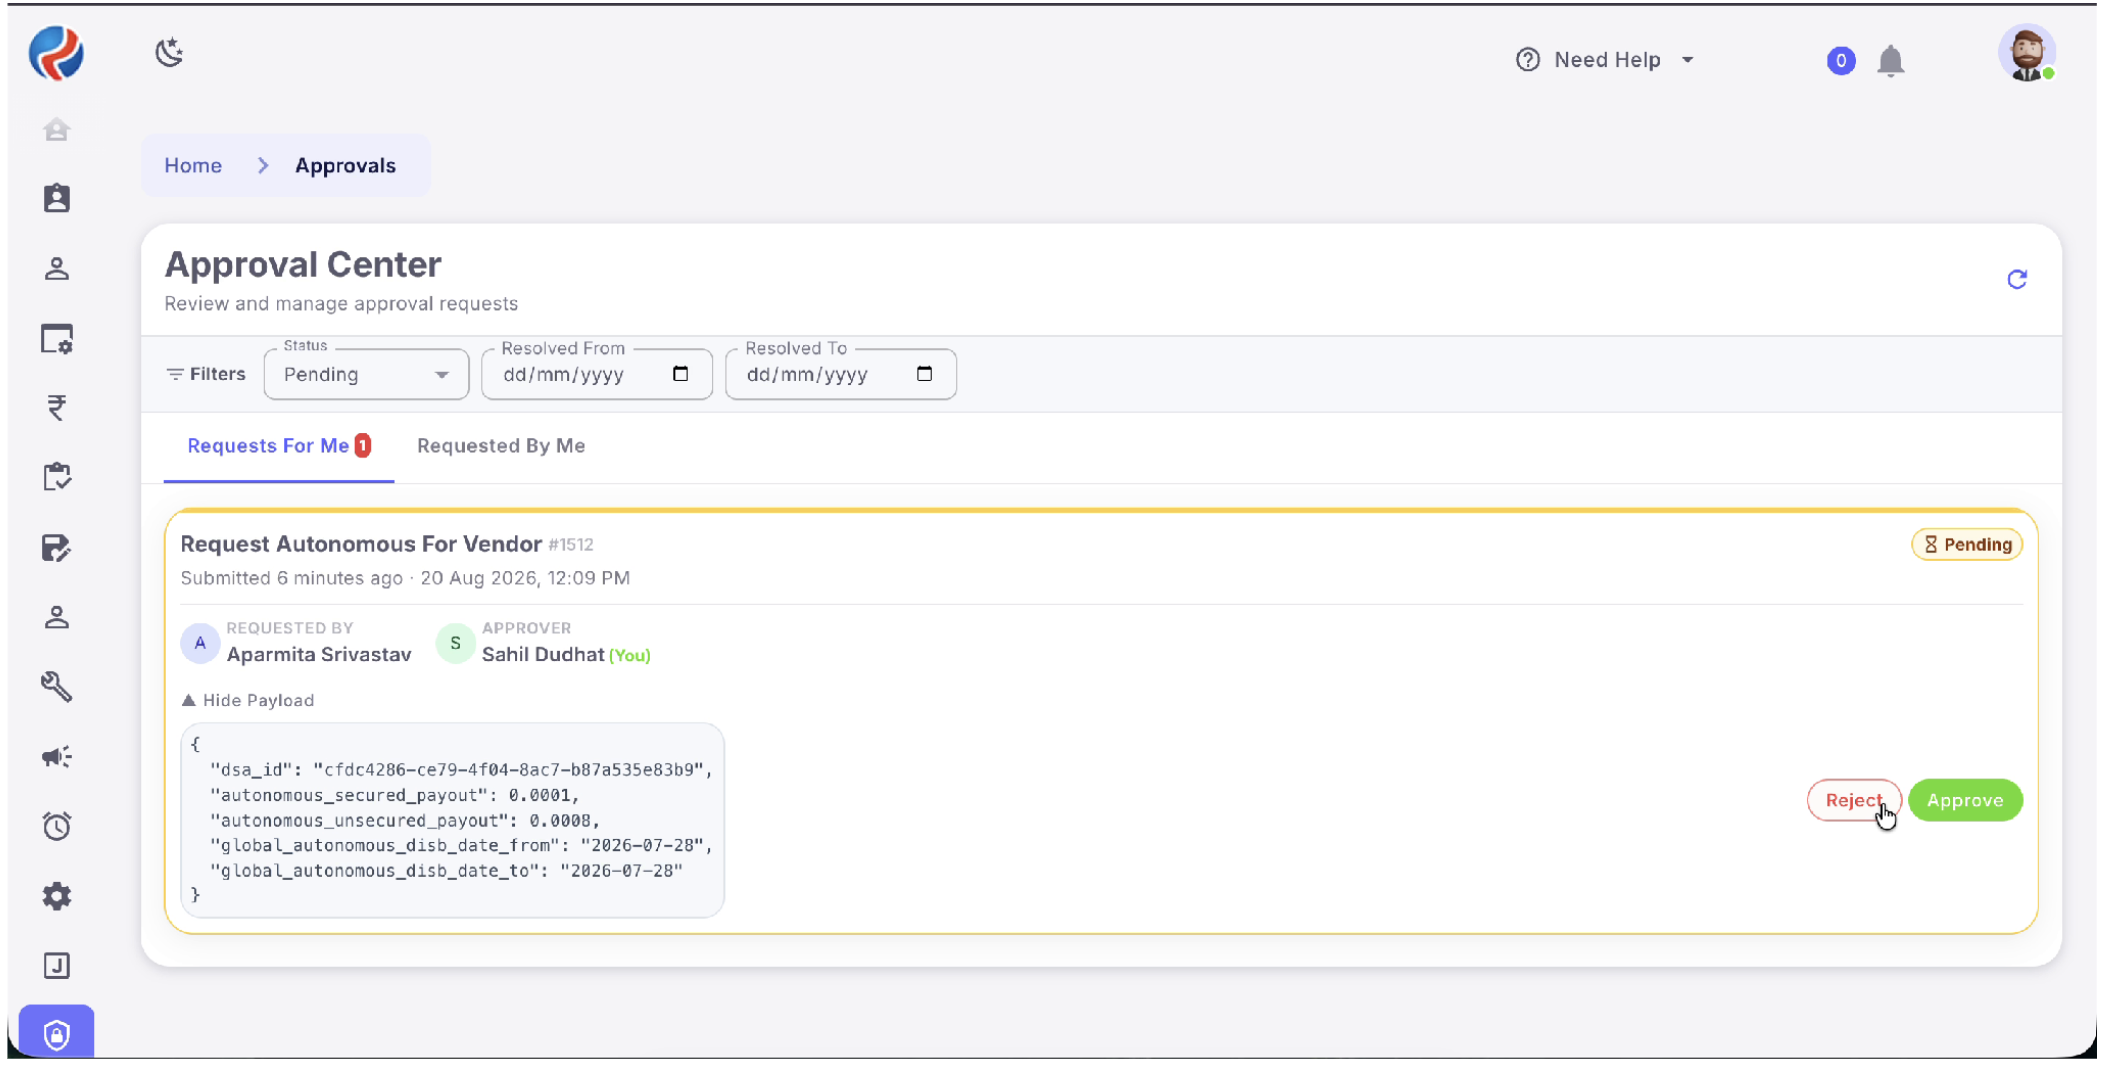 Figure 7 – Request details and data payload
11.3 Verify Request Data
Before approving, the approver should expand View Data Payload and verify the autonomous configuration submitted by the requester. The payload shown in the recording contains the DSA identifier, autonomous secured payout, autonomous unsecured payout, and global autonomous disbursement date range.11.4 Approve the Request
1. Click the green Approve button on the request card. 2. The Approve Request confirmation dialog opens. 3. The dialog displays the request reference and an Add remarks (optional) field. 4. Enter remarks if an approval comment is required. The remarks field is optional. 5. Click Confirm to complete the approval.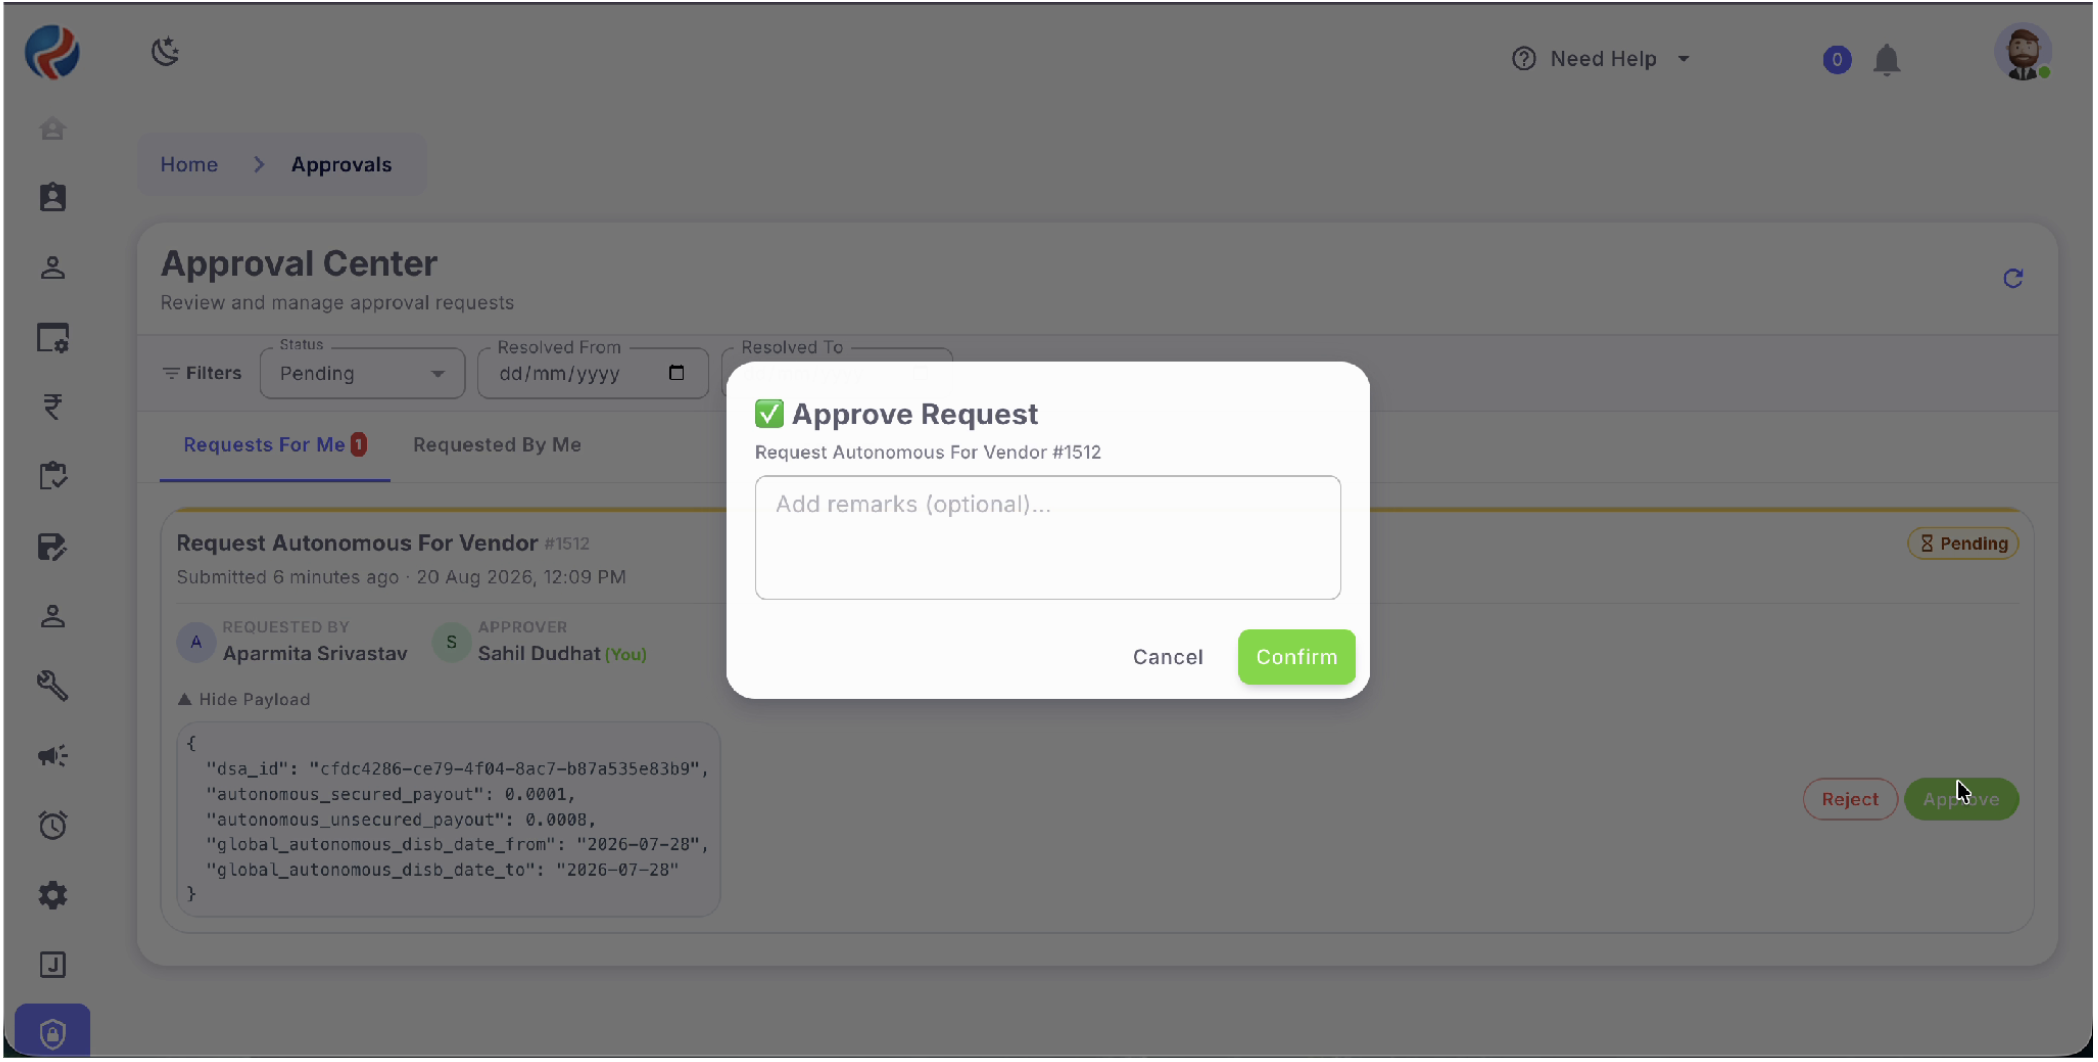 Figure 8 – Approve Request confirmation dialog
11.5 Approval Completion
After the approver confirms the action, the pending request is removed from the Requests For Me list. The Approval Center displays an “All clear!” message with “No requests awaiting your approval,” confirming that there are no remaining pending requests for the approver.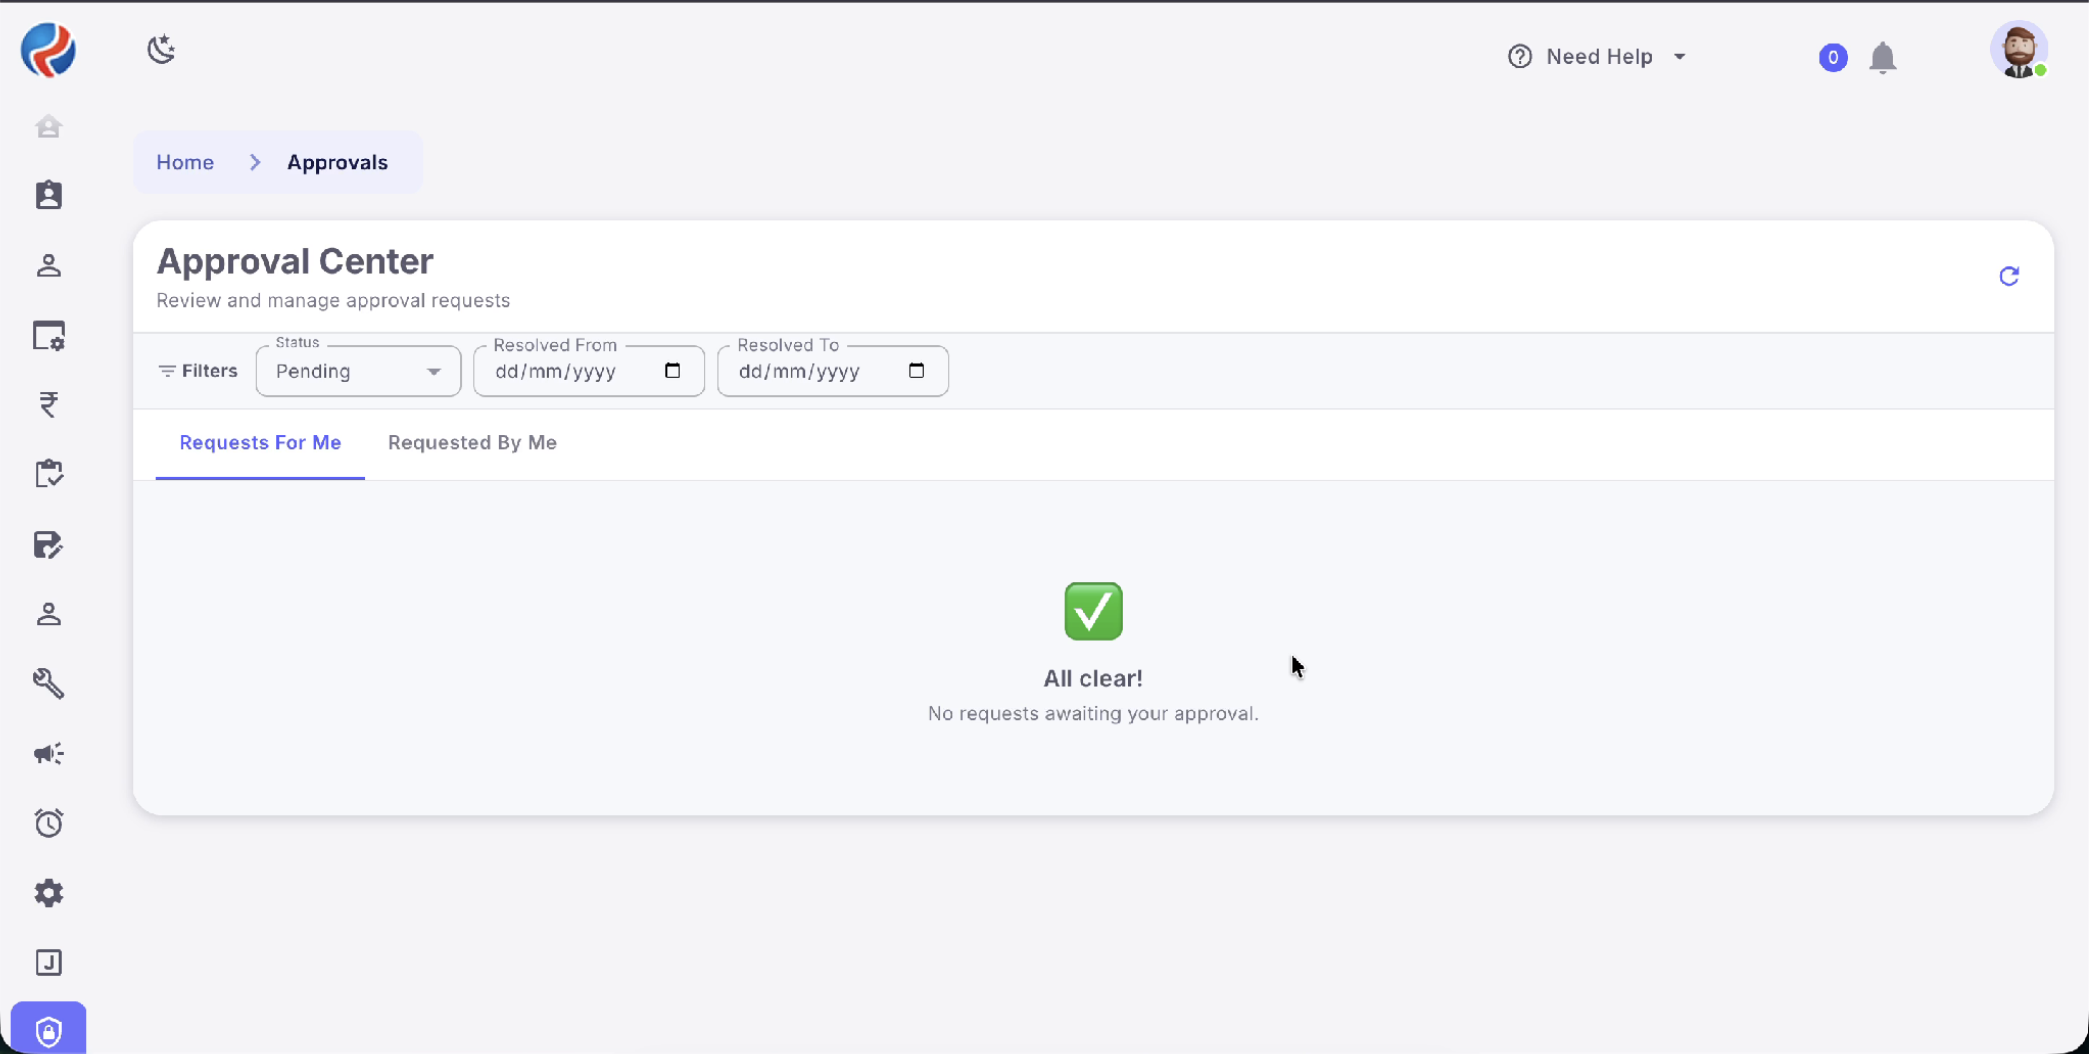 Figure 9 – Approval completed / no pending requests
11.6 End-to-End Approval Flow
1. Requester submits Autonomous Activation Request. 2. Selected approver receives the request in Approval Center. 3. Approver opens Home → Approvals. 4. Approver selects Pending and checks Requests For Me. 5. Approver reviews requester, approver, request status, and request details. 6. Approver expands View Data Payload and verifies the autonomous configuration. 7. Approver clicks Approve. 8. Approve Request dialog opens. 9. Approver optionally enters remarks. 10. Approver clicks Confirm. 11. Request is approved and removed from the pending approval list. 12. Approval Center shows All clear when no further approval requests are pending.12. Complete Autonomous Approval Lifecycle
13. Approver Eligibility & Configuration
13.1 Users Authorized to Raise Autonomous Approval Requests
The ability to raise an Autonomous Approval request is directly available to the following roles:- CEO
- Lead Admin
- Business Head
13.2 Approver Permission & Request Notification
Apart from CEO, Lead Admin, and Business Head, users can be configured as approvers through Global Configuration.- The mobile number of the users who need to have approver access must be added in the designated Global Configuration key.
- Once the permission is configured, those users become eligible to act as approvers.
- When an Autonomous Approval request is raised, the approval request will be sent to all users who have the required approver permission.
- The requester does not need to select a specific approver from the list.
- Any user with the required approver permission can review and take action on the request.
13.3 Automatic Approval
If the mobile number of a CEO, Lead Admin, or Business Head is configured in the designated Global Configuration key, any Autonomous Approval request raised by that user will be automatically approved by the system.13.4 Complete Approval Flow
Request Raised↓
System checks the requester and approver configuration
↓
If requester is a configured CEO / Lead Admin / Business Head → Request is automatically approved
↓
Otherwise → Approval request is sent to all users having the required approver permission
↓
Any authorized approver can review and approve/reject the request
↓
Request status and action are recorded in Autonomous Req Logs
Prepared By: Aparmita Srivastav