Product Mapping Process
This guide outlines the steps to map products within the Meta Data module using NetSuite Bank, NetSuite Product, and Bank Product Combination.Step-by-Step Process
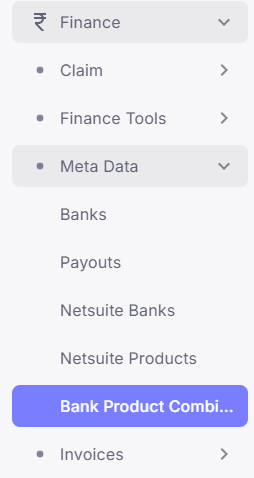
1.Navigate to Meta Data
Go to the Finance section, and then to Meta Data where the modules NS Bank, NS Product, and Bank Product Combination are available.2.NetSuite Product

- In this module, add the required products as per business needs.
- Click on the ‘’ADD PRODUCT’’ Button, ‘Add New Product’ window opens.
- Fill the required fields and set the status of the product as required, Active or Inactive, if inactive then the product will not be visible on the other pages.
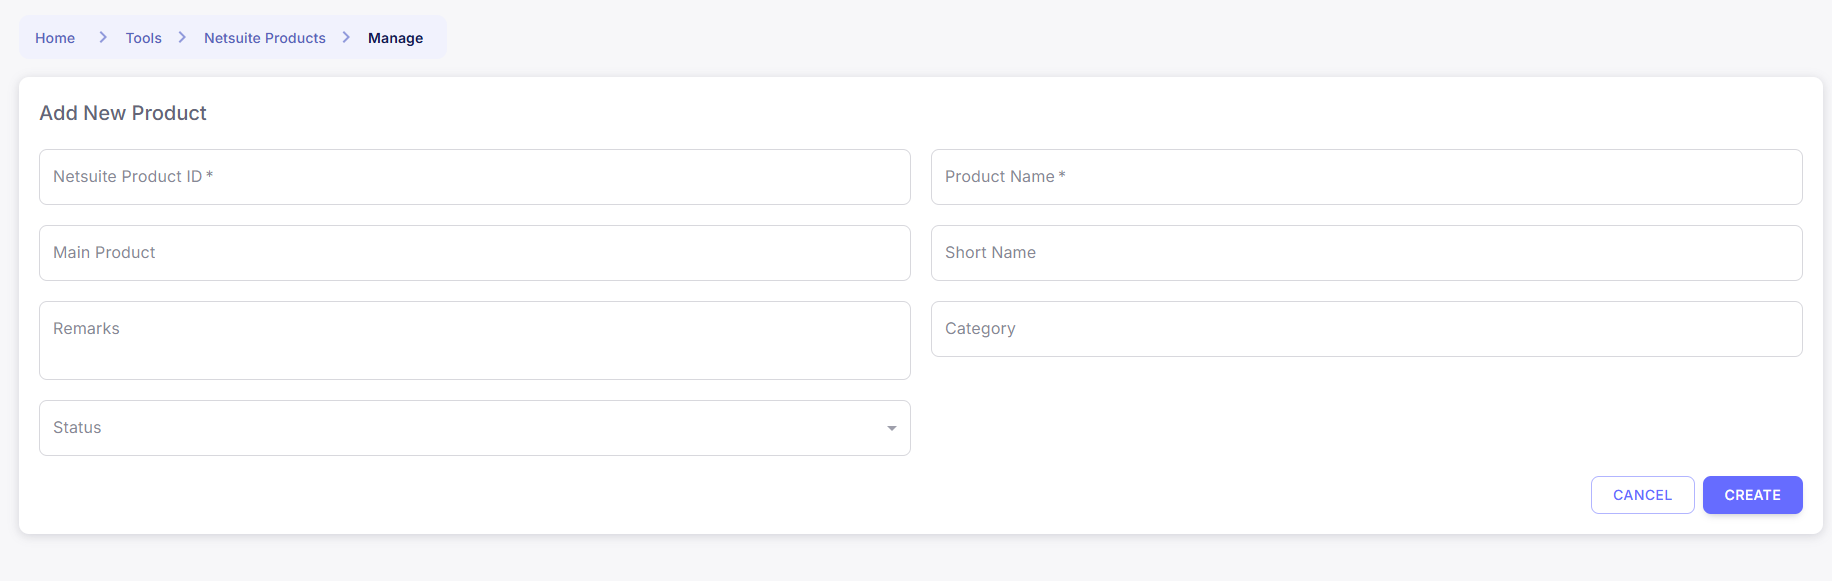
- Each product represents a service or offering that may be mapped to a bank later.
3.NetSuite Bank
- Add banks to the system through the NS Bank module.

- Go to NetSuite Banks, Click on The ‘’ADD BANK’’ Button.
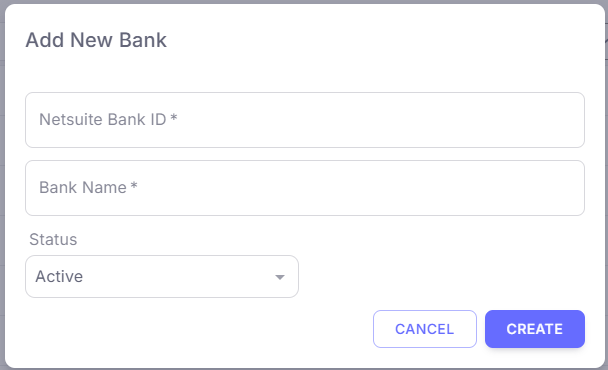
- Fill the required fields and set the status of the bank as required, Active or Inactive, if inactive then the bank will not be visible on the other pages.
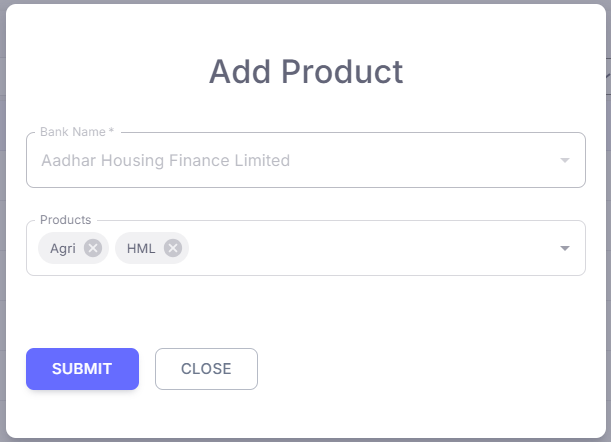
- Once a bank is saved, a plus (+) icon appears next to the bank name.

- Click the plus icon to associate products (from NS Product) with that specific bank.
4.Product Mapping
- The selected products will now be mapped to the bank.
- This product-mapping links the bank to the services/products it offers.
5.Bank Product Combination
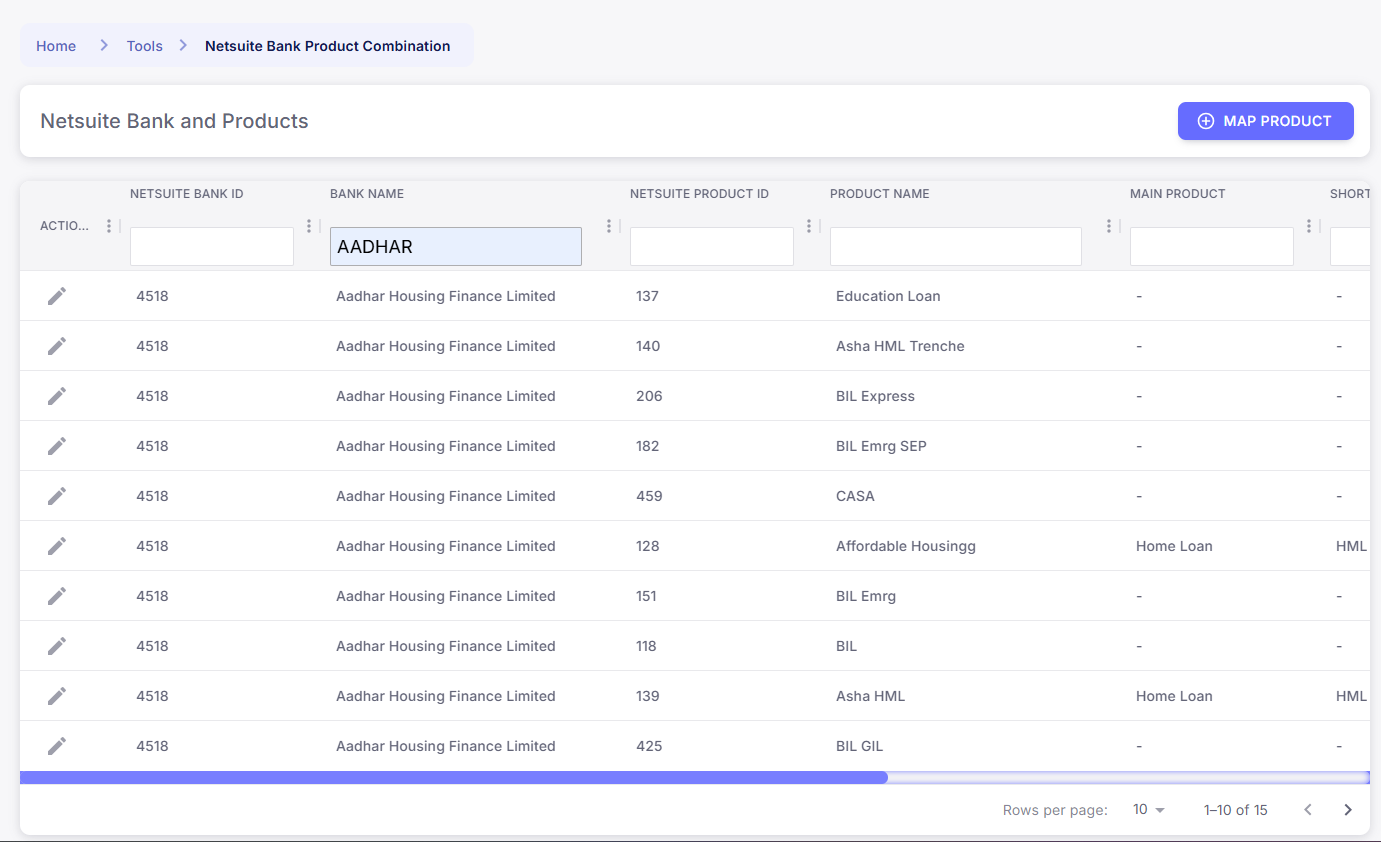
- To view all mappings, go to the Bank Product Combination module.
- This section displays all banks along with their associated products in a structured format.