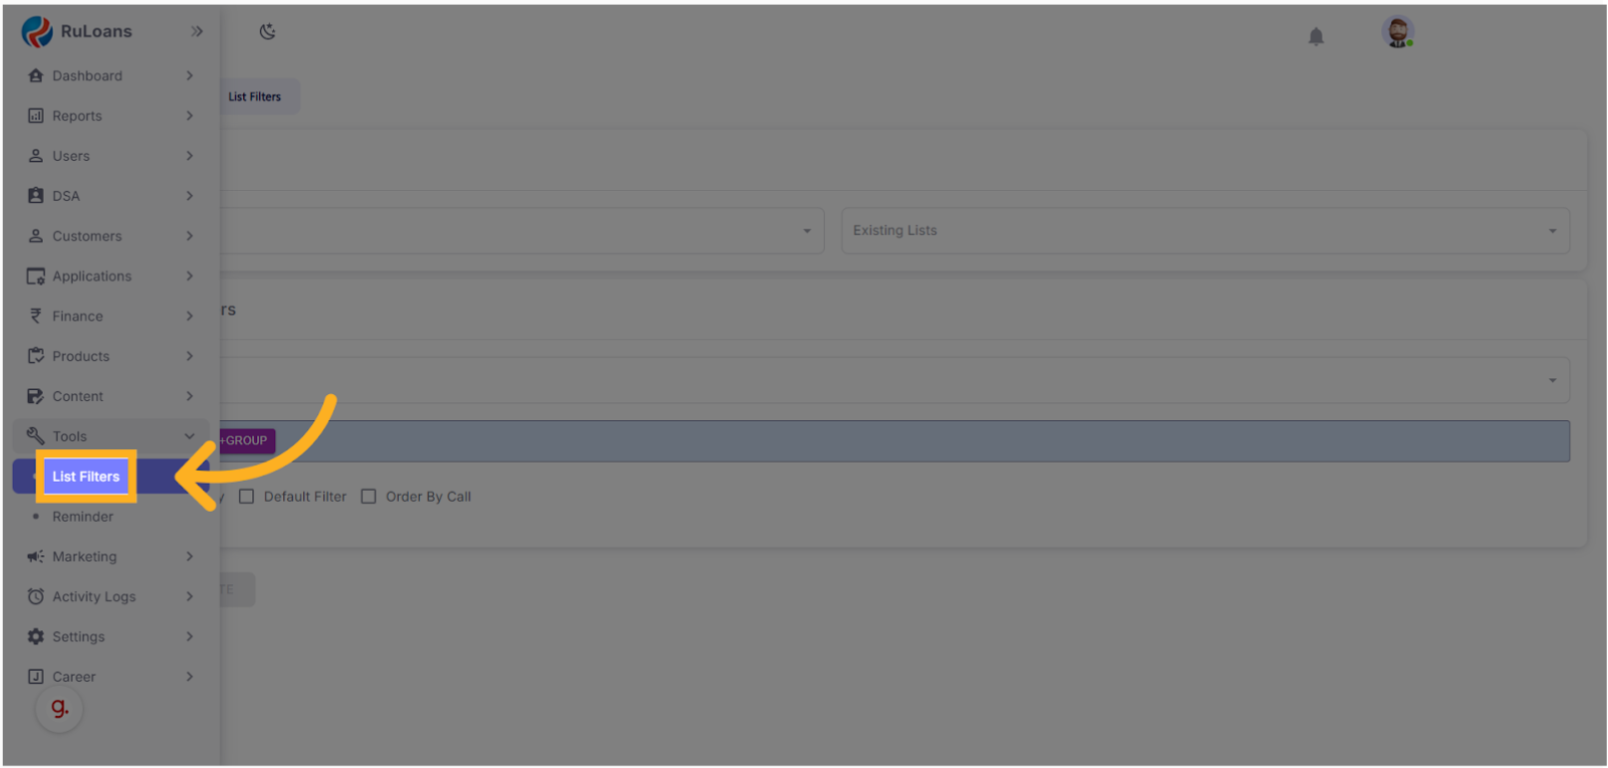
Section 1: Creating a New Filter
Step 1: Access List Filters
- Navigate to the CRM home page.
- Go to the “Tools” section in the side menu.
- Click “List Filters”.
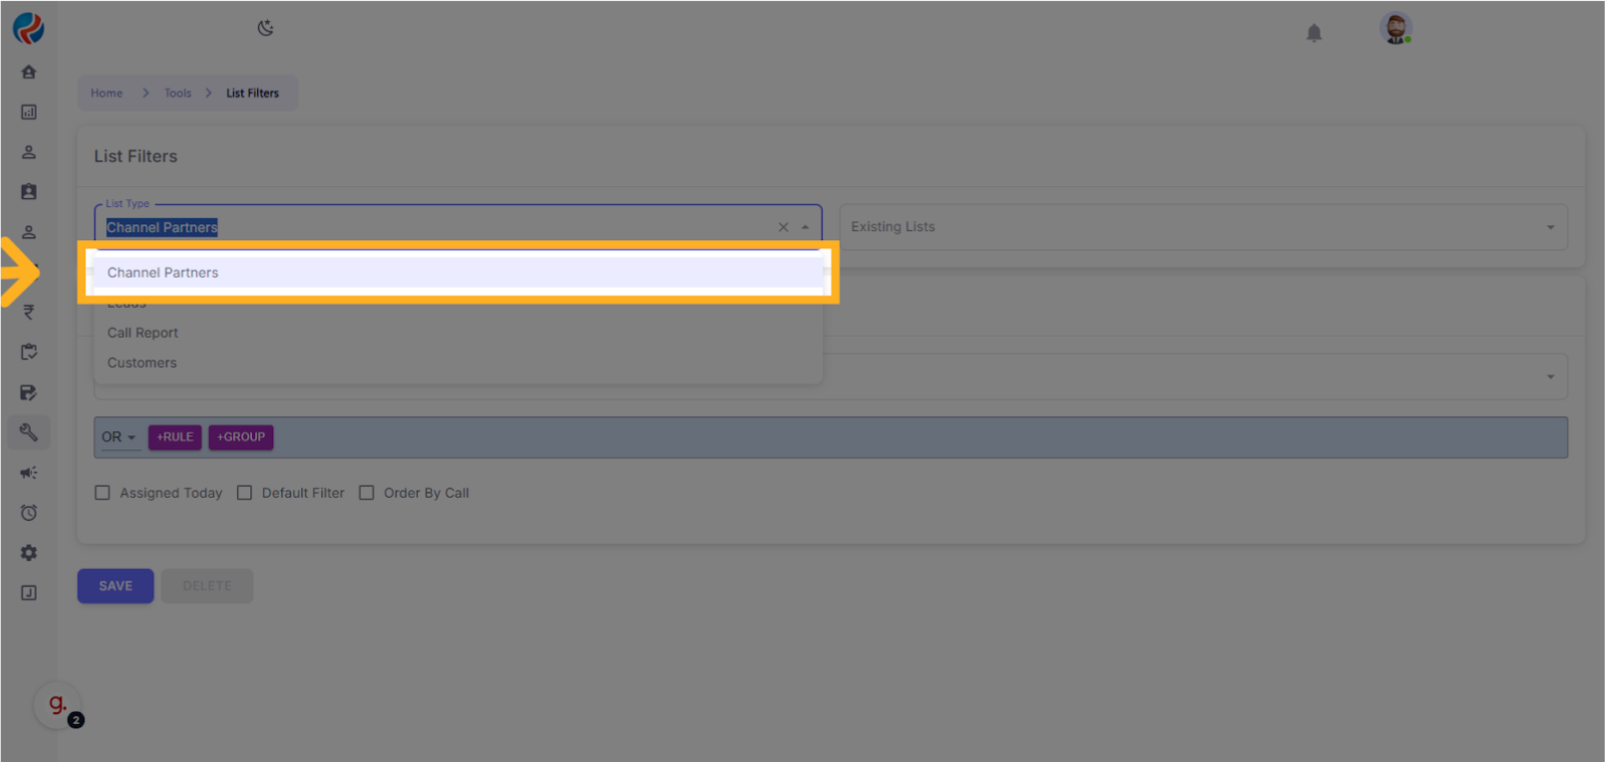
Step 2: Choose List Type
- Click on “List Type”.
- Select from available types:
- Channel Partner
- Leads
- Call Report
- Customers
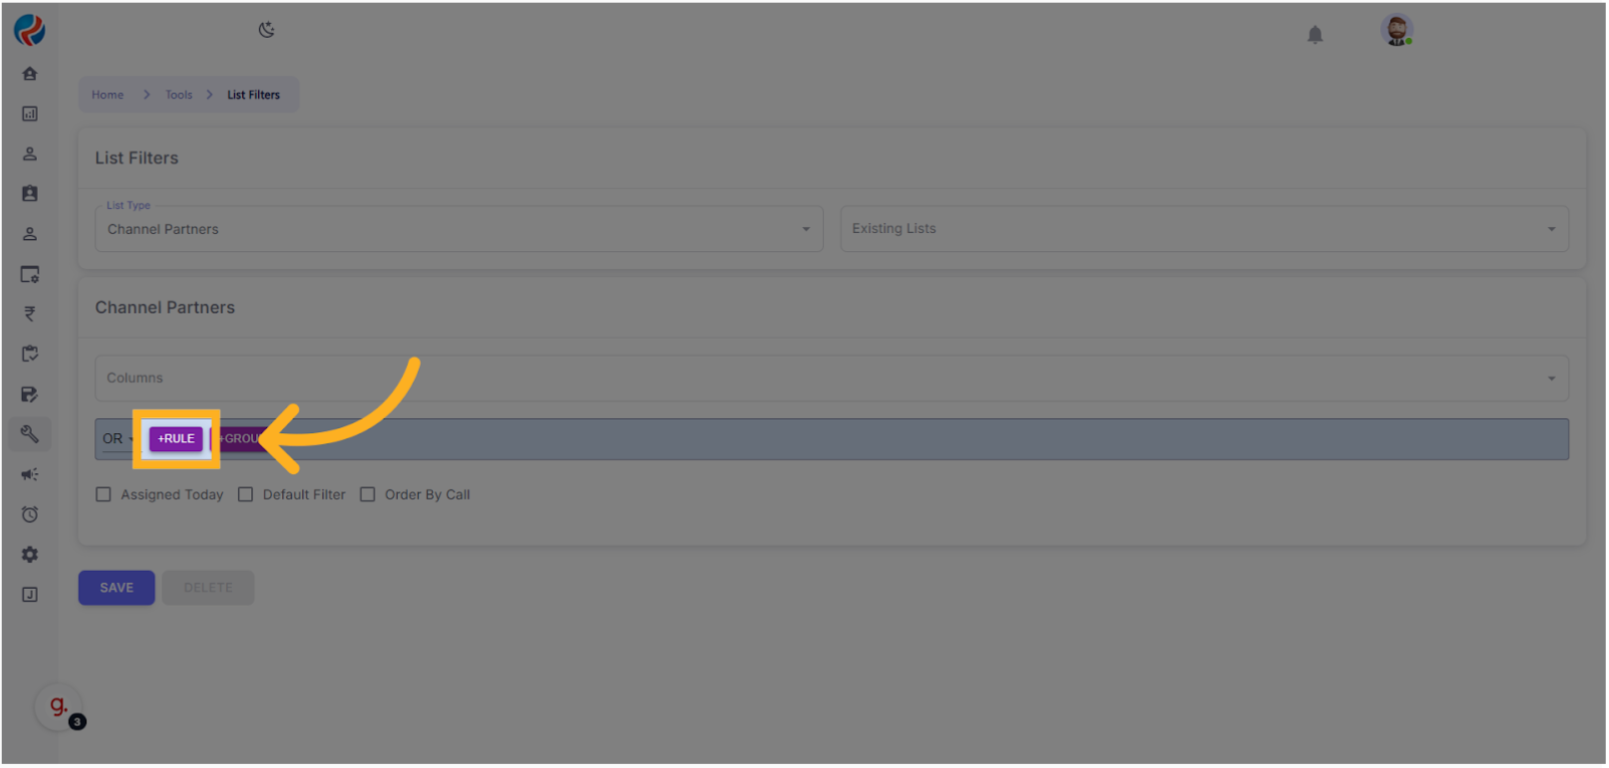
Step 3: Start Creating a Filter
- Choose “Channel Partners” from the list type.
- Click the “+Rule” button.
Step 4: Add Conditions to the Filter
- Select “Vendor Name”.
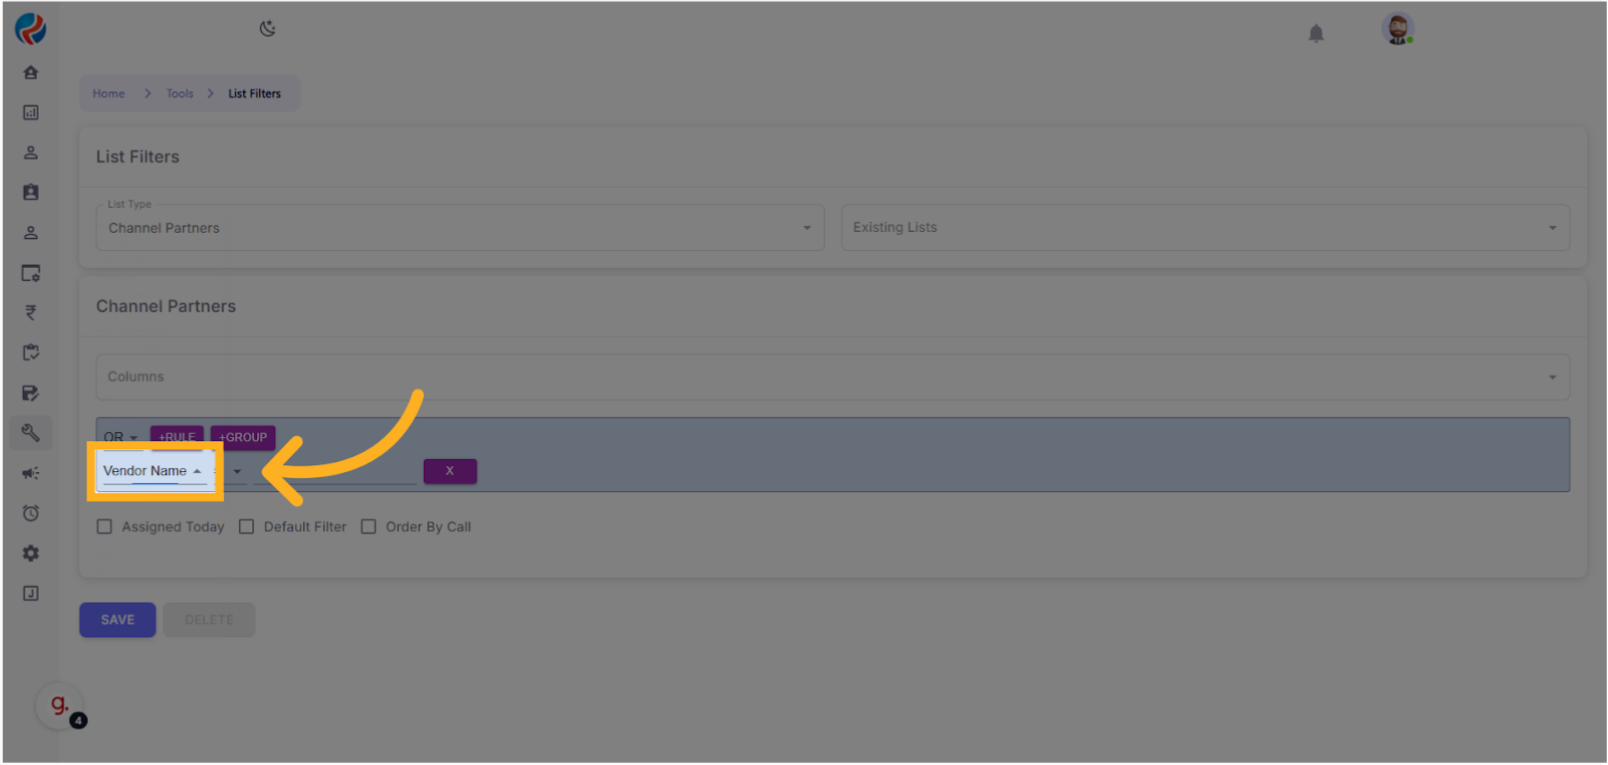
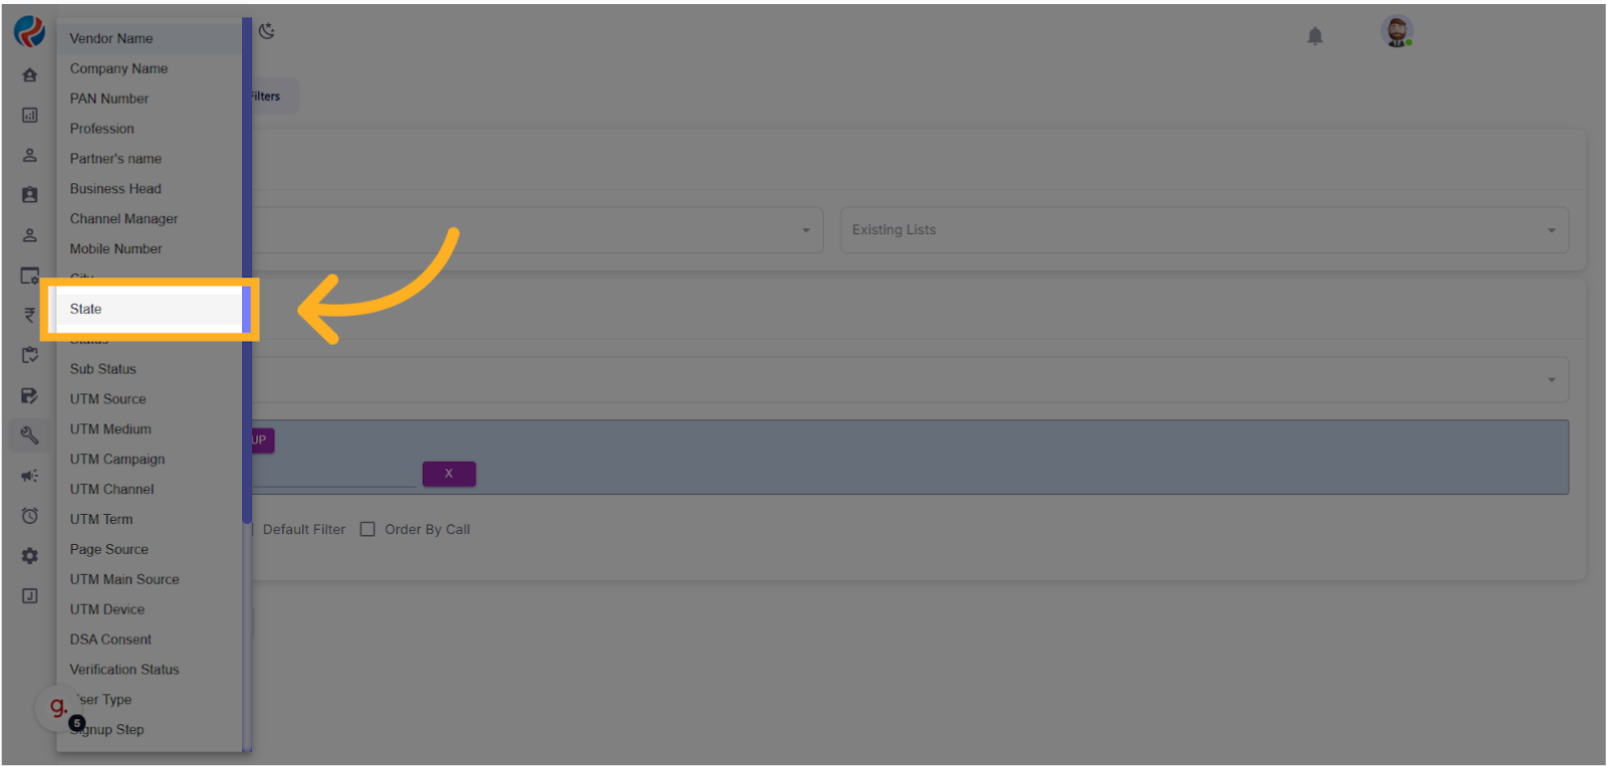
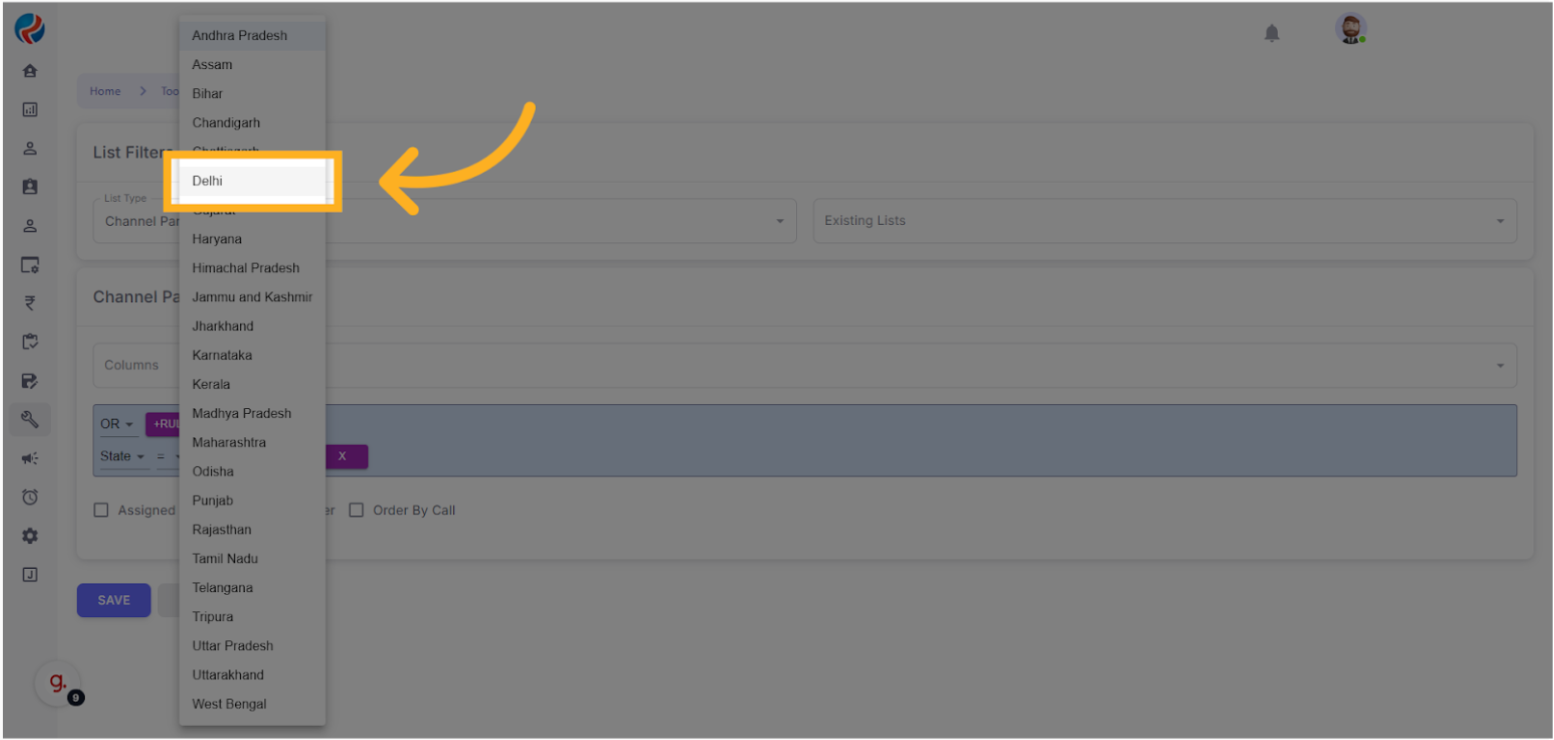
- Add another rule and choose “State”.
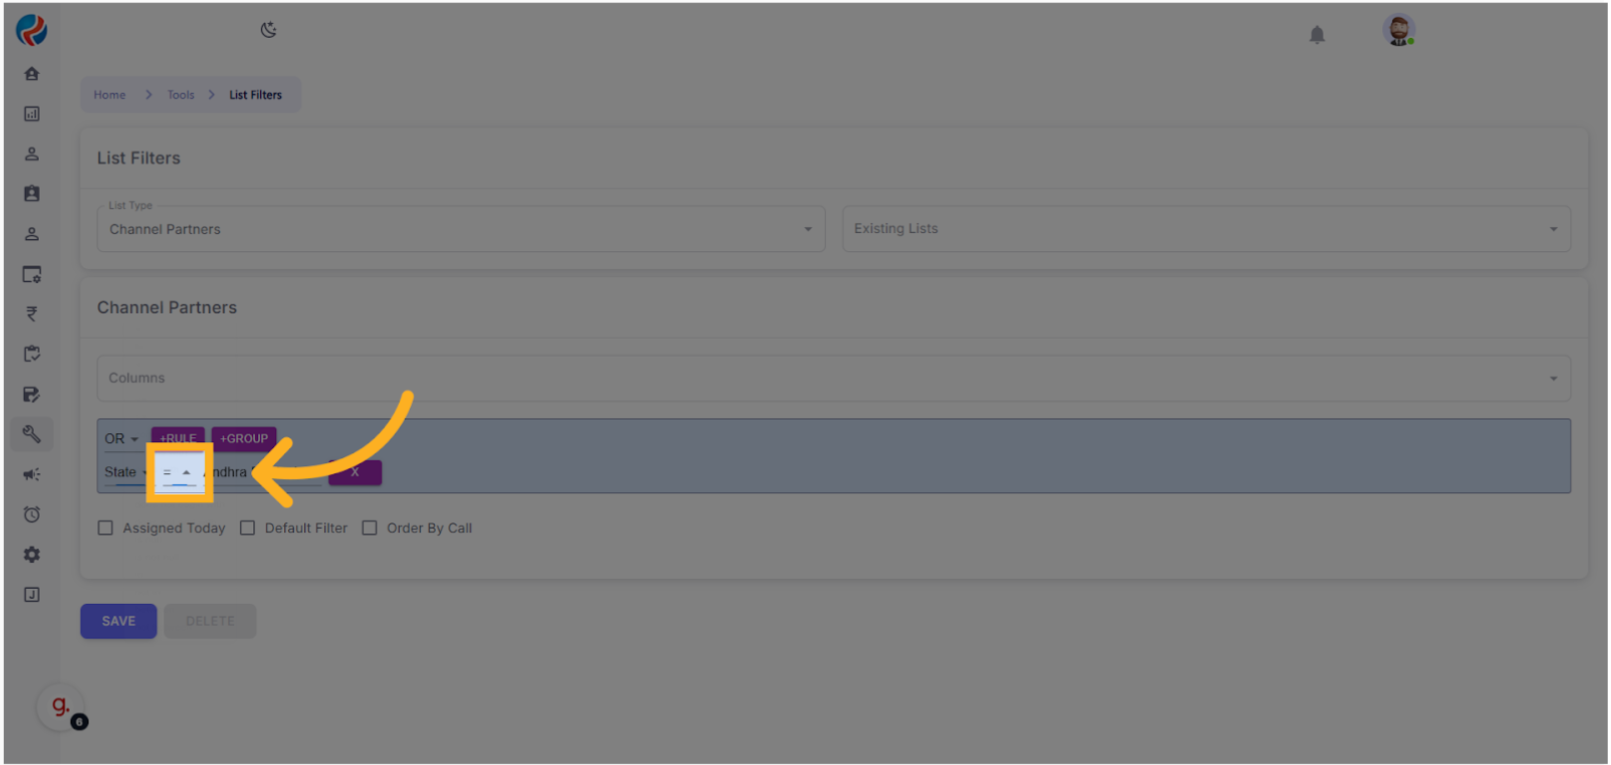
-
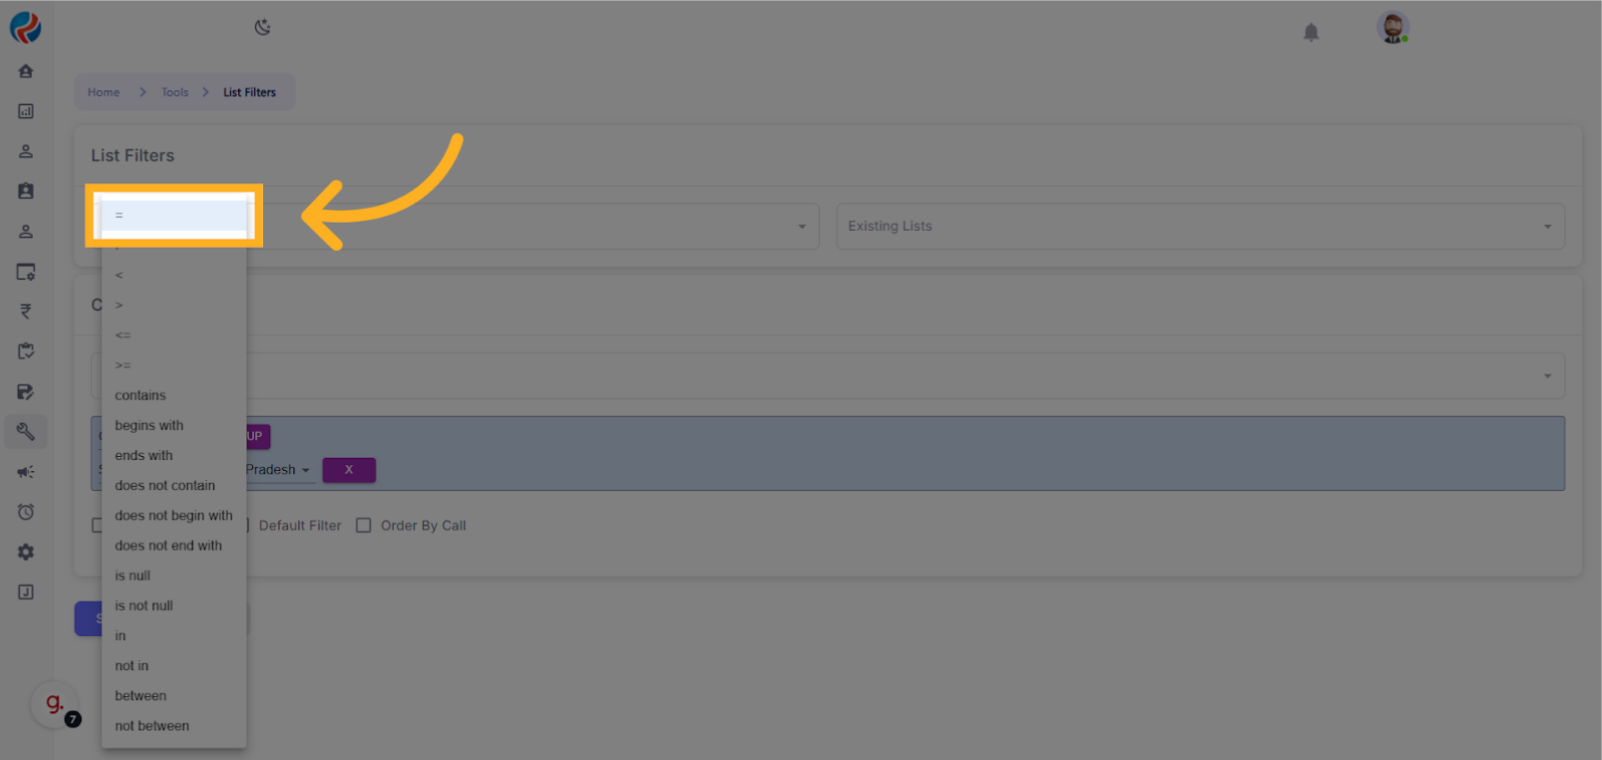
Clicking on the equal sign opens the operator list,
-
We have to select according to our need, for learning right now we will go with the equal sign. (Operator References has been given in the button of the Document)
- Select the “=” sign.
- Now To select the required state, Click on the state dropdown that appears. That will give the list of states.
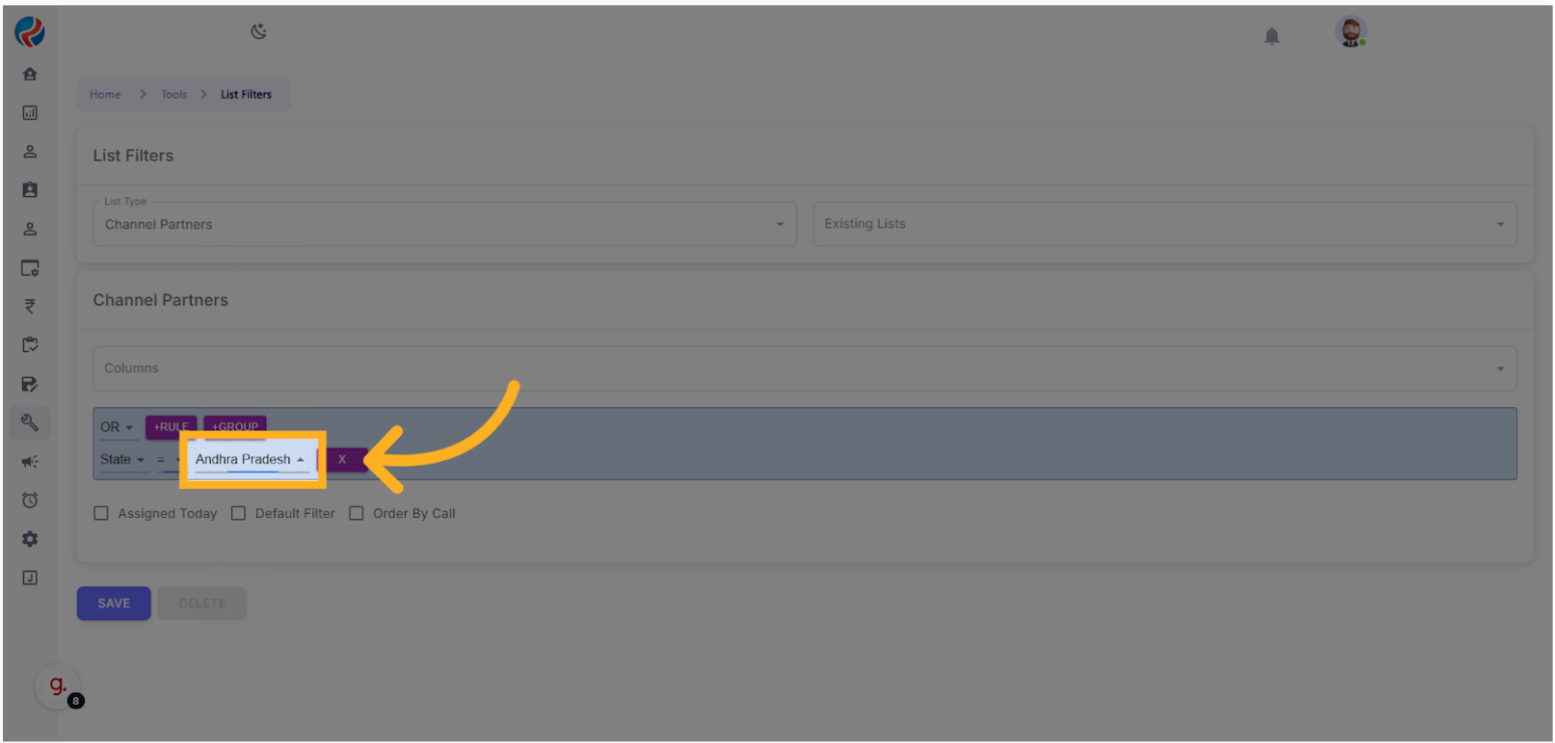
- From the dropdown, choose “Delhi” as the state.
Step 5: Save the Rule
- Click on “Save”.
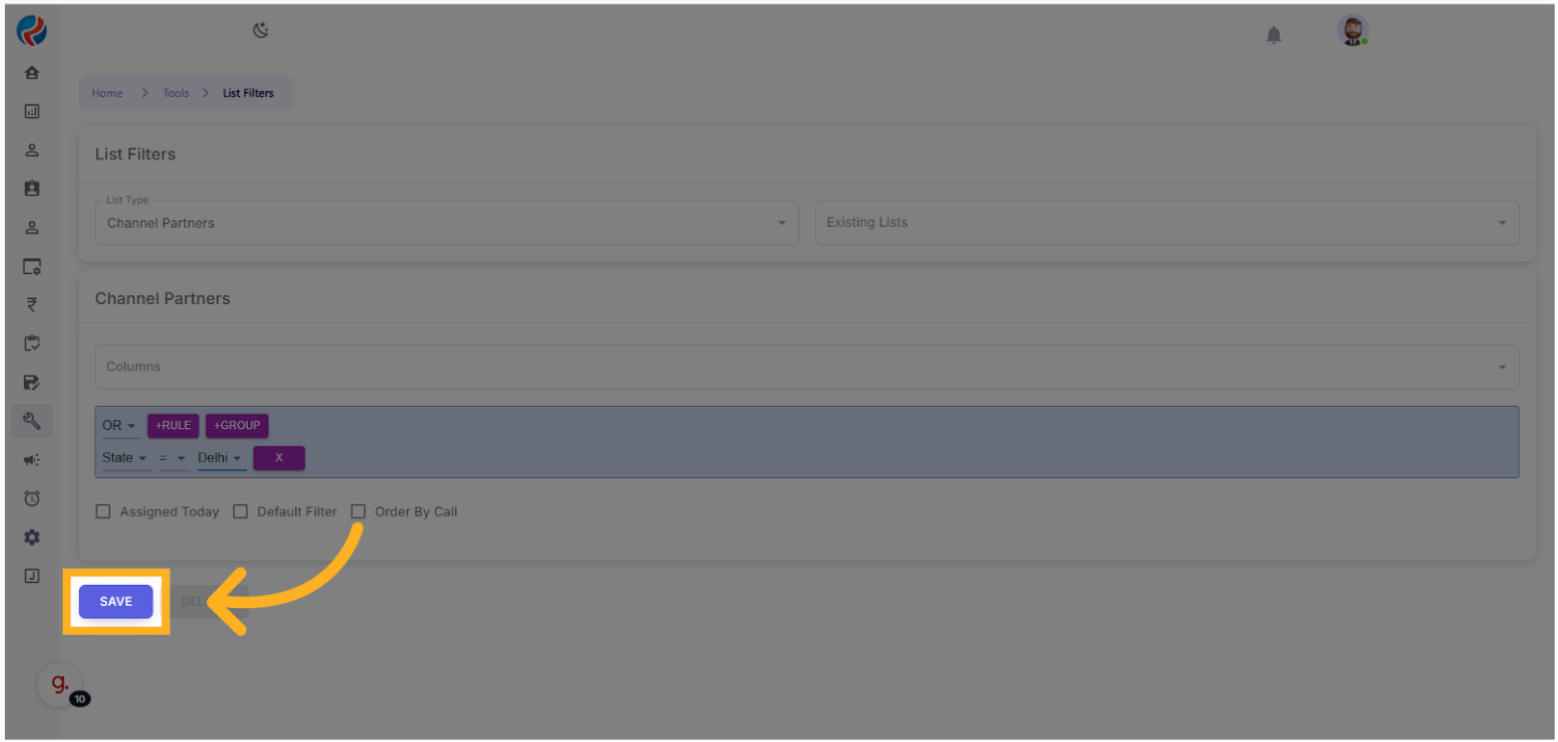
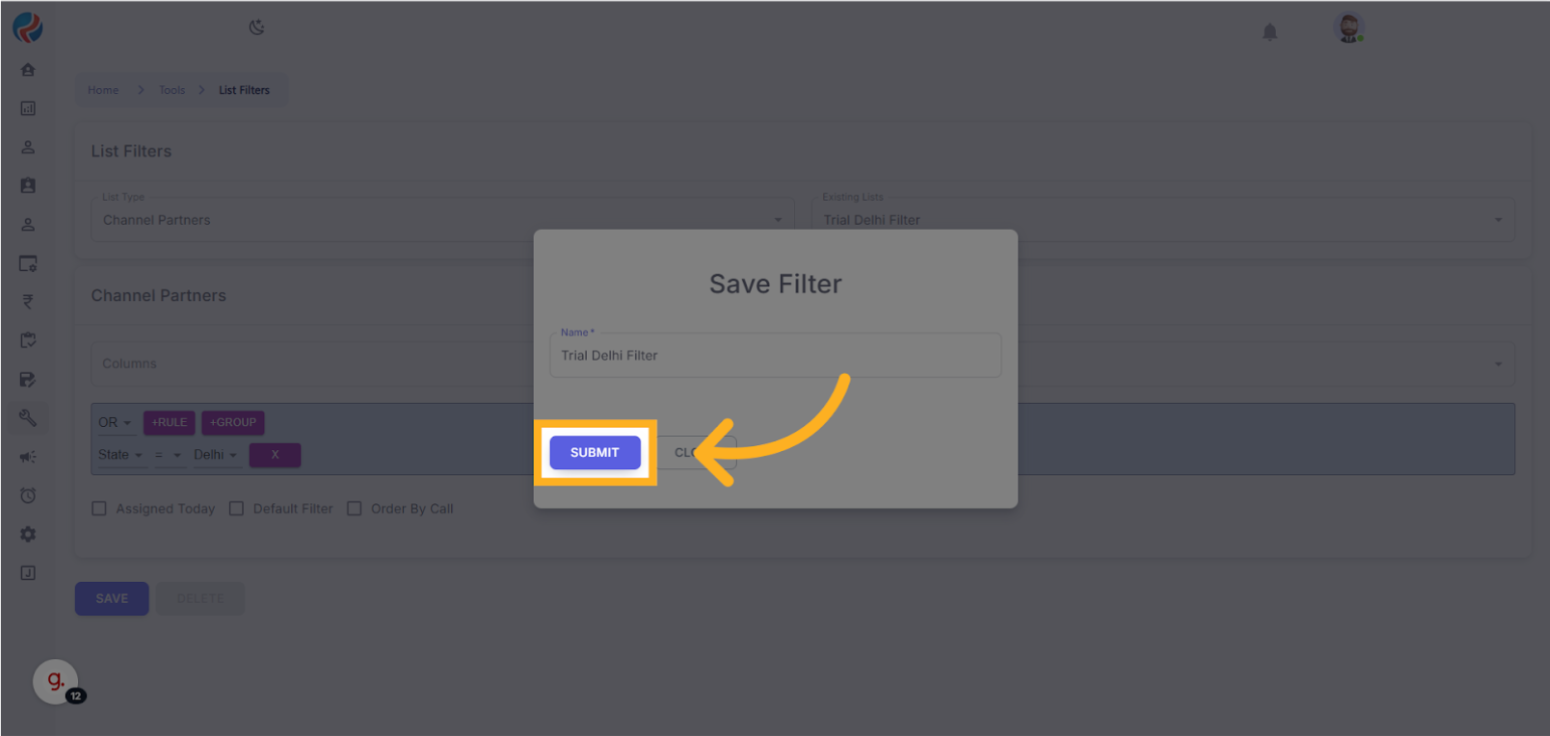
- In the Name field, enter a descriptive filter name (e.g., “Trial Delhi Filter”).

- Click “Submit”.
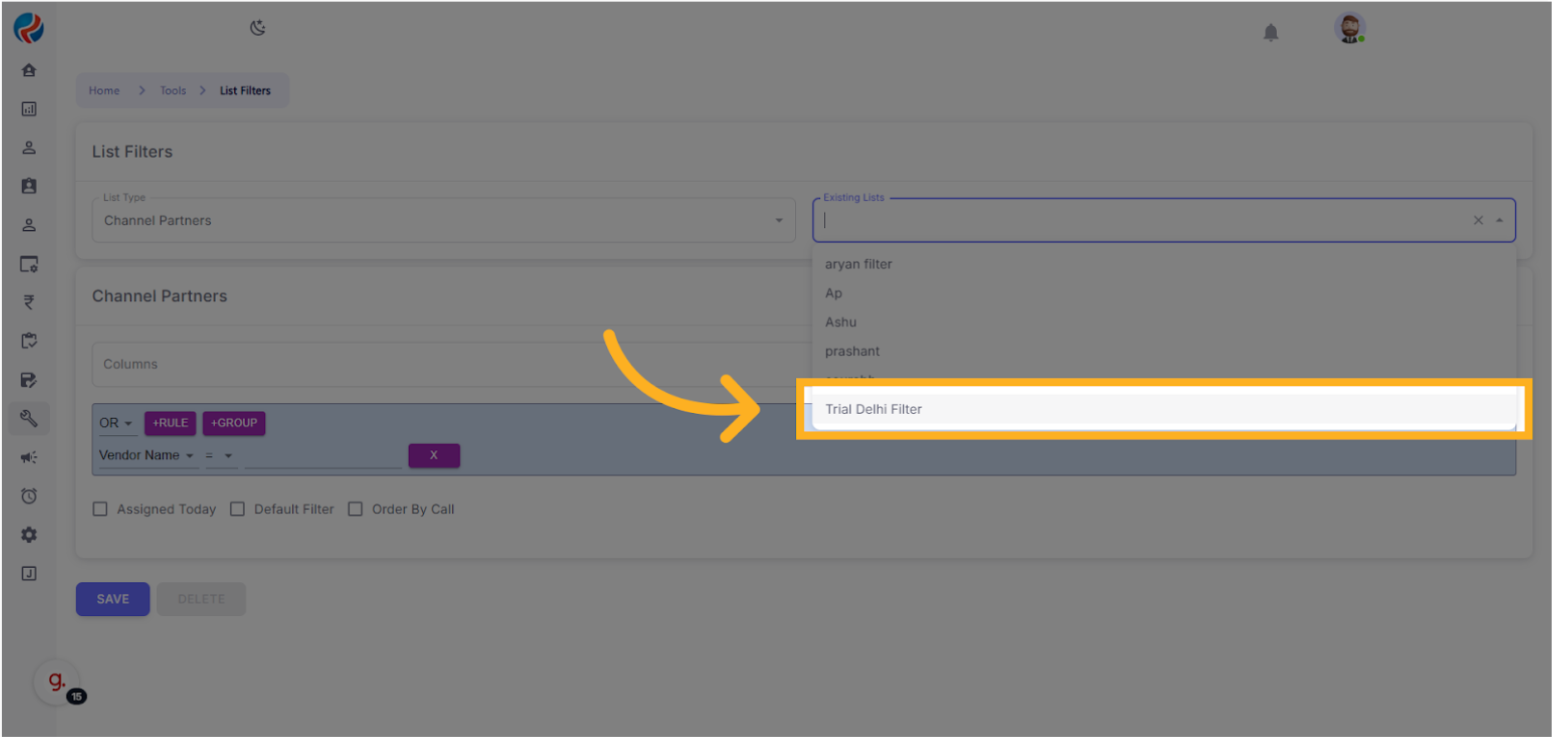
Step 6: Verify Filter Creation
- Go back to “List Type”.
- Check under Existing Lists.
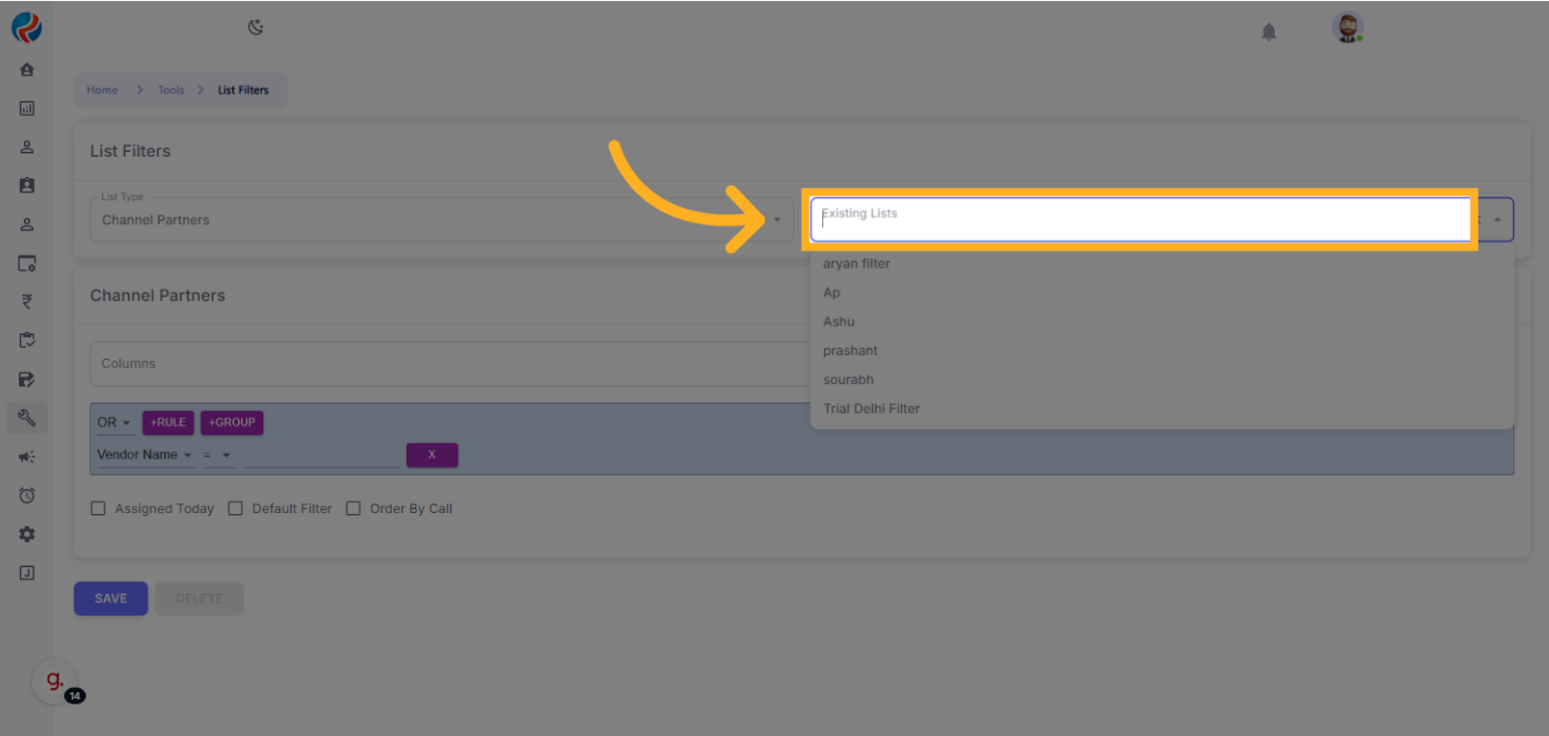
- Confirm the filter “Trial Delhi Filter” appears in the dropdown.
Section 2: Sending Notifications Using Filters
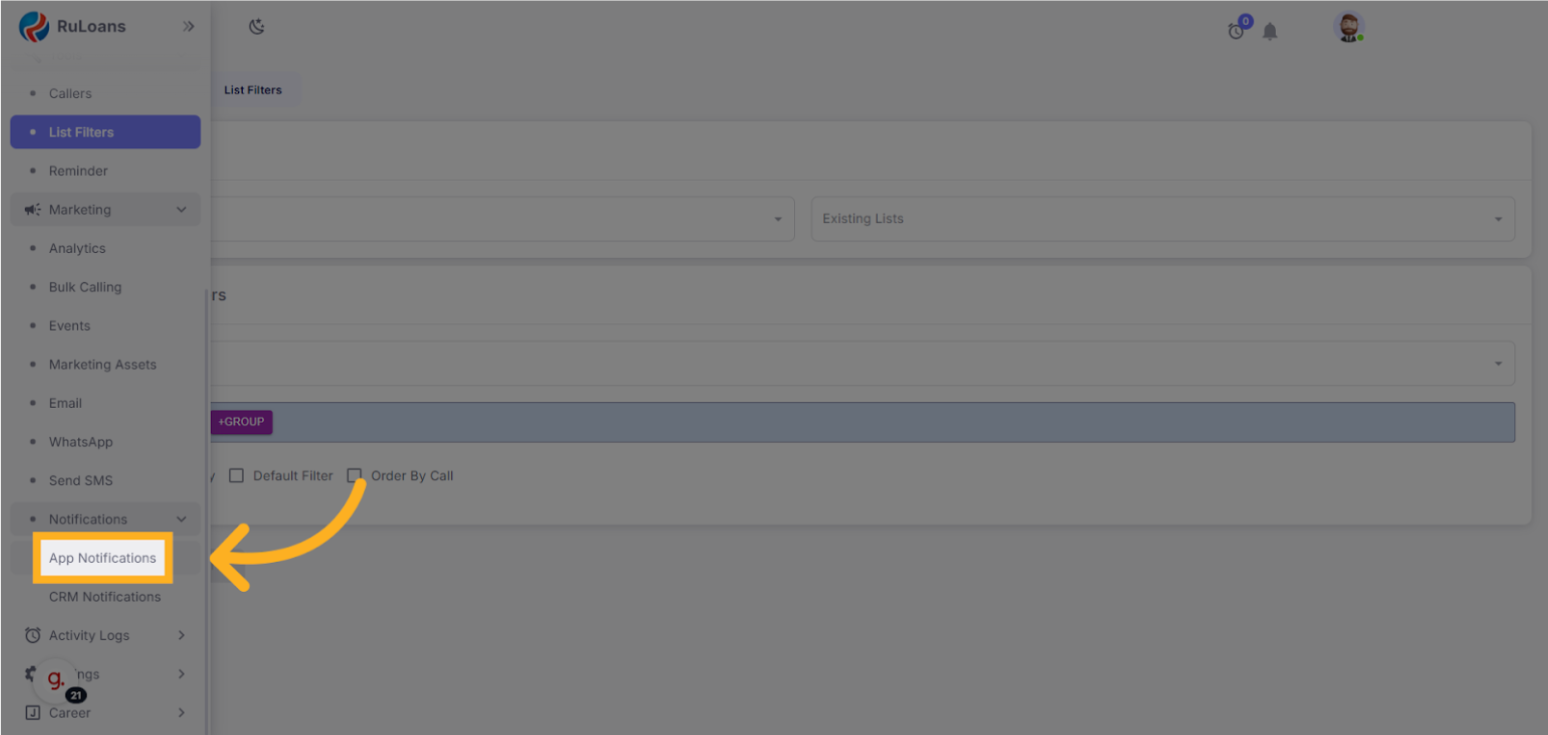
Step 7: Navigate to Notifications
- From CRM, go to “Marketing”.
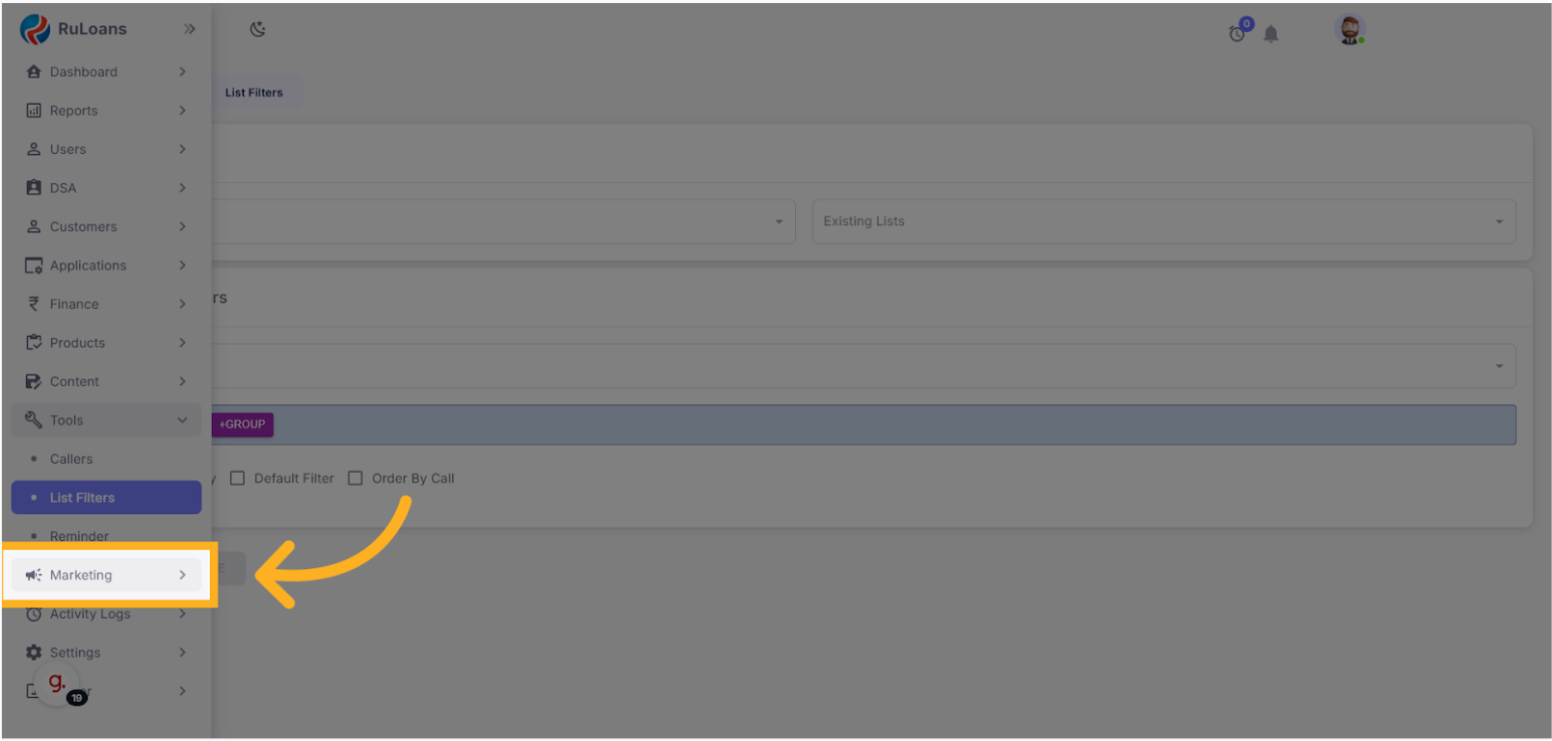
- Select “Notifications”, then choose “App Notifications”.
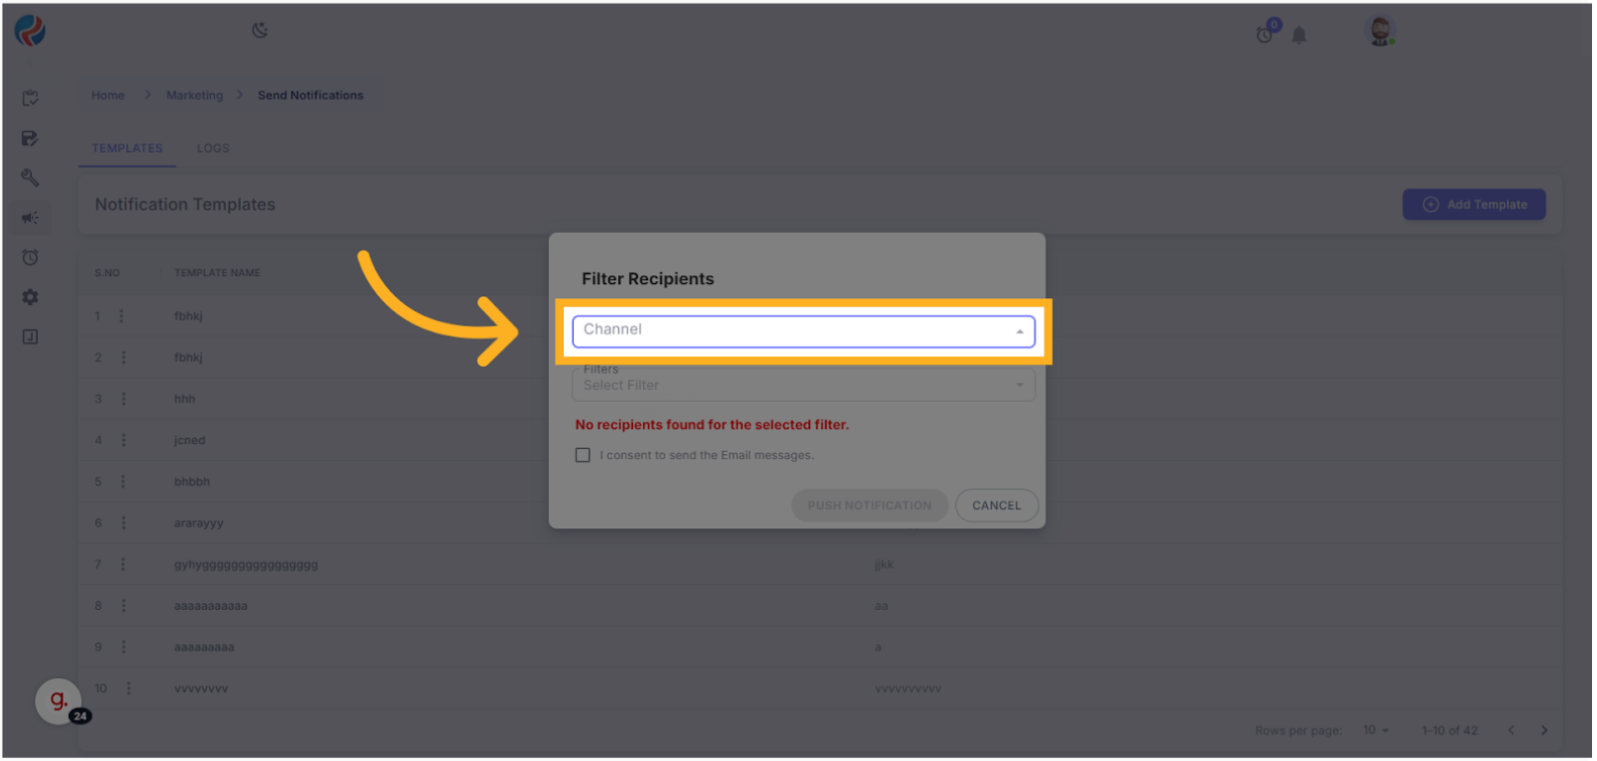
Step 8: Prepare to Send
- Click on the three dots next to the template you want to use.
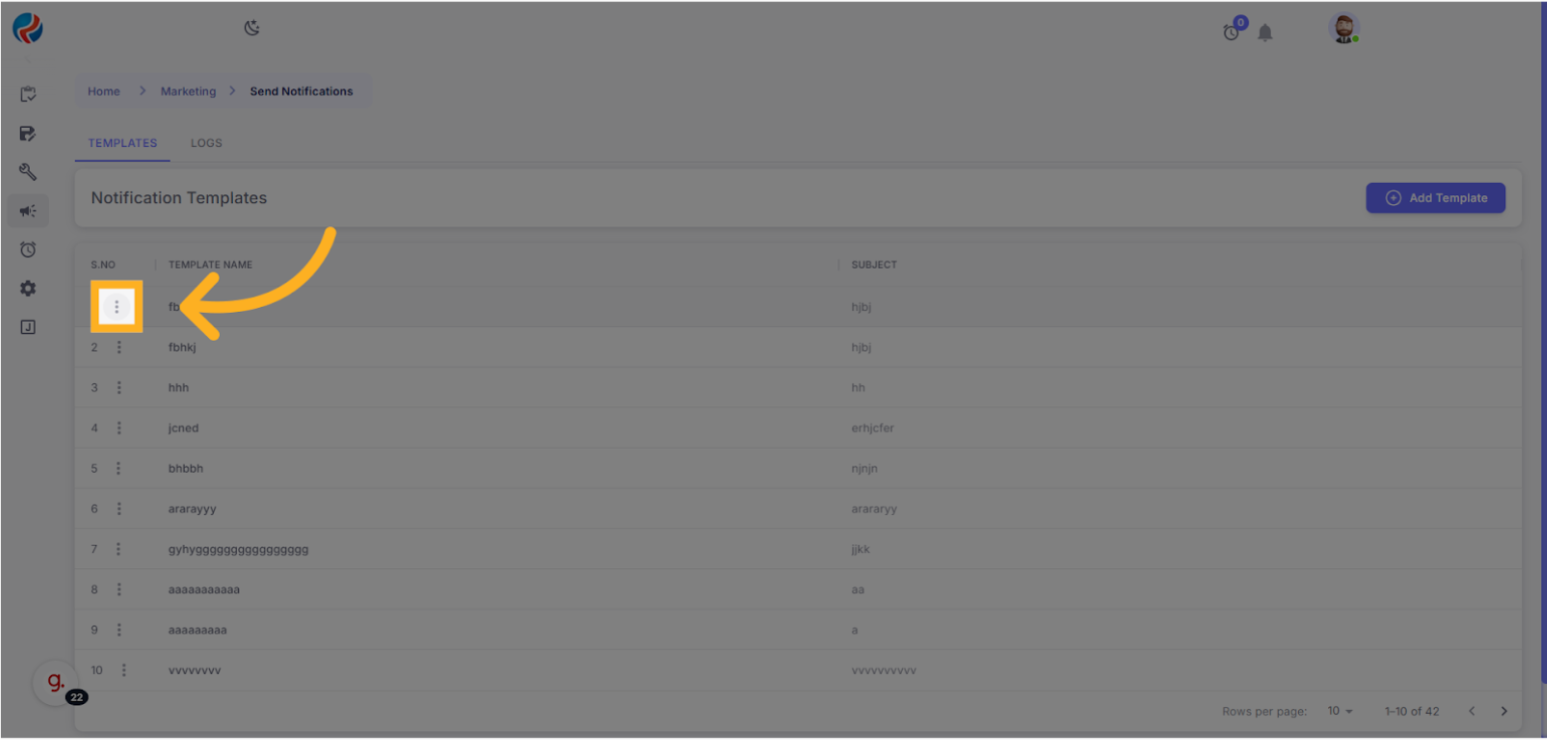
- Click “Send”.

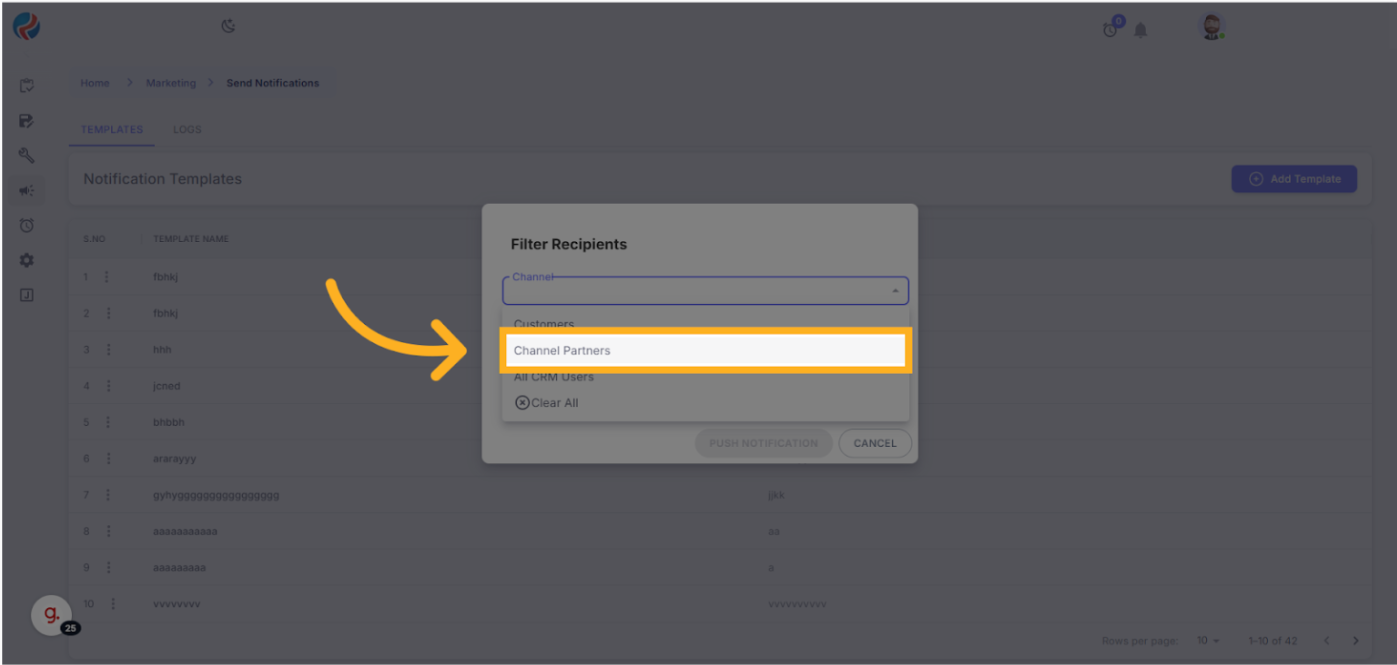
- Choose the “Channel”, then select “Channel Partners”.
Step 9: Apply the Filter
- Click on “Channel”
- Select “Channel Partners”.
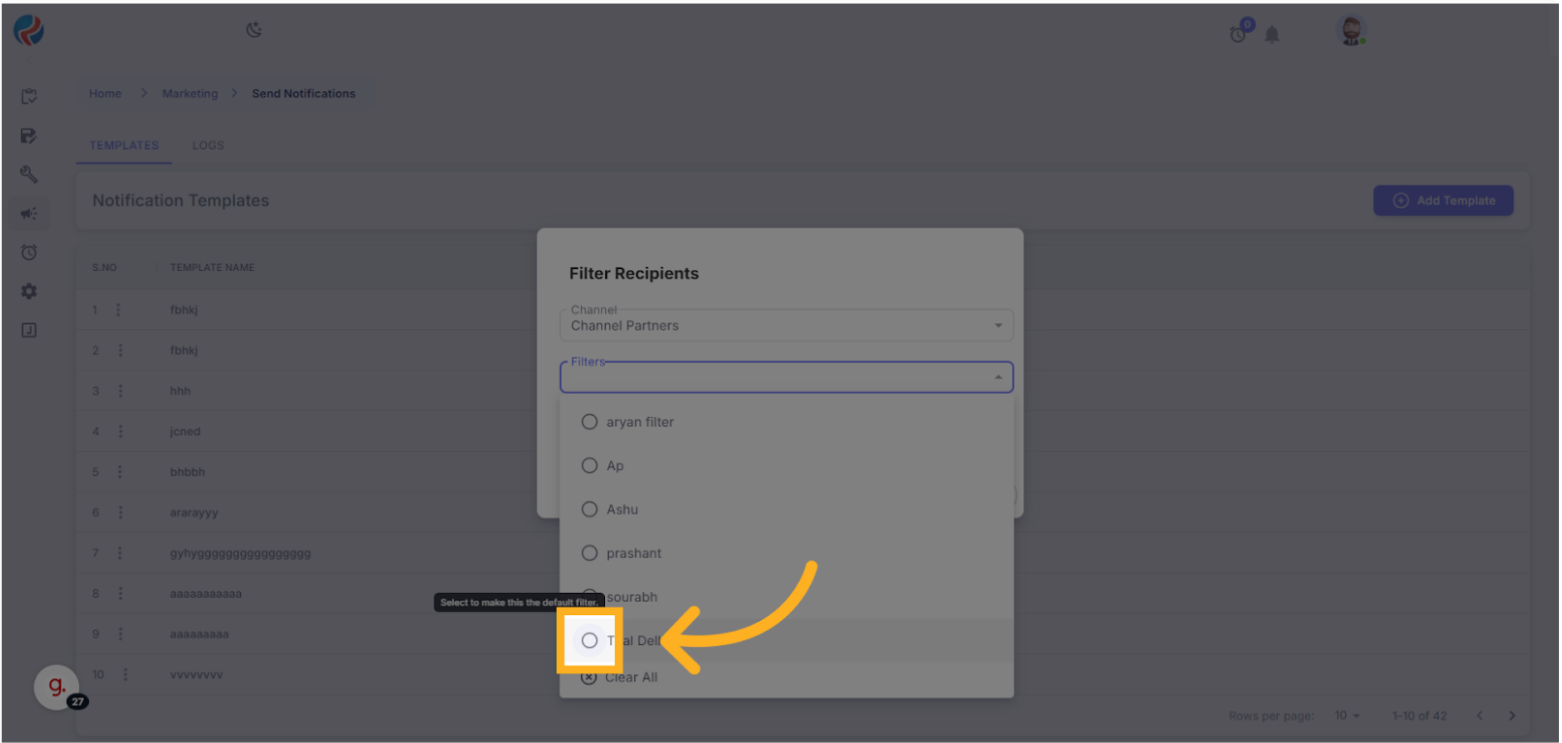
- Click on “Filters”
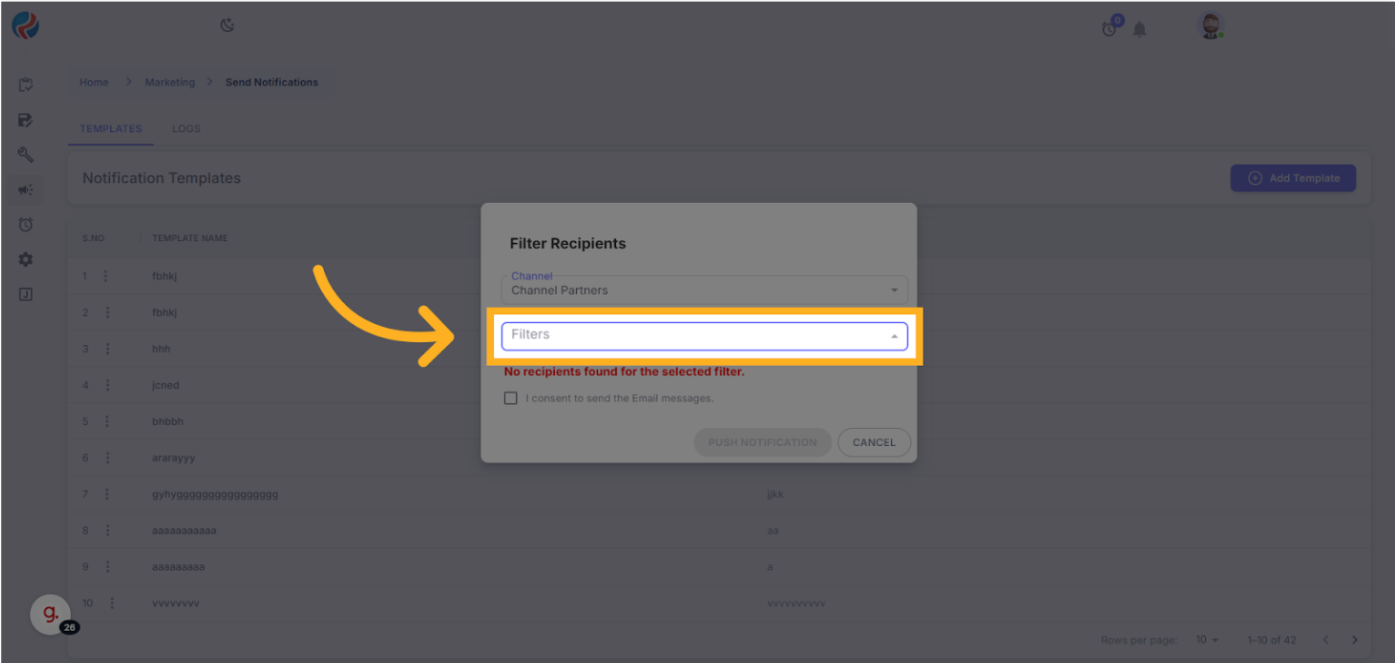
- Select the filter you created (Trial Delhi Filter).
- The system displays the total recipients matching the filter.
- For example: State = Delhi → 87 matches
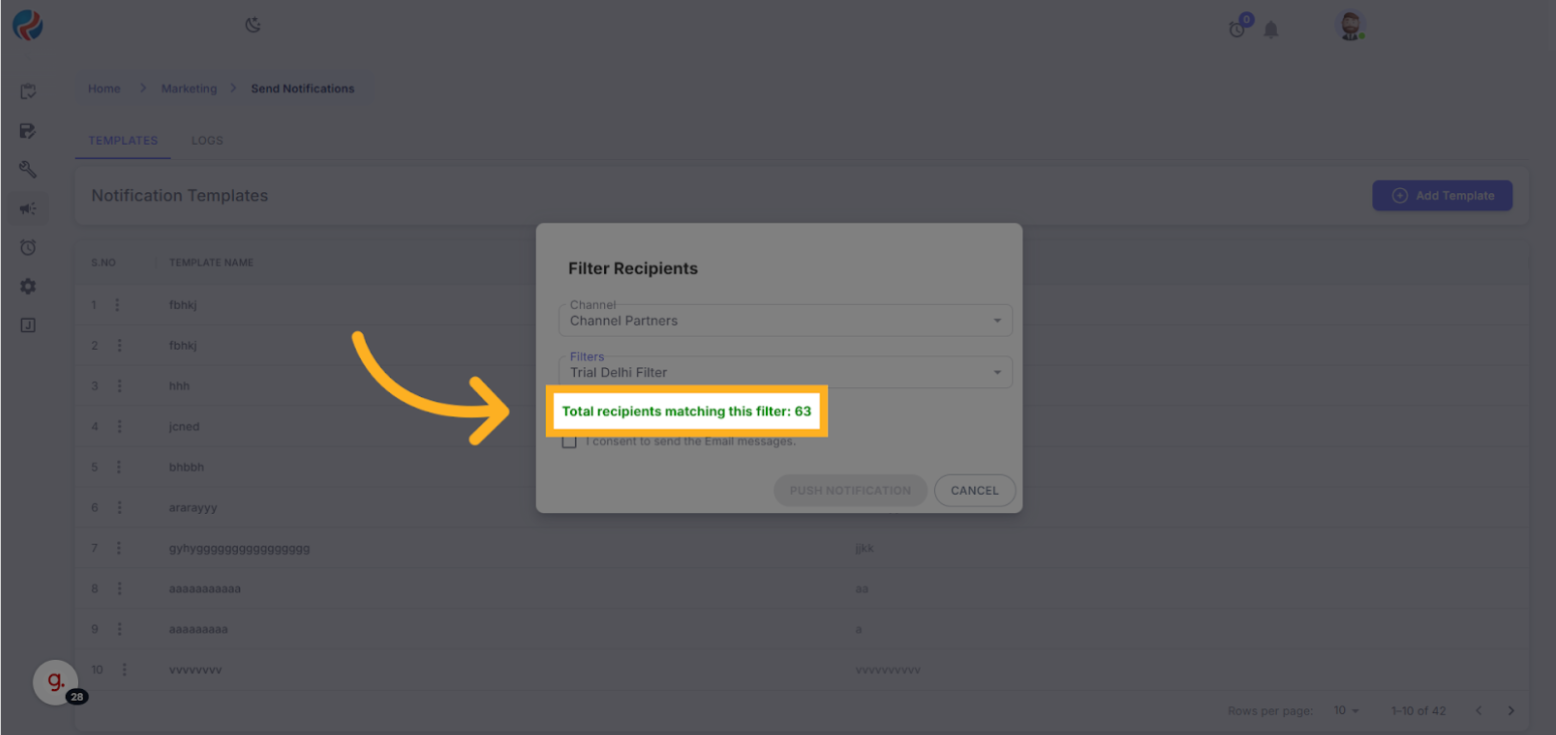
Please check the count carefully once or twice before sending the notification to avoid any mistakes, View the total recipients again.
Step 10: Confirm and Send
After thoroughly checking the count, filters, and channel details, click the consent checkbox to proceed.
- Carefully verify:
- The count of recipients
- Filter conditions
- Channel details
- Tick the Consent Checkbox to proceed.
- Click “Push Notification”.

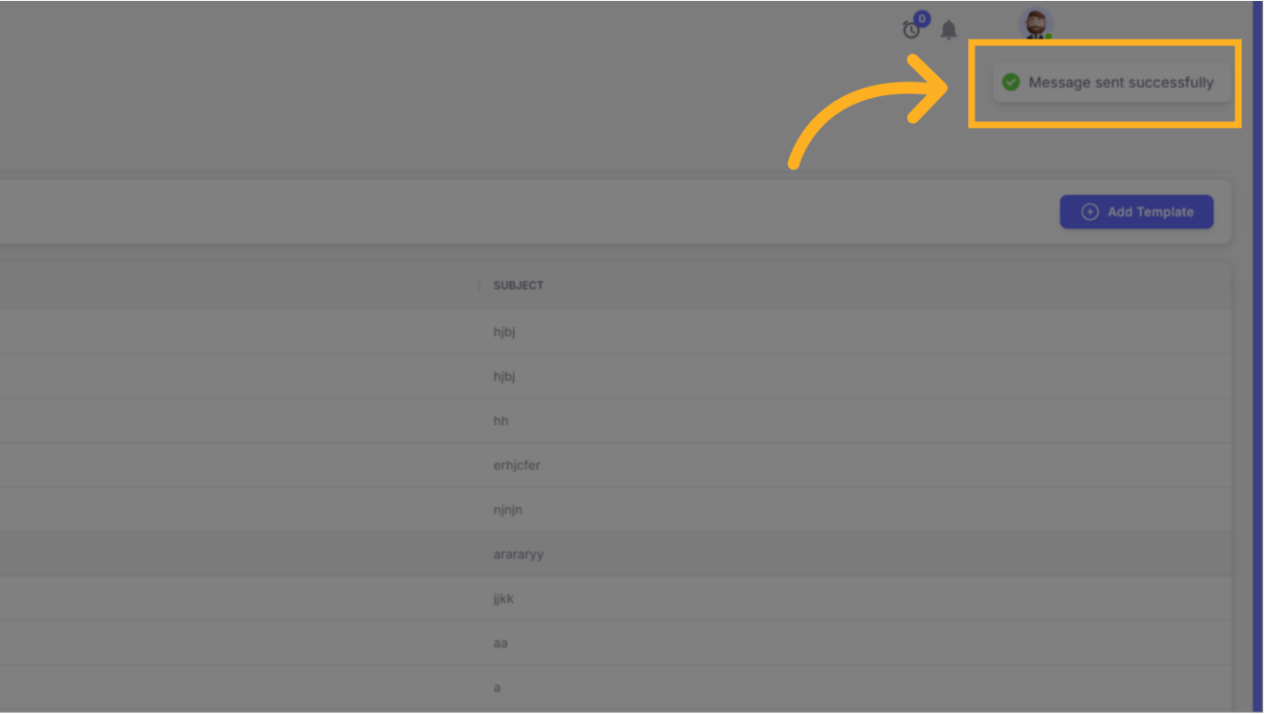
Step 11: Confirmation
- You will see a “Message sent successfully” notification at the top-right.
OPERATOR REFERENCES
Comparison Operators Reference
| Operator | Meaning | Example |
|---|---|---|
= | Equal to | Age = 30 |
!= | Not equal to | Age != 30 |
< | Less than | Age < 30 |
> | Greater than | Age > 30 |
<= | Less than or equal to | Age <= 30 |
>= | Greater than or equal to | Age >= 30 |
Text Matching Operators
| Operator | Description | Example |
|---|---|---|
| contains | Includes specified text | Name contains “John” |
| begins with | Starts with specified text | Name begins with “A” |
| ends with | Ends with specified text | Email ends with “@gmail.com” |
| does not contain | Excludes specific text | Name does not contain “John” |
| does not begin with | Doesn’t start with specific text | Name does not begin with “A” |
| does not end with | Doesn’t end with specific text | Email does not end with “@gmail.com” |
Null Check Operators
| Operator | Meaning | Example |
|---|---|---|
| is null | Value is blank | Phone is null |
| is not null | Value is present | Email is not null |
List Operators
| Operator | Meaning | Example |
|---|---|---|
| in | Belongs to a list | Country in (India, Nepal) |
| not in | Excluded from list | Country not in (India, Nepal) |
Range Operators
| Operator | Meaning | Example |
|---|---|---|
| between | Within range | Age between 18 and 25 |
| not between | Outside range | Age not between 18 and 25 |
Prepared By: Aparmita Srivastav