Objective
This user guide provides a step-by-step overview of how to manage and view customer leads on the CRM platform. It helps users understand how to access lead data, track lead status, update information, and efficiently handle the lead lifecycle. The guide is designed to ensure smooth navigation, improve productivity, and enable better lead management through the platform’s features.Process Steps
Step 1: Login to the CRM.
The user logs in using their provided credentials.Upon successful login, the user will be redirected to landing page.
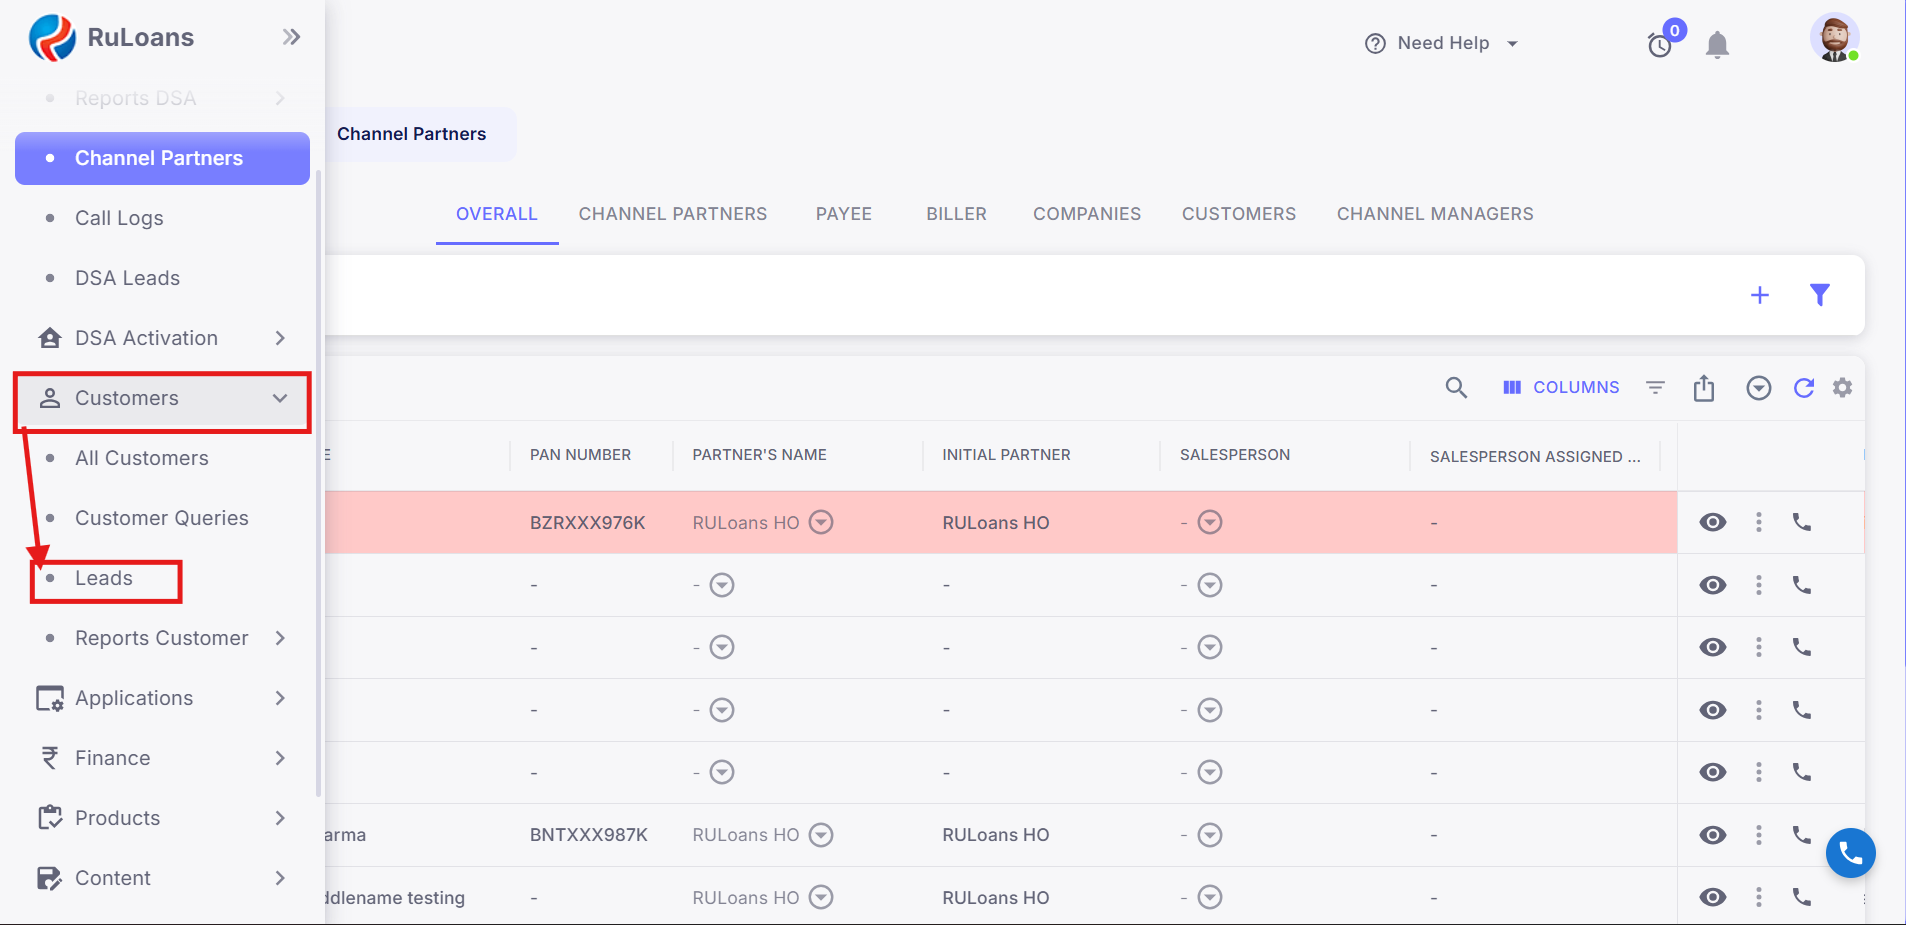
Step 2: Navigate to the Customer Leads Section
Access the Customer Leads section by clicking on the Customer > Leads tab in the main menu on the left.The system will redirect the user to the Leads Page.
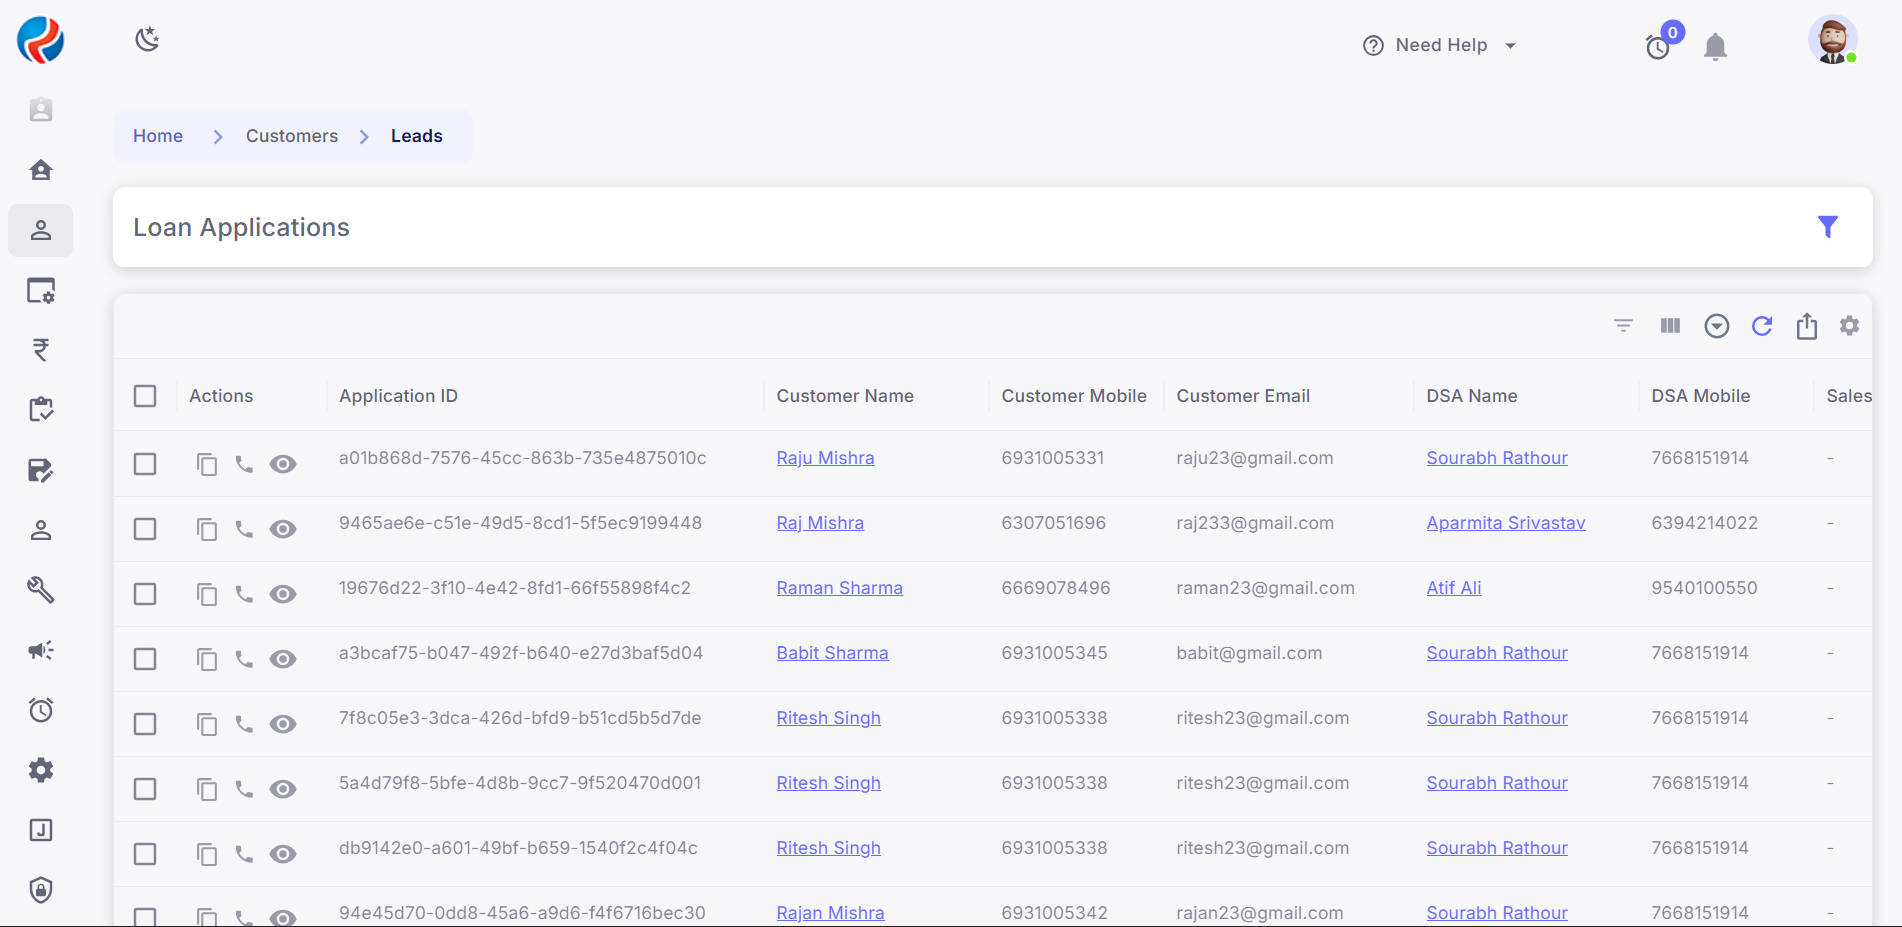
Step 3: Overview of the Leads Page
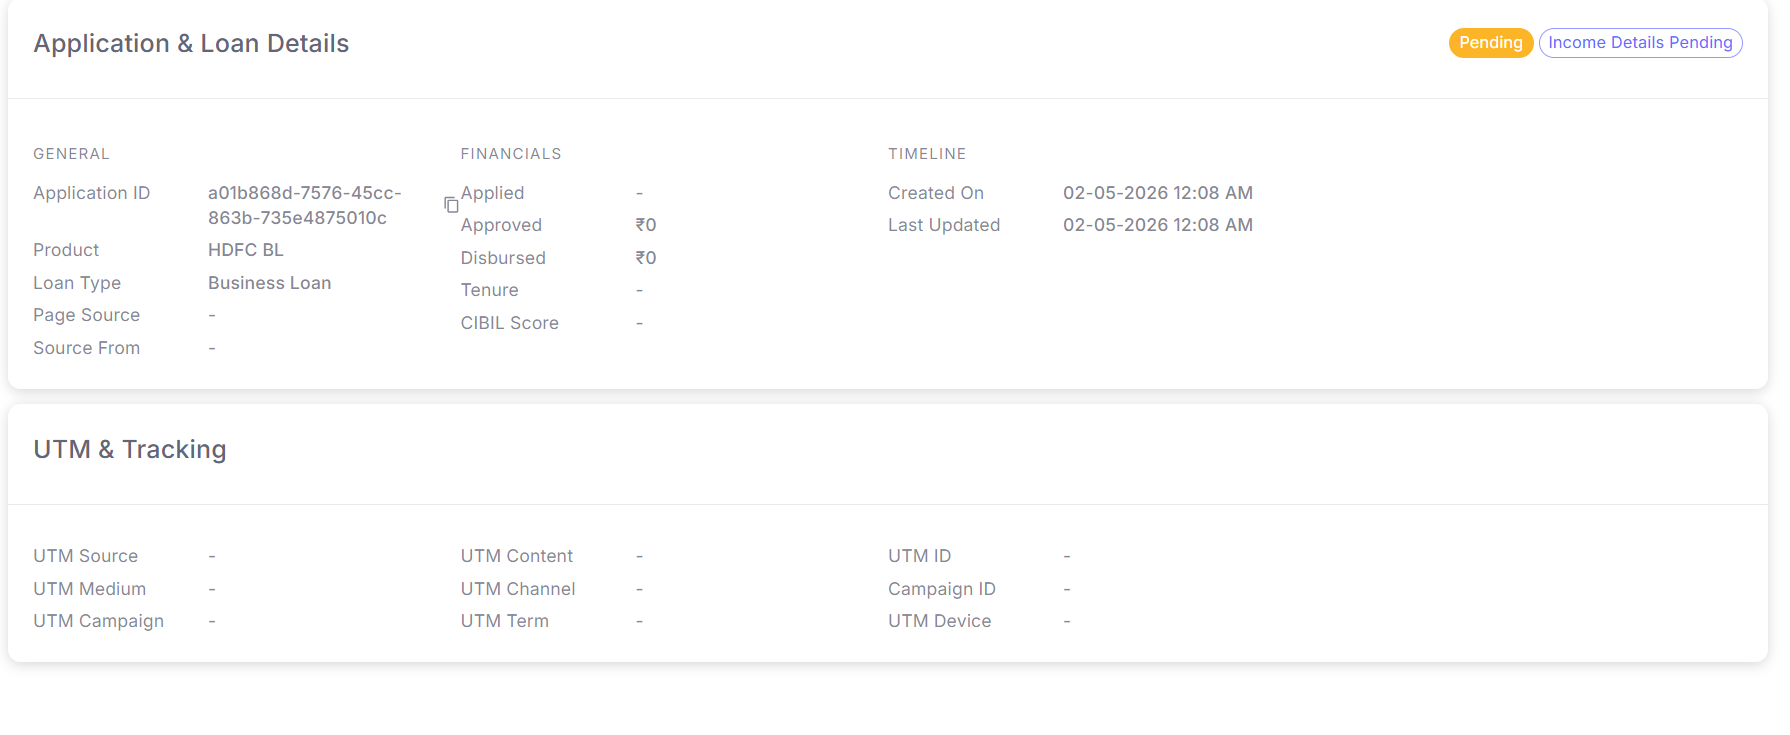
The following sections will be displayed:Columns for leads:
- Checkbox selection
- Action Buttons
- Application ID
- Customer ID
- Customer Name
- Customer Mobile
- Customer Email
- DSA ID
- DSA Name
- DSA Mobile
- Salesperson
- SP Assigned Date
- Status
- Lead Status
- Sub Status
- Call Status
- Call Remark
- Last Call Date
- Product Name
- Loan Type
- Applied Amount
- Approved Amount
- Disbursed Amount
- Loan Tenure
- CIBIL Score
- Date of Birth
- Pincode
- City
- State
- Income Type
- Consent Given
- UTM Source
- UTM Medium
- UTM Campaign
- UTM Content
- UTM Channel
- UTM Term
- UTM ID
- Campaign ID
- GAD
- GCLID
- MT
- AD
- Ad Position
- Ad Group ID
- UTM Ad Group
- UTM Main Source
- UTM Device
- Page Source
- Source From
- Created At
- Updated At
Step 4: Action Buttons on the Page
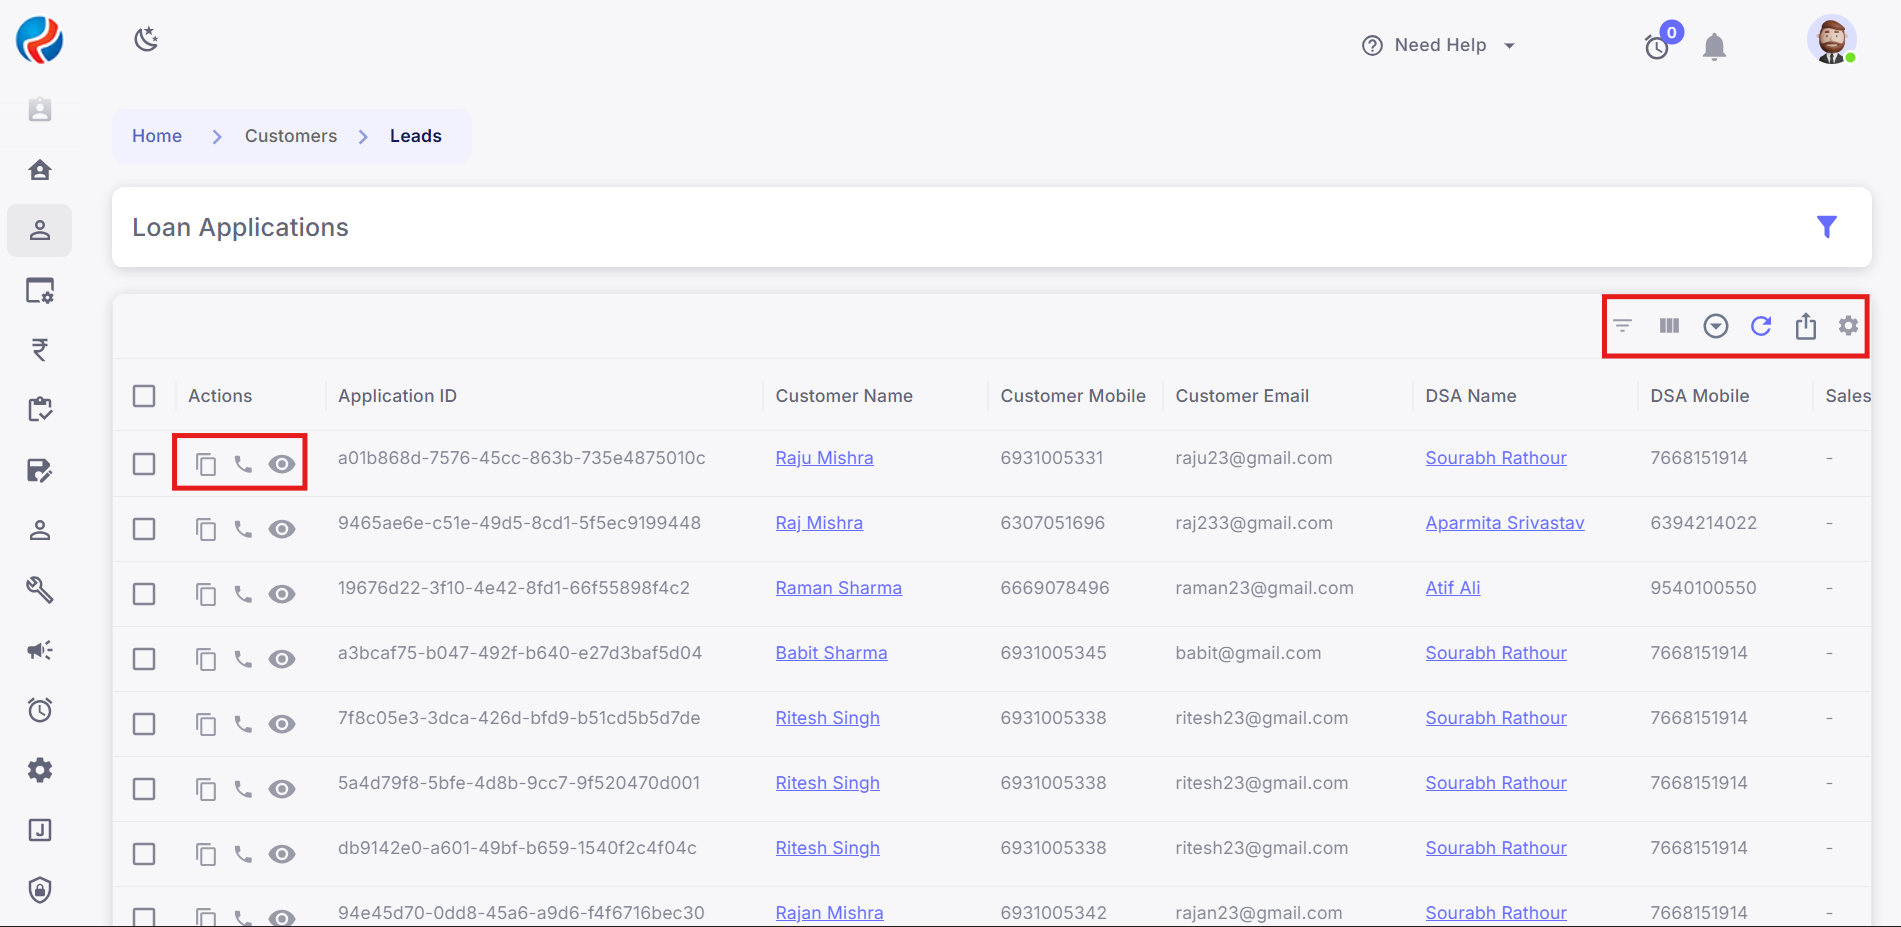
- Check Box :- This will be used to select multiple leads on the page.
- Copy Application ID :- This will be used to copy Application ID on the page.
- Capture Call and Lead Status :- This is used to capture call status and lead status of the lead with remarks.
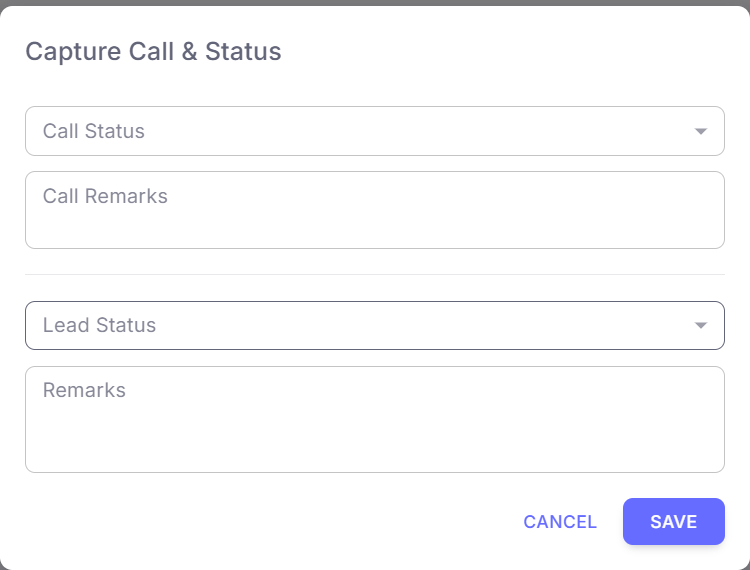
Call Status has following values in the dropdown:
- RNR
- Call Back
- Follow Up
- Spoken
- Not Interested
- Not Eligible
- Interested
- App Login
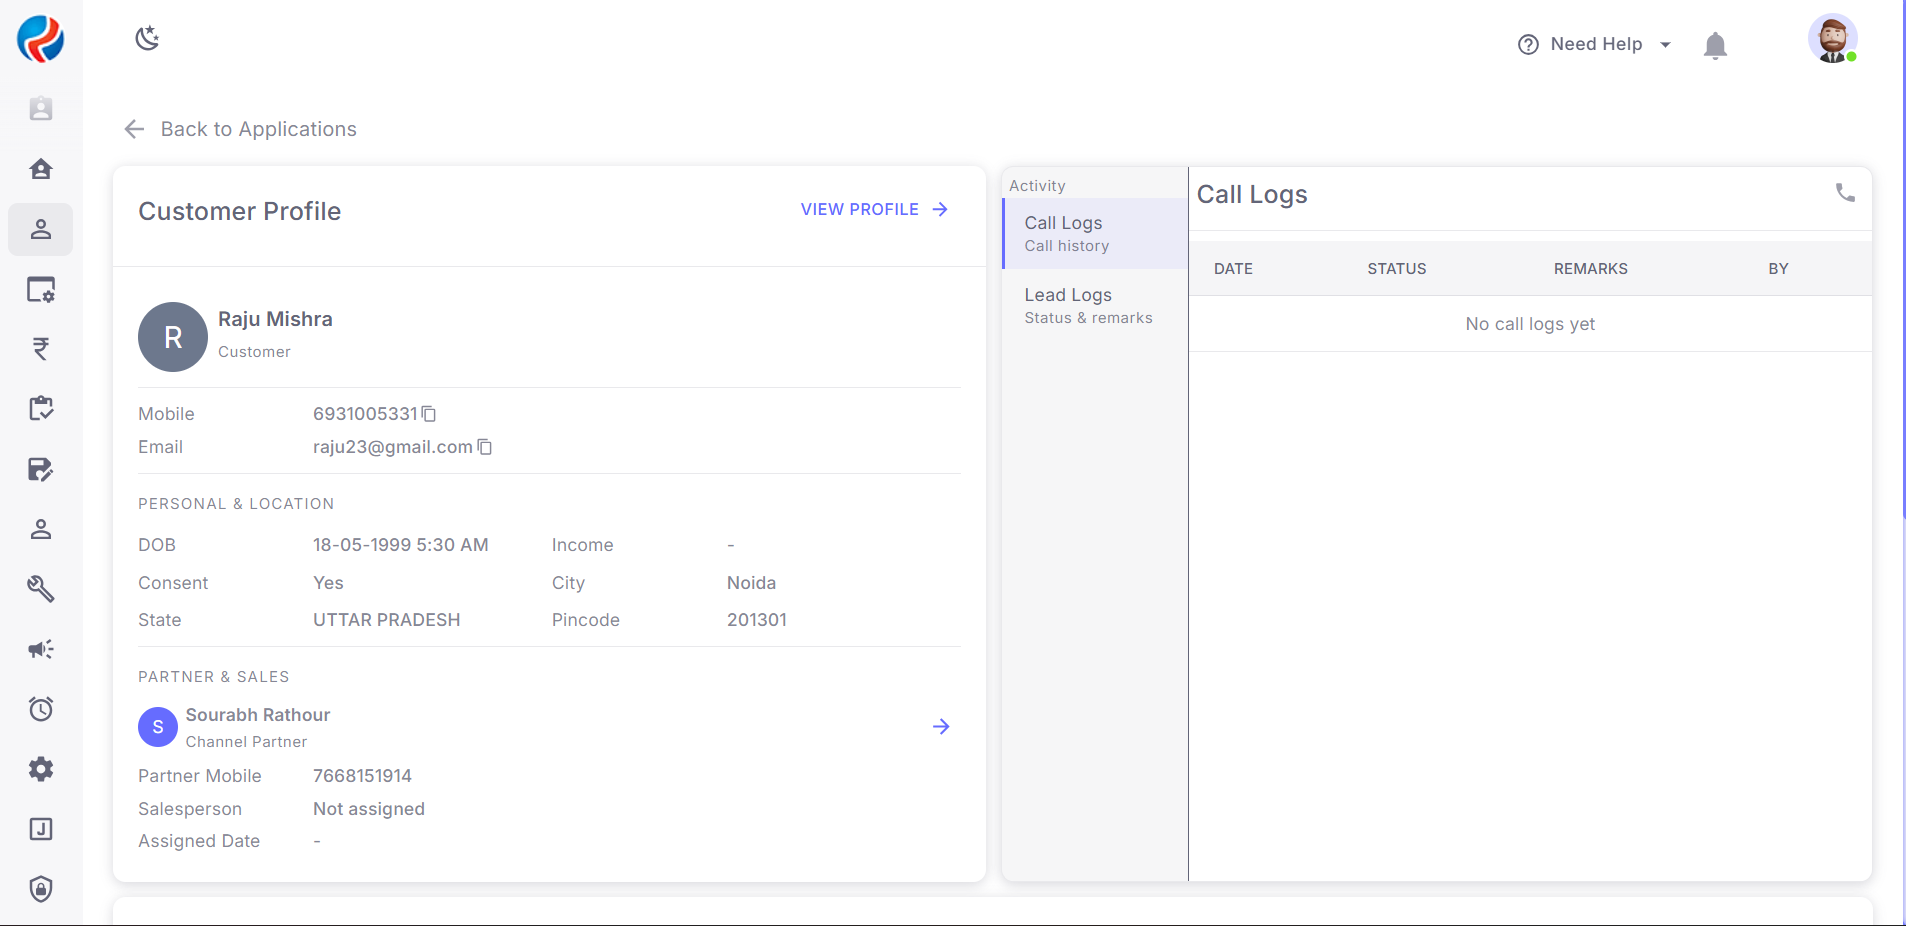
- View/Eye :- This is used to view full application view of the lead which includes Customer details,DSA details,Application Details,Call logs,Lead logs and UTM details of the lead.
- Filter :- This is used to apply filters on the page for Columns.
- View Columns :- This is used to show/hide columns from the page as the user requirement.
- Assign SP :- This is used to assign Salesperson to the selected leads
- Export :- This is used to export leads into a excel format by the user.