Product logs in CRM
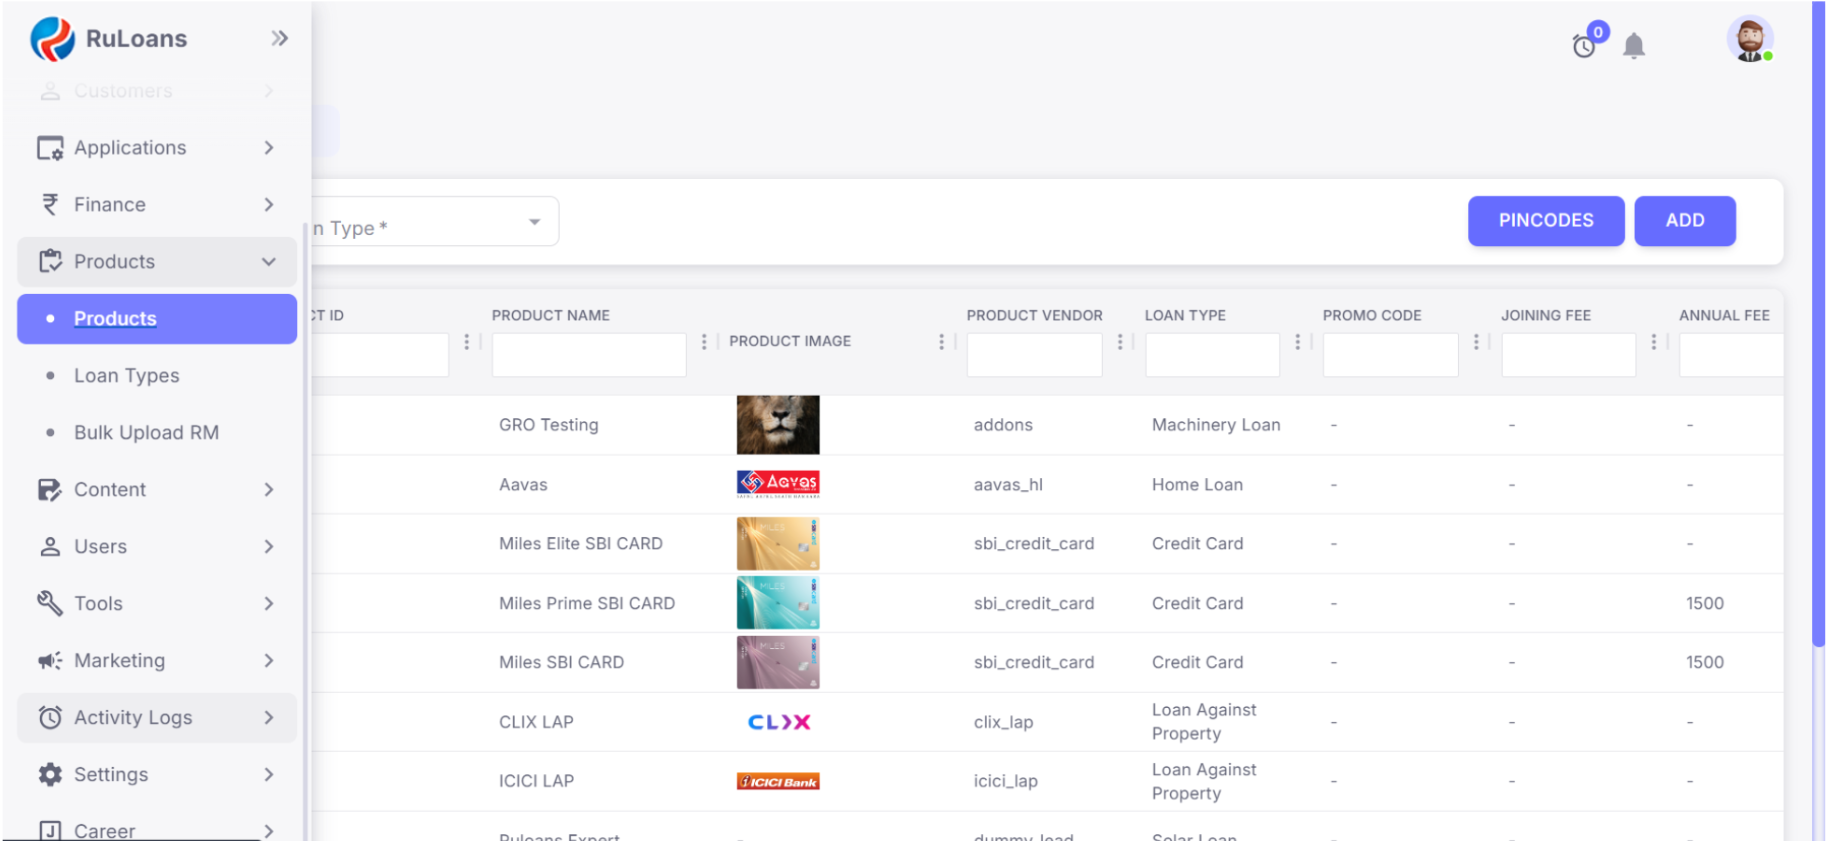
This guide explains how to check the logs for Adding , Updating the Products.Steps to Access the Products Section
- Log in to the CRM.
- Navigate to Products from the side menu.
- Select Product to open the Products Page.
Creating a New Product
- On the Products Page, click the Add button.

- Fill in the required details

-
Product Name –* Text field (mandatory). Used to define the official name of the product.
Example: Miles Elite SBI Card-
Product Vendor –* Dropdown (mandatory). Select the vendor/provider for the product.
Example: SBI Credit Card -
Loan Type –* Dropdown (mandatory). Choose the loan/financial category of the product.
Example: Credit Card -
Product Vendor Alias – Text field. Short code/alias for backend reference.
Example: sbi_credit_card -
Status – Dropdown. Shows whether the product is Active/Inactive.
Example: Active -
B2B Status – Dropdown. Indicates product availability in B2B channel.
Example: Active -
B2C Status – Dropdown. Indicates product availability in B2C channel.
Example: Active -
Journey Type – Dropdown. Defines the type of customer journey used.
Example: UTM Journey - Communication Type – Dropdown. Specifies the method of communication related to this product (e.g., Email, SMS, etc.).
-
UTM Journey URL – Text field (URL). Holds the UTM journey tracking link.
Example: https://sbi-dev7.sbicard.com/ - Sort Order – Number input. Defines the order in which the product is displayed in CRM/website lists.
-
Pincode Product Alias – Text field. Alias used for product identification in pincode-based mapping.
Example: universal - Netsuite Product – Dropdown. Maps the product with its Netsuite ERP equivalent.
- Lender Partner Page – Text field/URL. For linking the lender’s partner details page.
- Privacy Policy – Text field (URL). Used to store the privacy policy link of the product.
-
Official Website – Text field (URL). Link to the official product/vendor website.
Example: https://www.sbicard.com/ - Change Image – File upload. Lets you upload or change the product’s image/logo/banner.
- Enable Instant Claims – Toggle switch (ON/OFF). Enables or disables instant claim functionality for this product.
-
Product Vendor –* Dropdown (mandatory). Select the vendor/provider for the product.
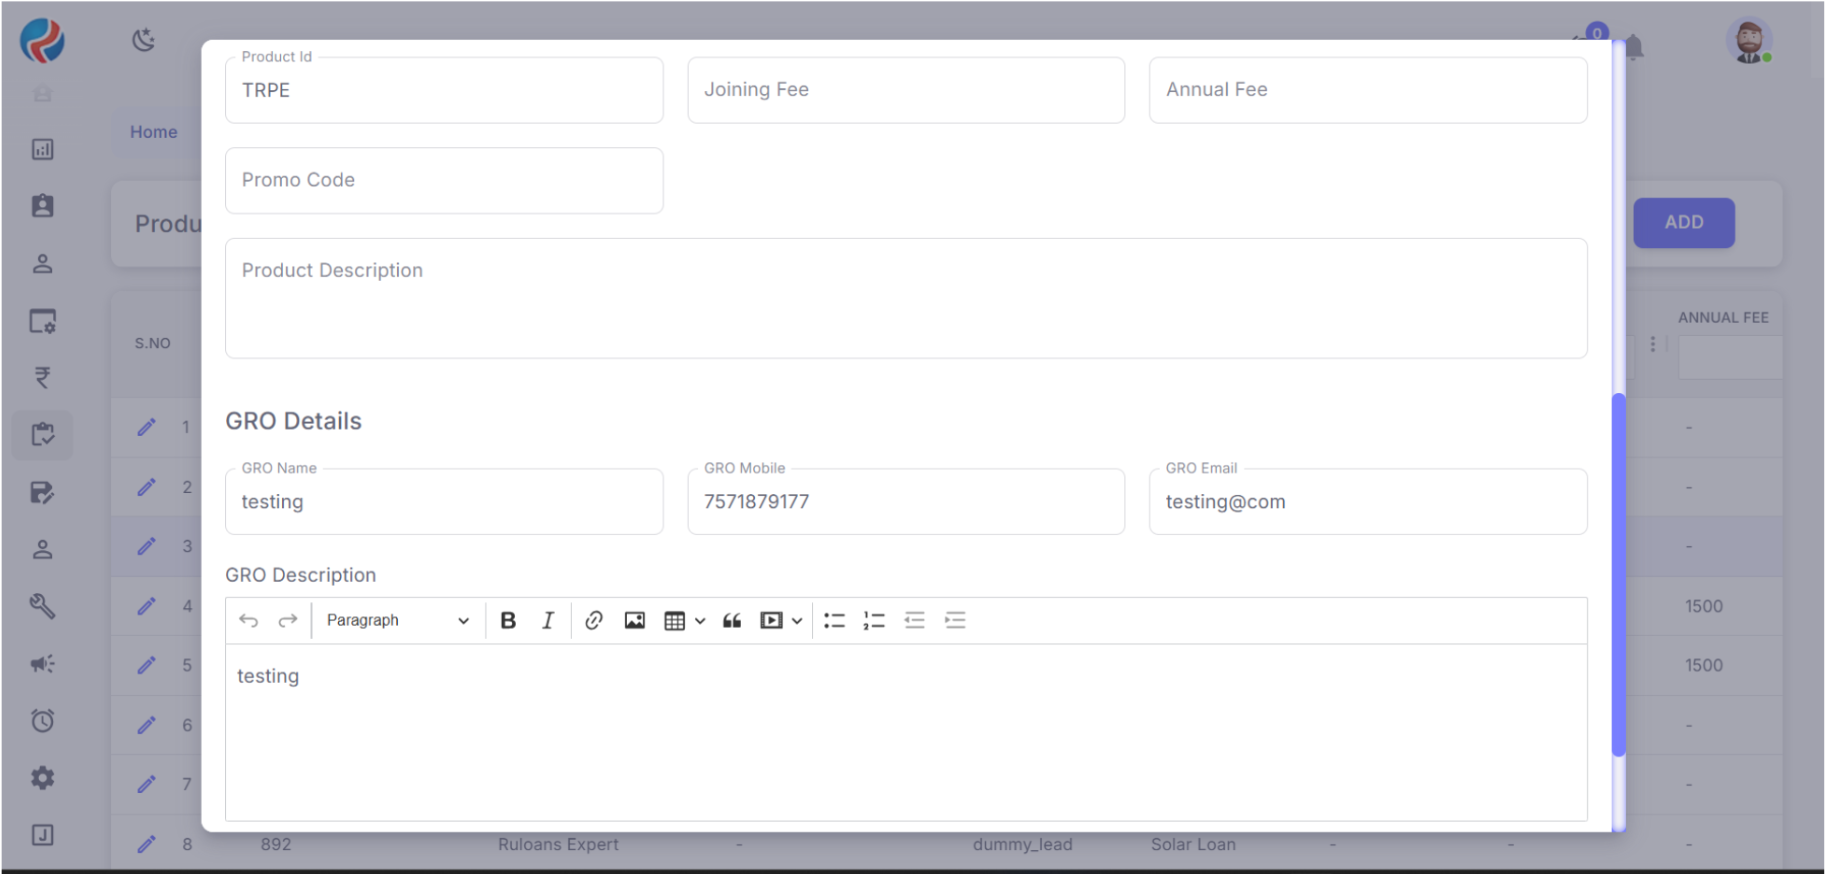
- Product ID –
Type: Text field.
Purpose: A unique identifier for the product, usually system-generated or assigned for internal reference.
Example: TRPE- Joining Fee –
Type: Numeric/Text field.
Purpose: Specifies the one-time joining fee charged for the product (e.g., for credit cards). - Annual Fee –
Type: Numeric/Text field.
Purpose: Indicates the yearly fee applicable for maintaining the product (e.g., credit card annual charges). - Promo Code –
Type: Text field.
Purpose: Allows entry of promotional/discount codes applicable to this product. - Product Description –
Type: Text area (multi-line).
Purpose: Detailed description of the product, its features, and benefits. This is usually shown on the website or CRM for reference.
- Joining Fee –
-
GRO Name –
Type: Text field.
Purpose: Enter the name of the GRO (Grievance Redressal Officer).
Example: testing-
GRO Mobile –
Type: Numeric/Text field.
Purpose: Enter the official mobile number of the GRO.
Validation Needed: Should only allow valid 10-digit numbers.
Example: 9876543210 -
GRO Email –
Type: Text field (Email format).
Purpose: Enter the official email address of the GRO.
Validation Needed: Must be in correct email format (e.g., [email protected]).
Example: [email protected] -
GRO Description –
Type: Text area ( text editor).
Purpose: Provide additional details about the GRO, such as responsibilities, notes, or remarks.
Features: Supports formatting like Bold, Italic, bullet points, links, etc.
Example: testing
-
GRO Mobile –
- Scroll down to the GRO Section and complete the details.
- Click Submit to save the new entry.
- Once submitted, the data will be saved and displayed on the website.
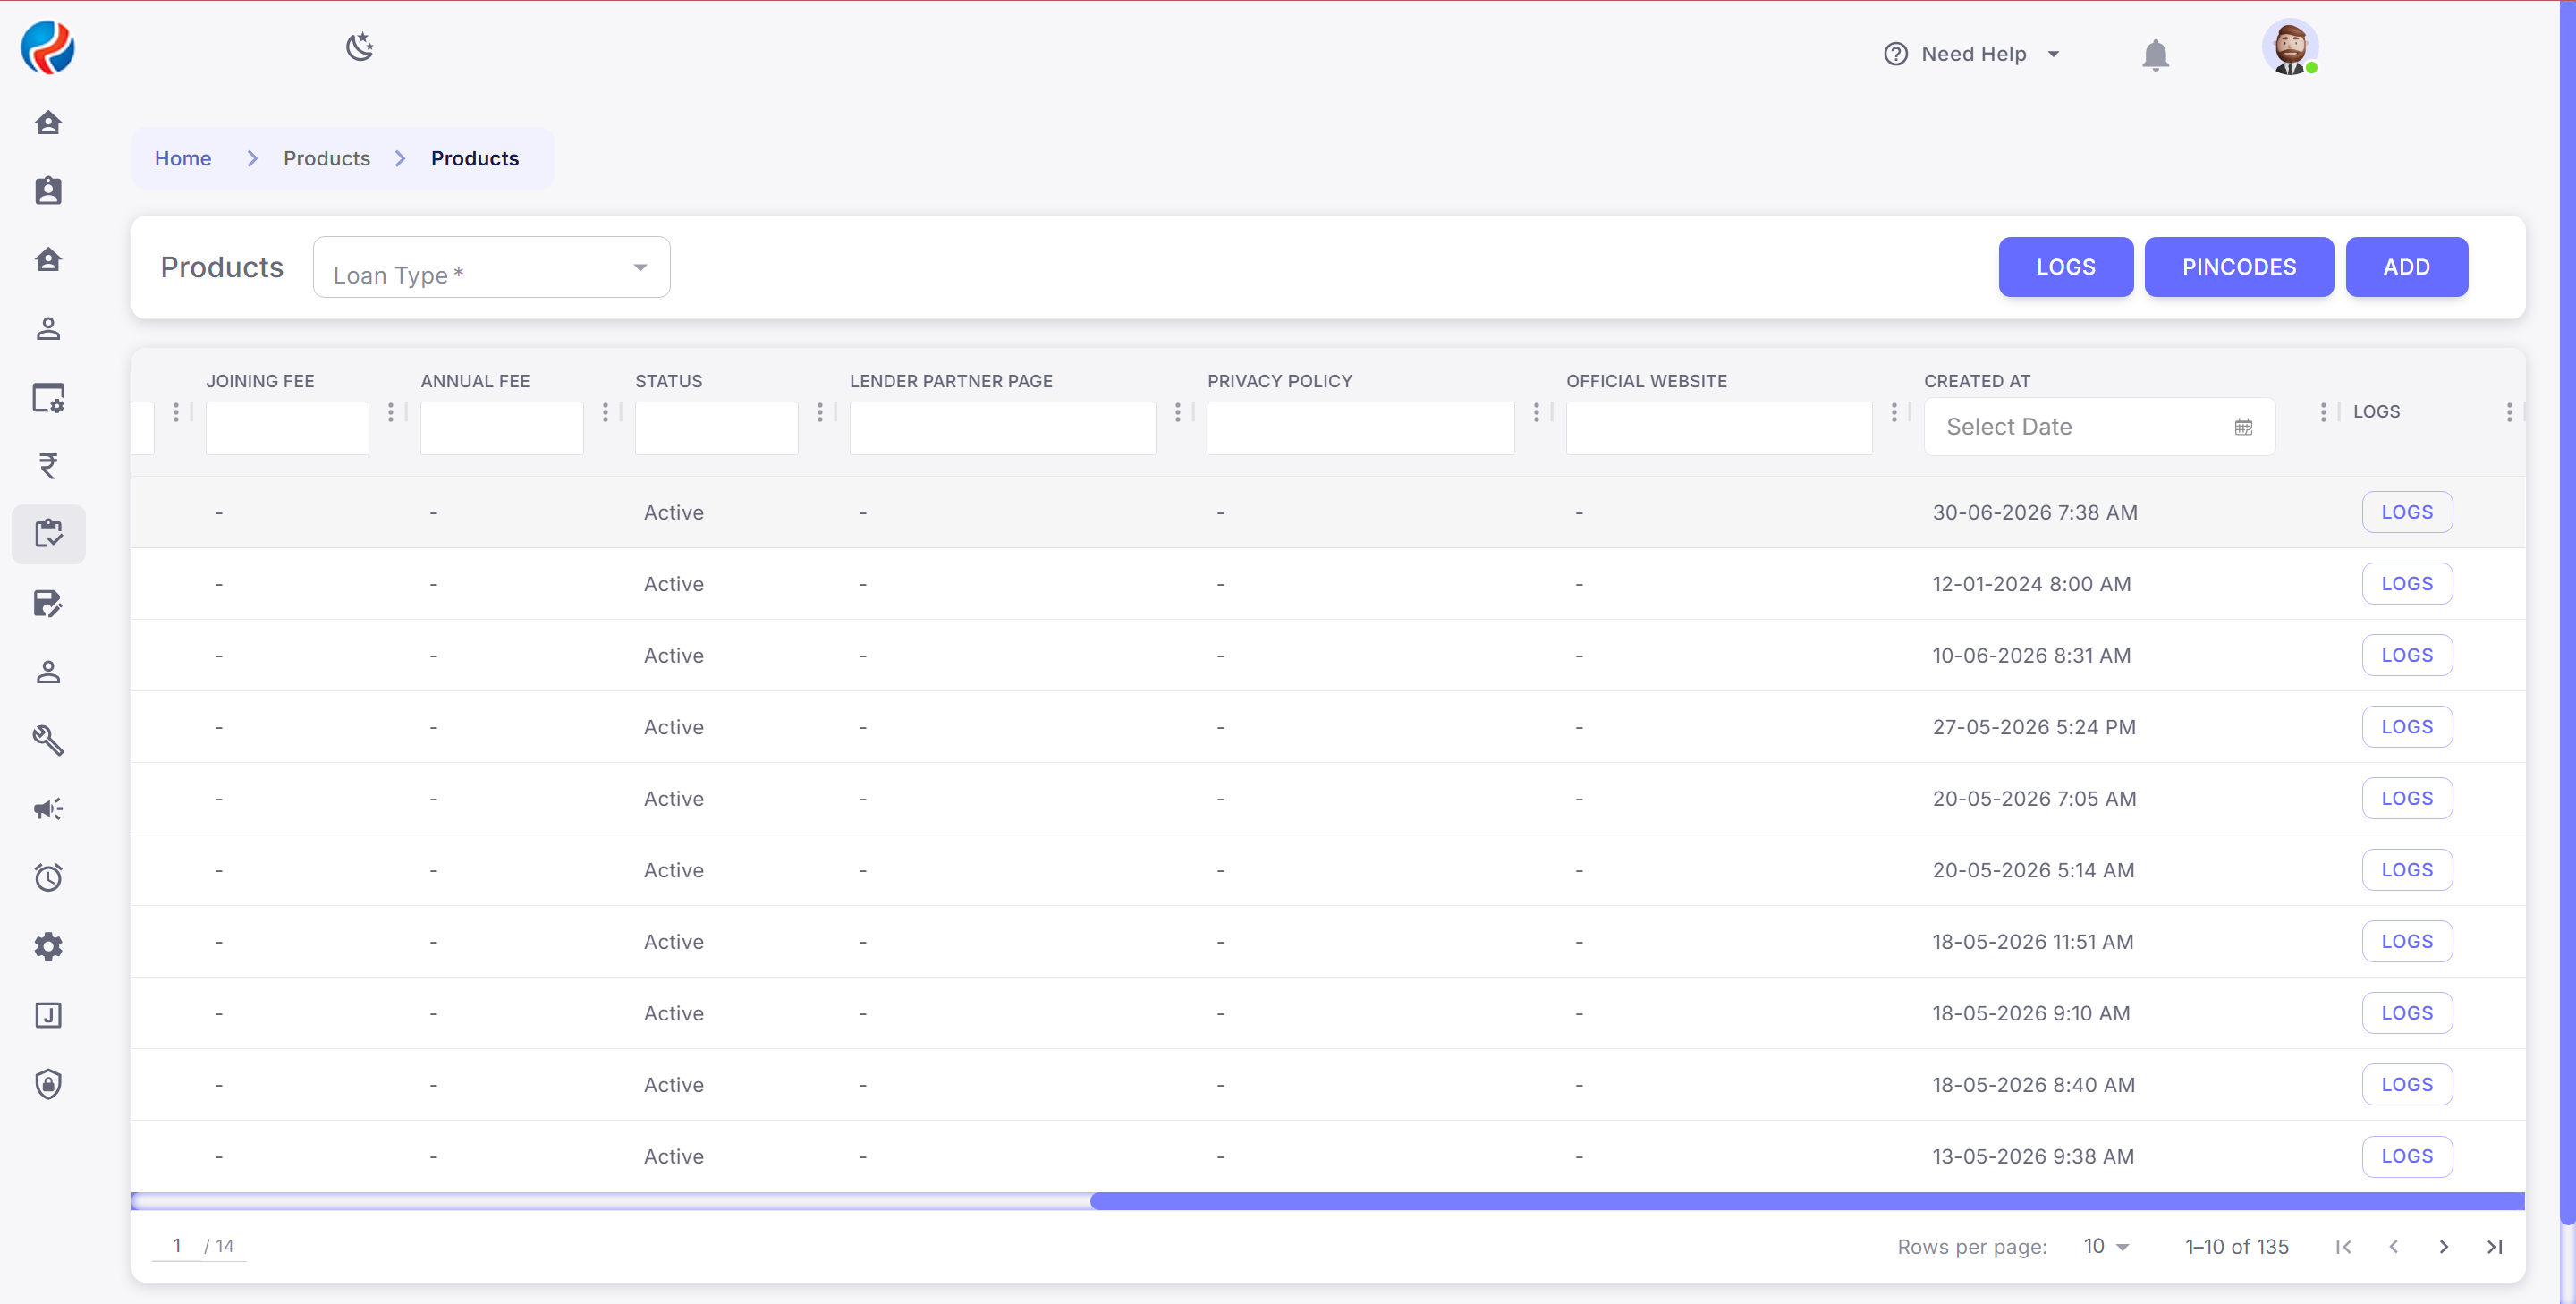
- Select the products from the list.
- Scroll left on the product page.
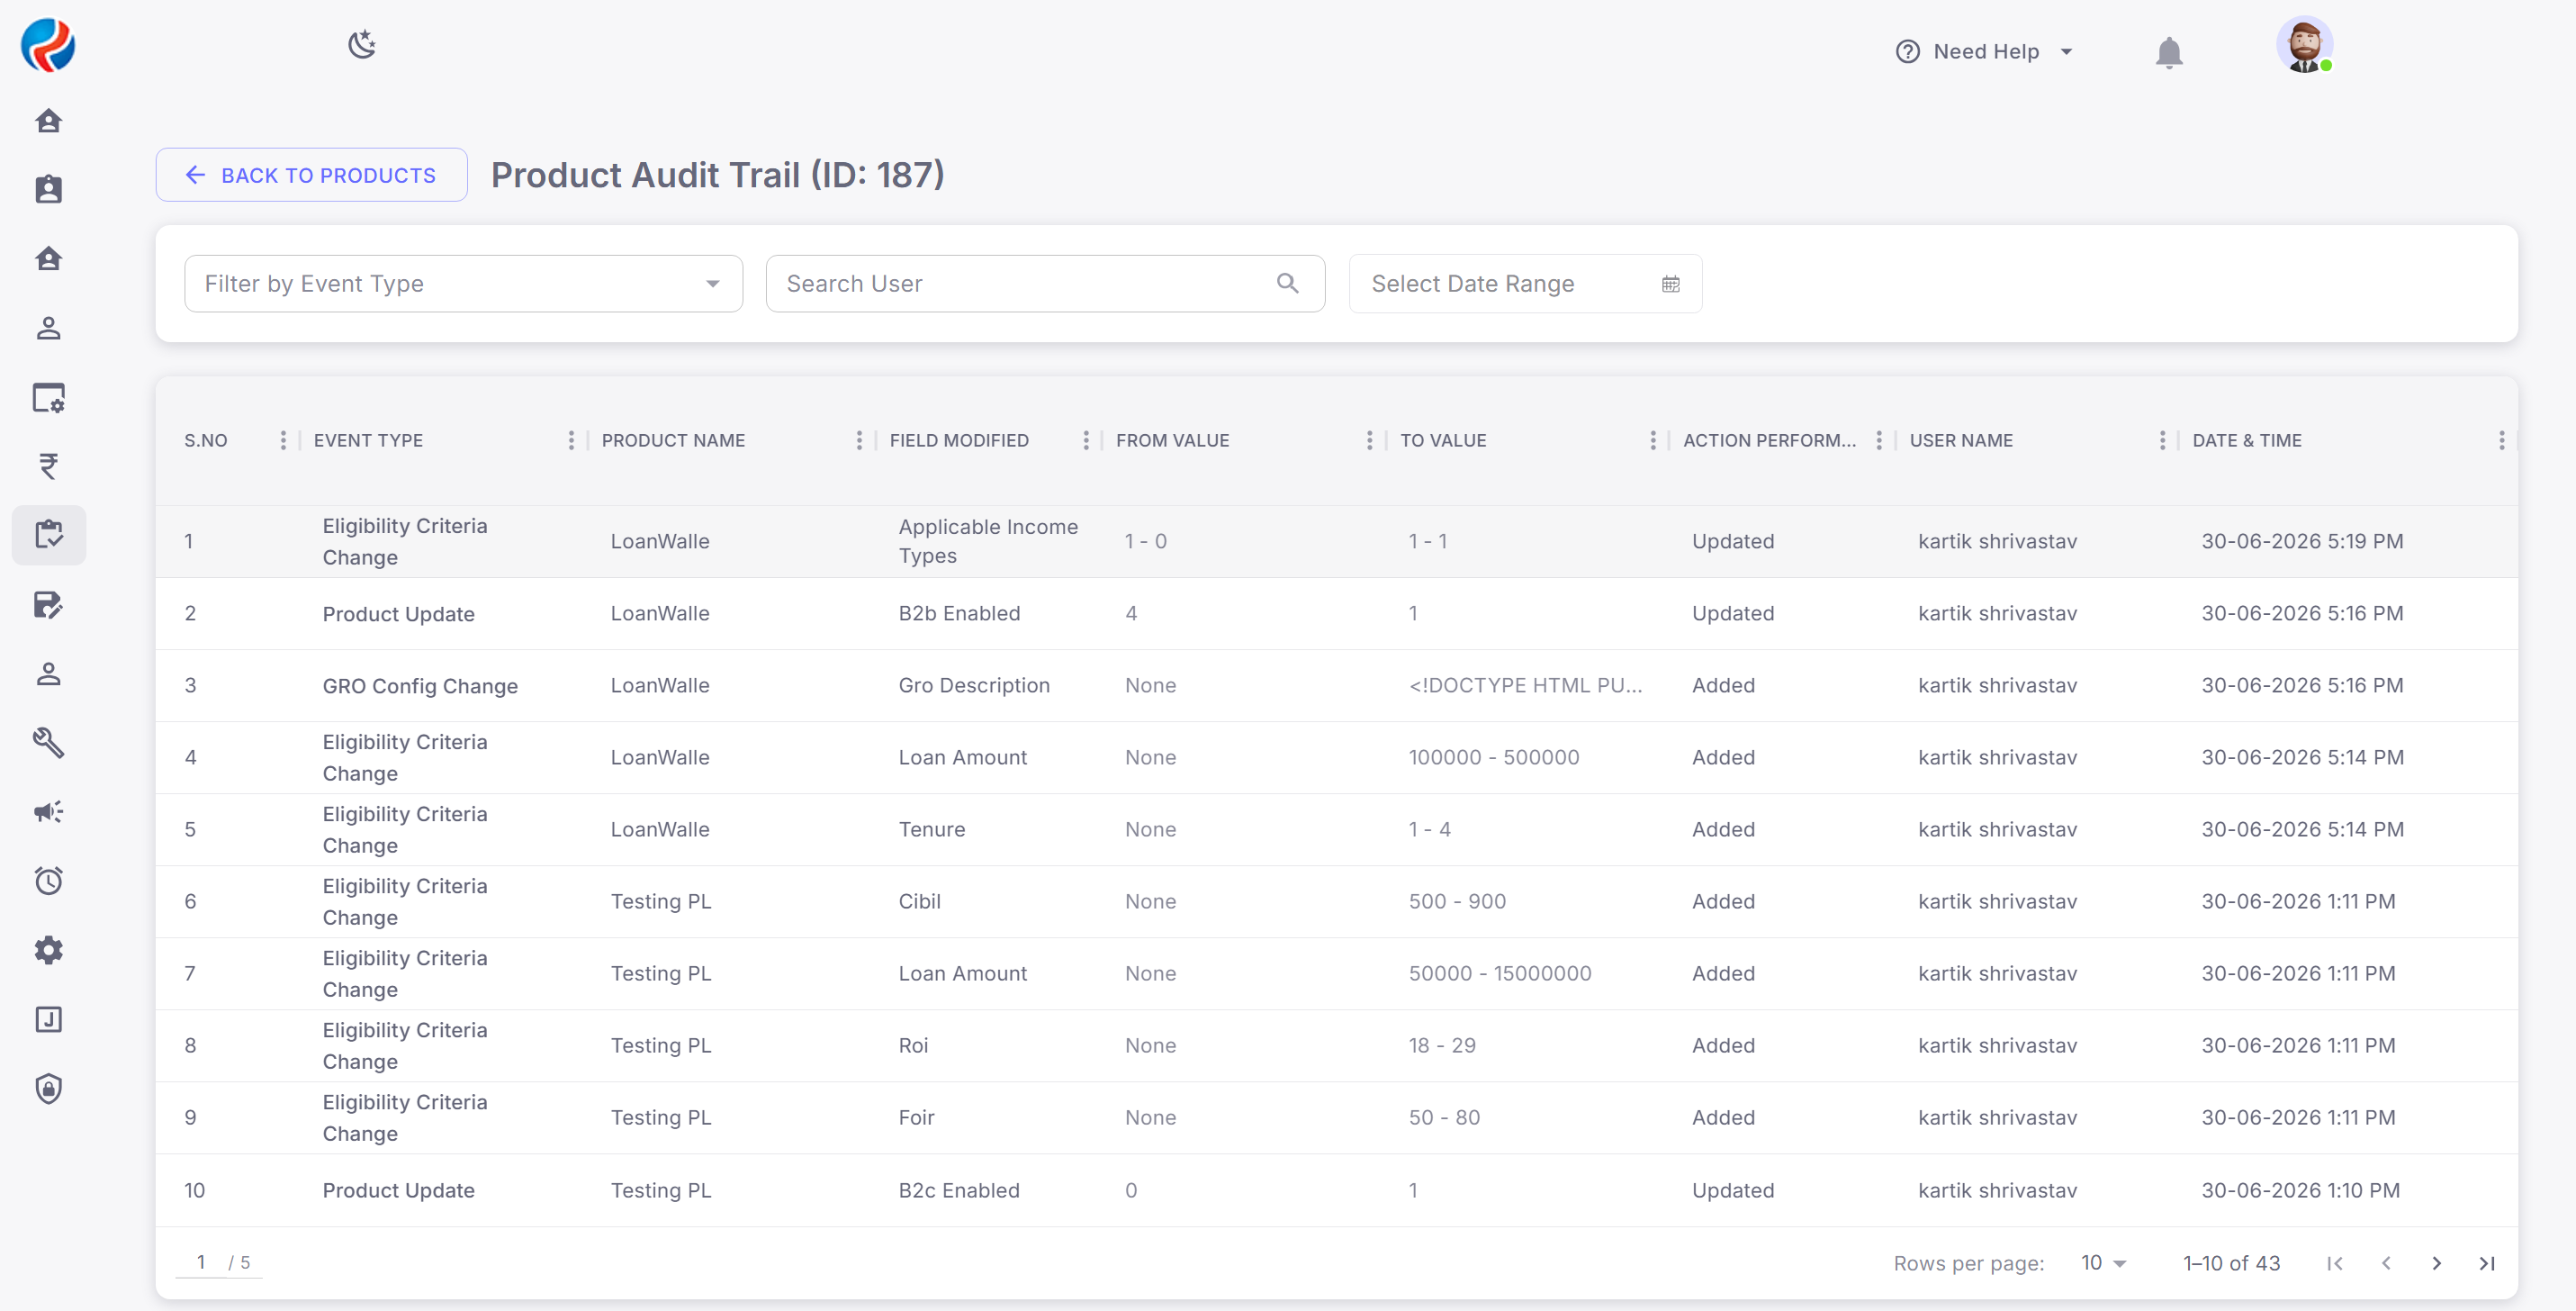
- click on the logs for the product which you want to check.
- All the updated and previous details are mentioned.
- The previous details are mentioned by the “0” and new details are mentioned by the “1”.
- By clicking on the logs the folowing tables are mentioned these are:
- Event Type- Which shows the module of the product which was changed by the user like: Eligibility, Product Update.
- Product Name- Changes reflected on which product.
- Field Modified- Which field was modified by the user.
- From Value- Which shows the previous value.
- To Value- Which shows the current/updated value by the user.
- Action Performed- Which shows, If something is added new so it denotes “New” and If somethis is updated so it denotes “Updated”.
- User Name- Which shows who perform the last action on the products.
- Date & Time- Which shows the date and time by when was the changes are done by the user.