Introduction
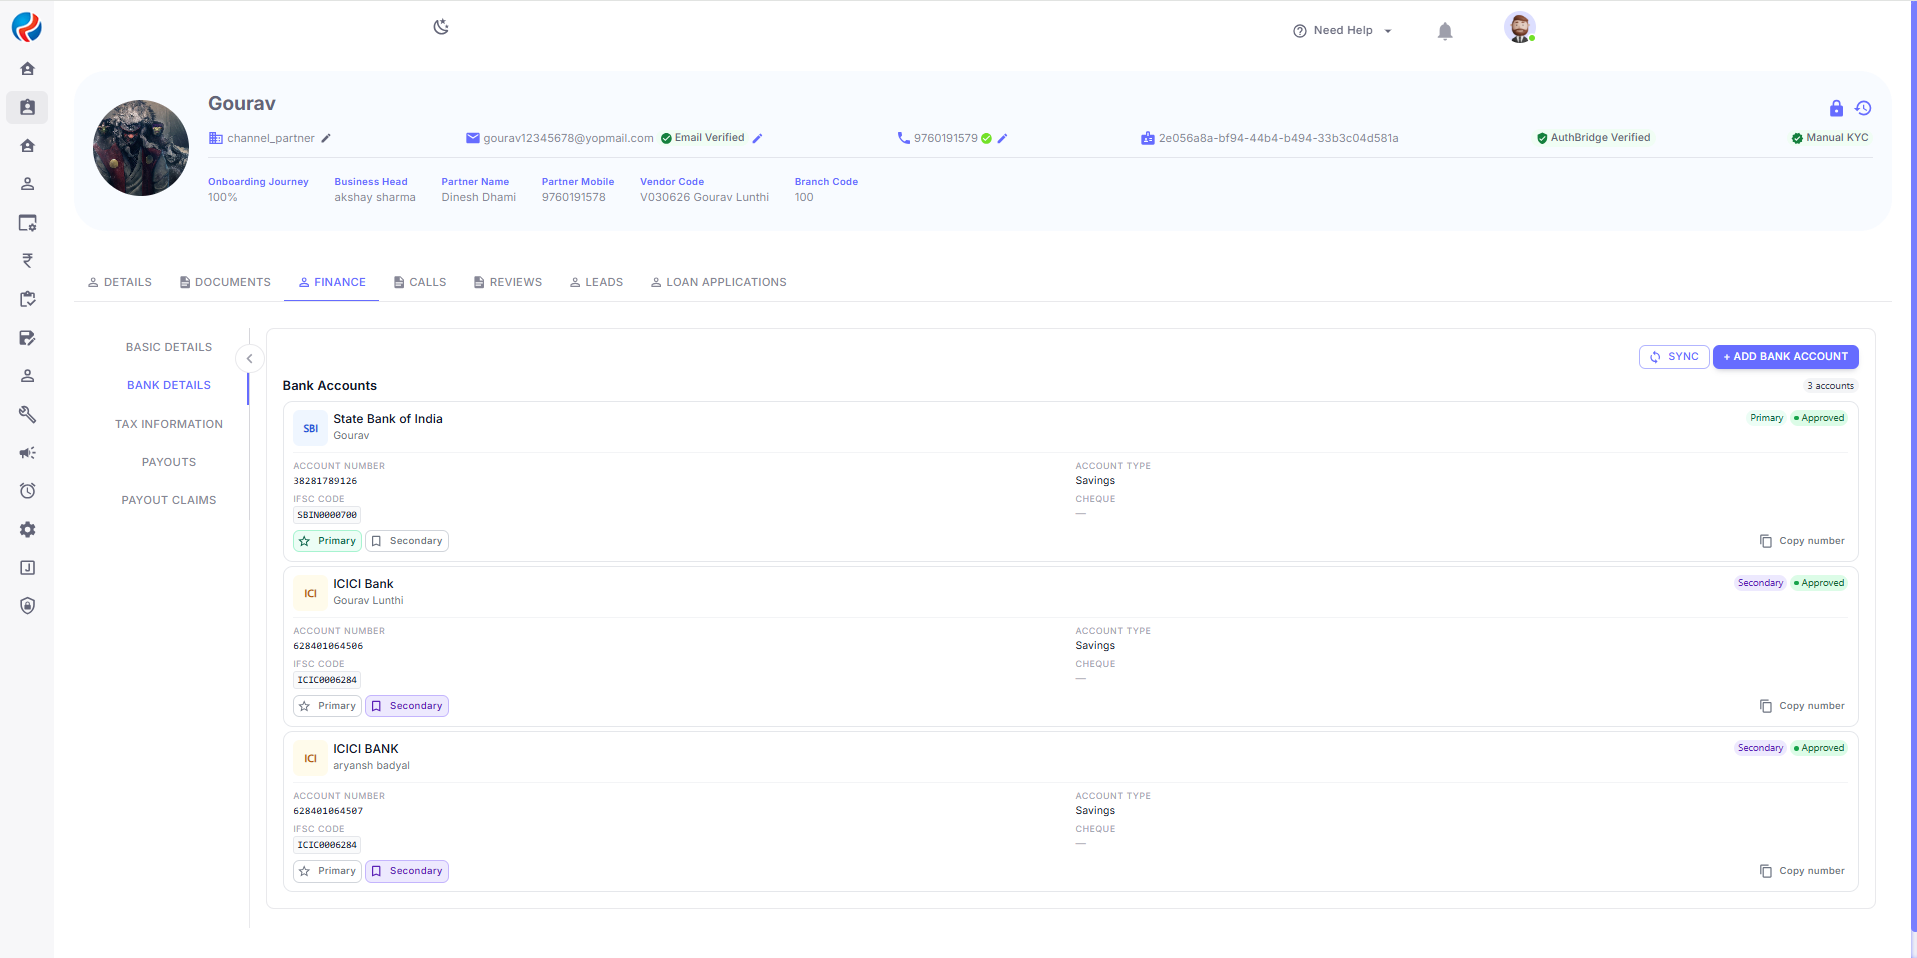
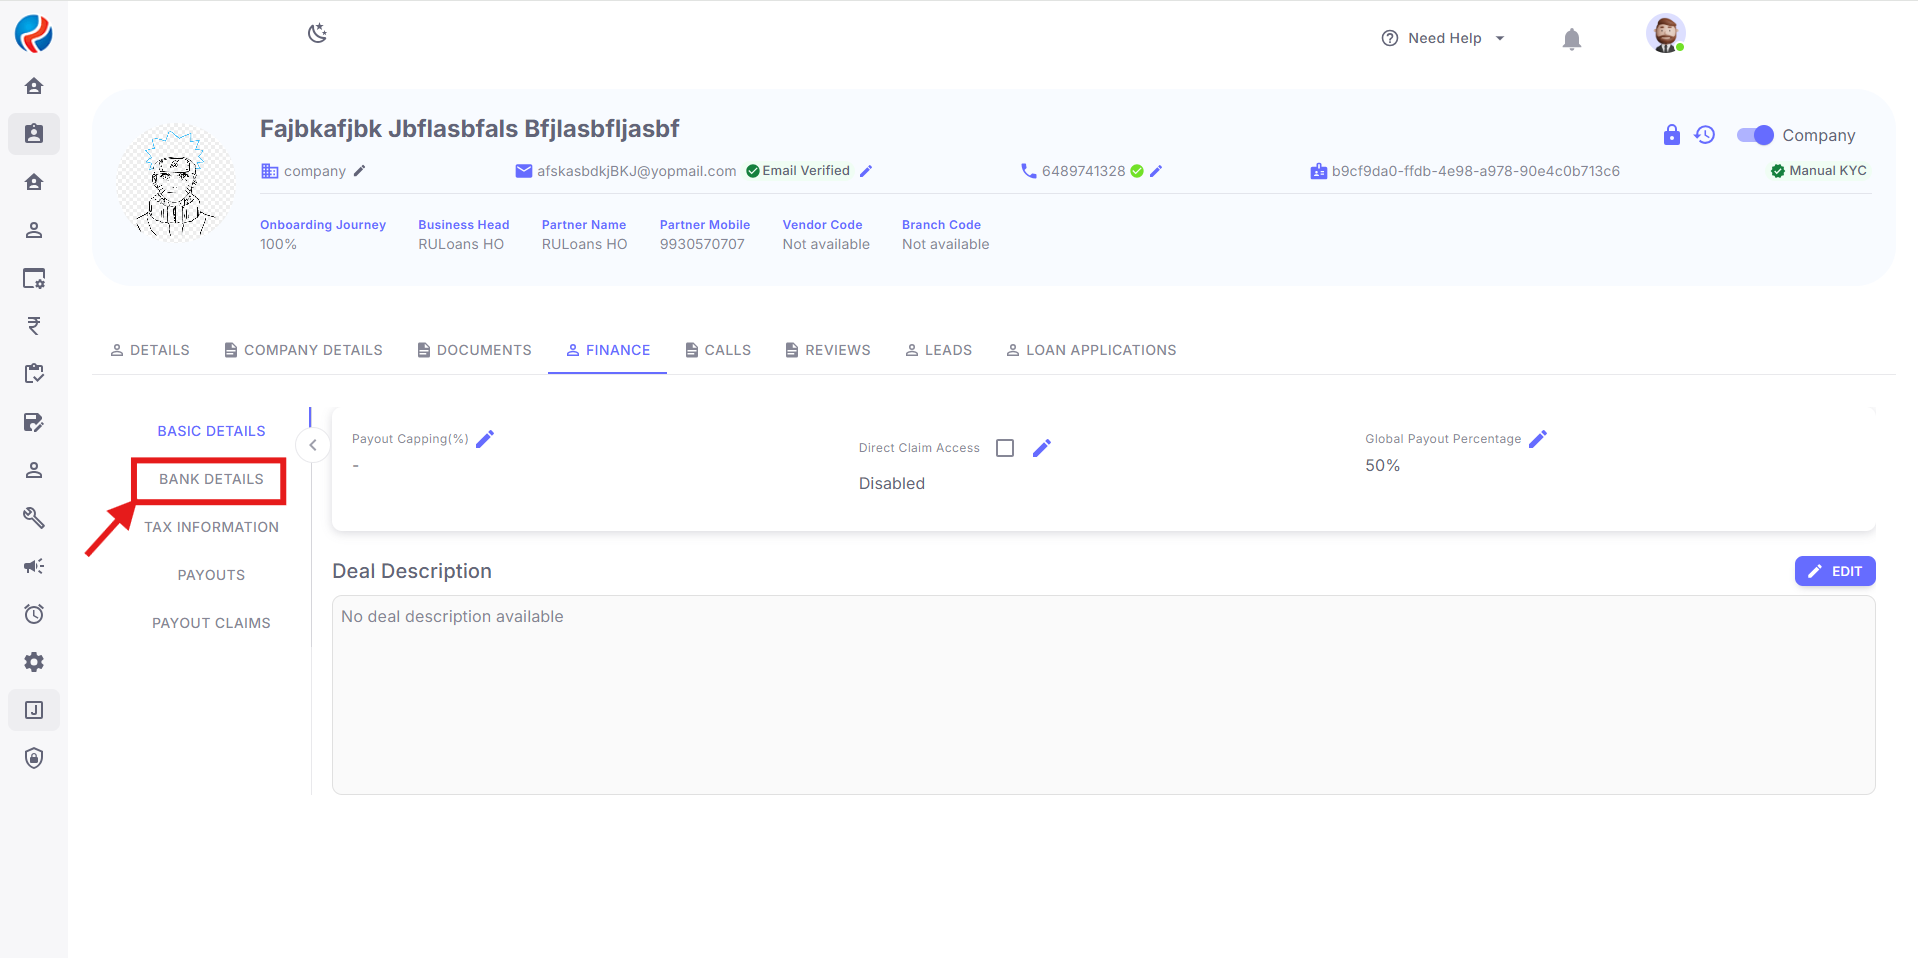
This document provides a comprehensive step-by-step guide for CRM users to add multiple bank accounts for a DSA on the CRM. A DSA can add up to 3 approved bank accounts. Of these, one account is always marked as Primary and the remaining accounts are marked as Secondary. Users can switch which account is Primary at any time. This guide covers adding individual and company bank accounts, understanding the 3-account limit, and switching between Primary and Secondary. The individual (personal) bank account and the company bank account are added from two different locations in the CRM:- Individual bank account: DSA Profile → Finance tab → Bank Details subtab.
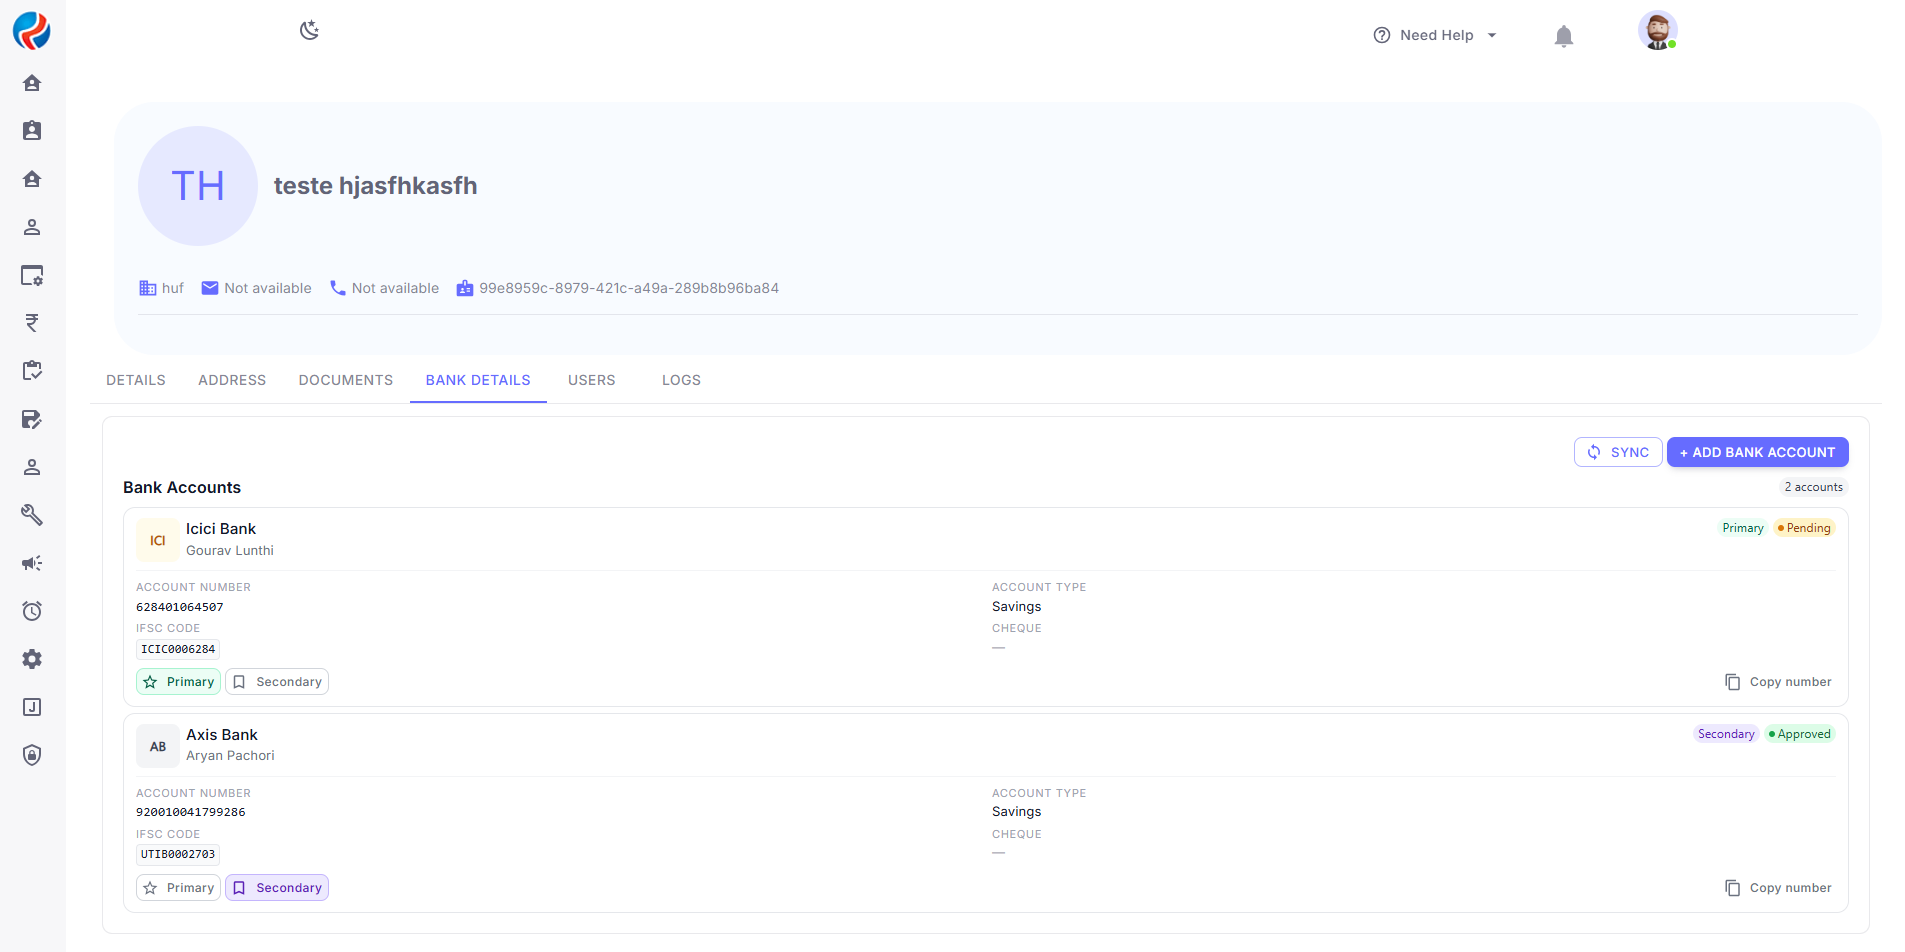
- Company bank account: Channel Partner → Company tab (for the relevant company).
Step 1: Access the CRM
- URL: Open the CRM.
- Login using your registered credentials.
Step 2: Navigate to Channel Partner
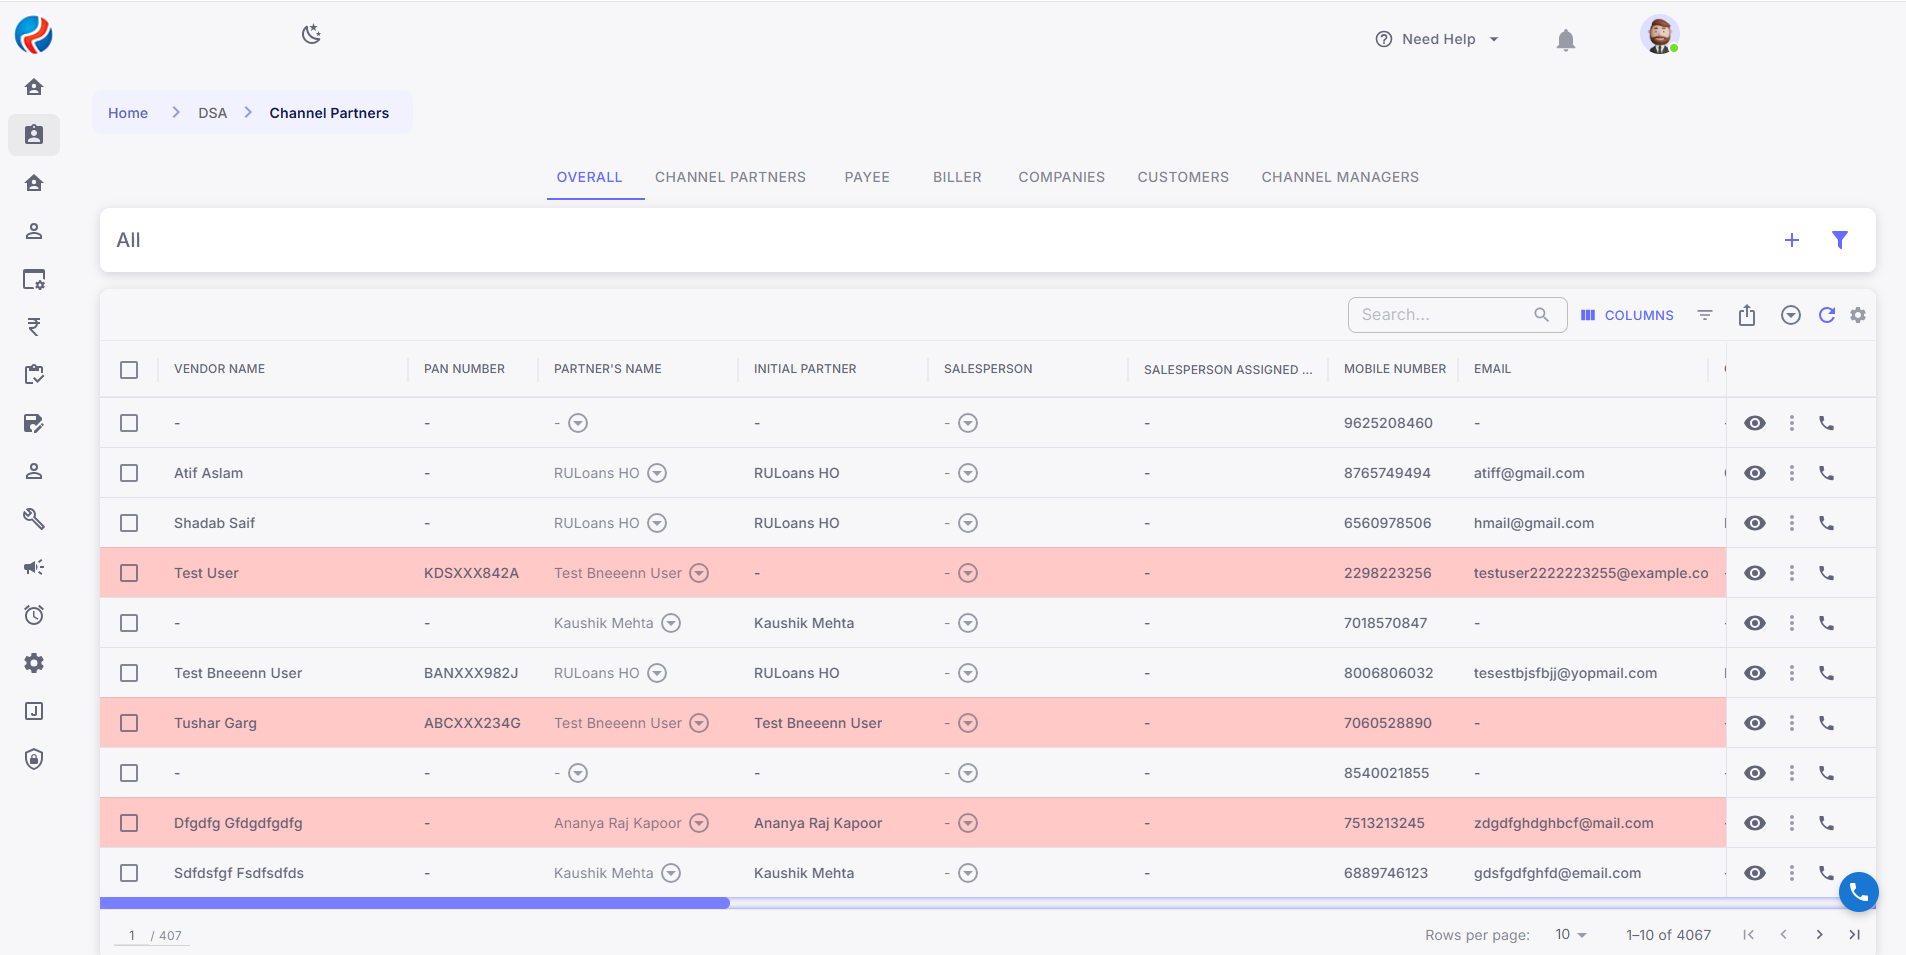
- From the CRM navigation, go to the Channel Partner section.
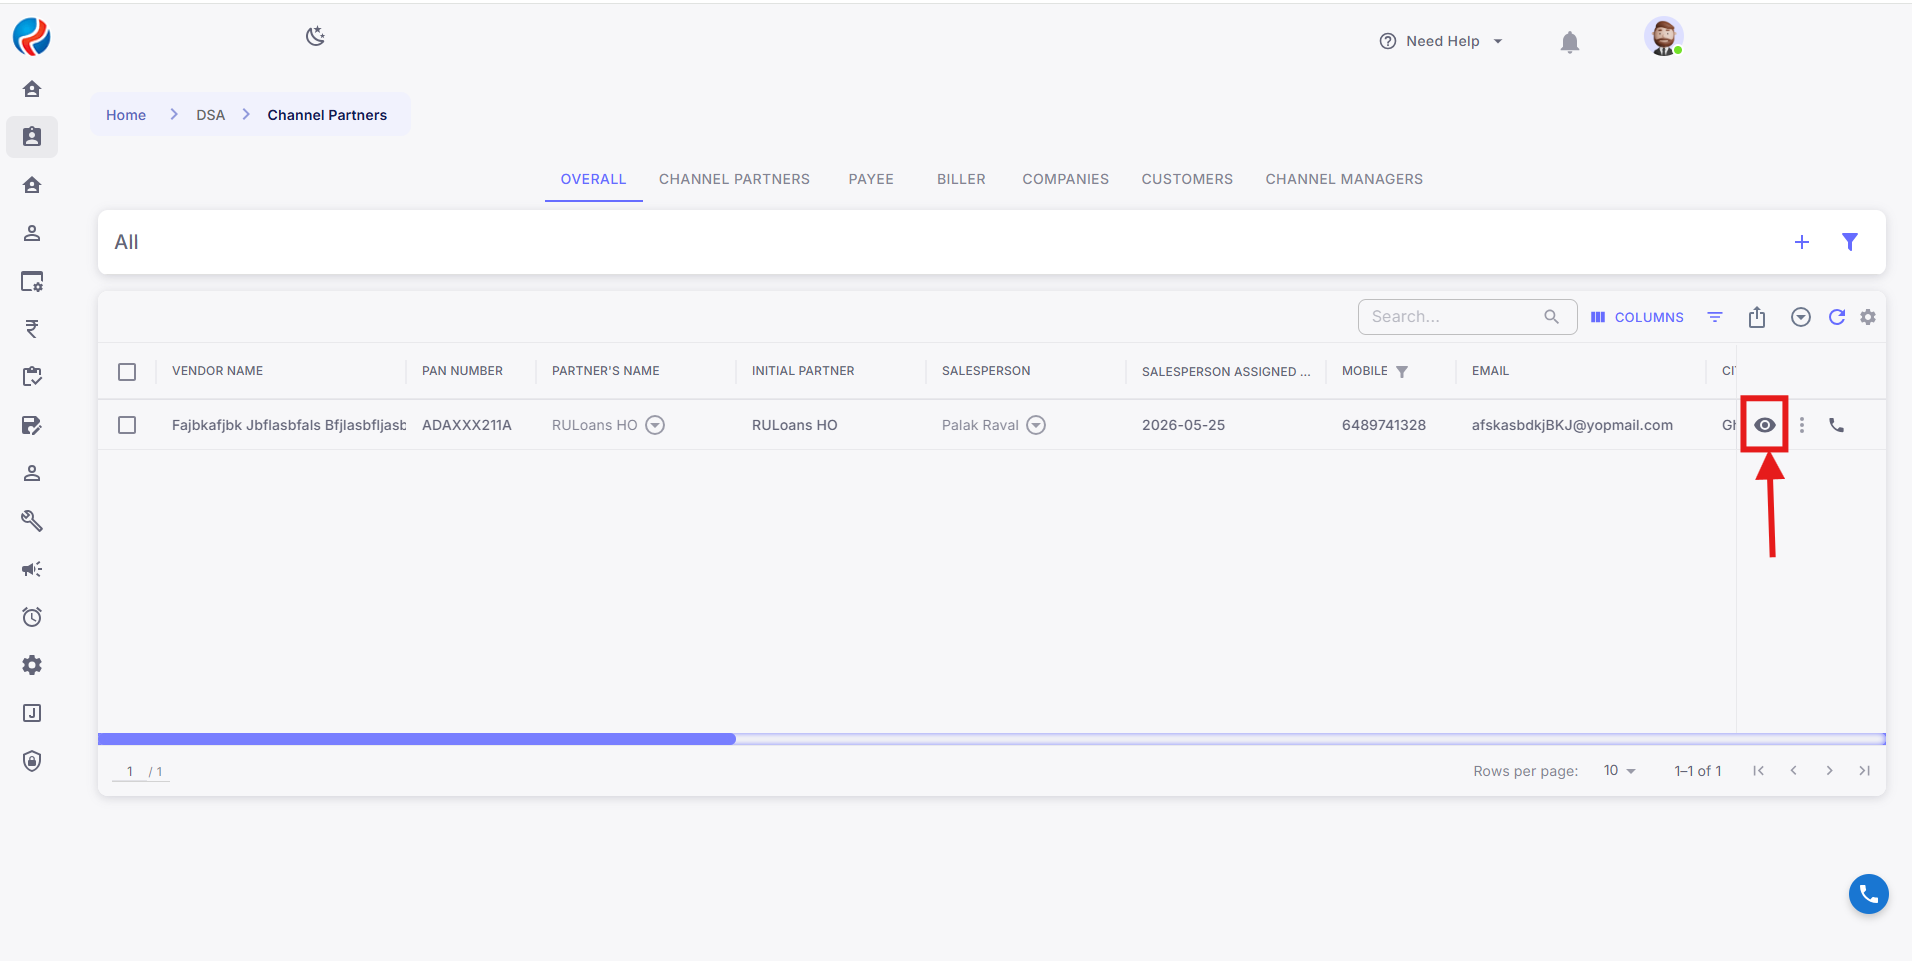
- Search for and select the DSA for whom the bank account needs to be added.
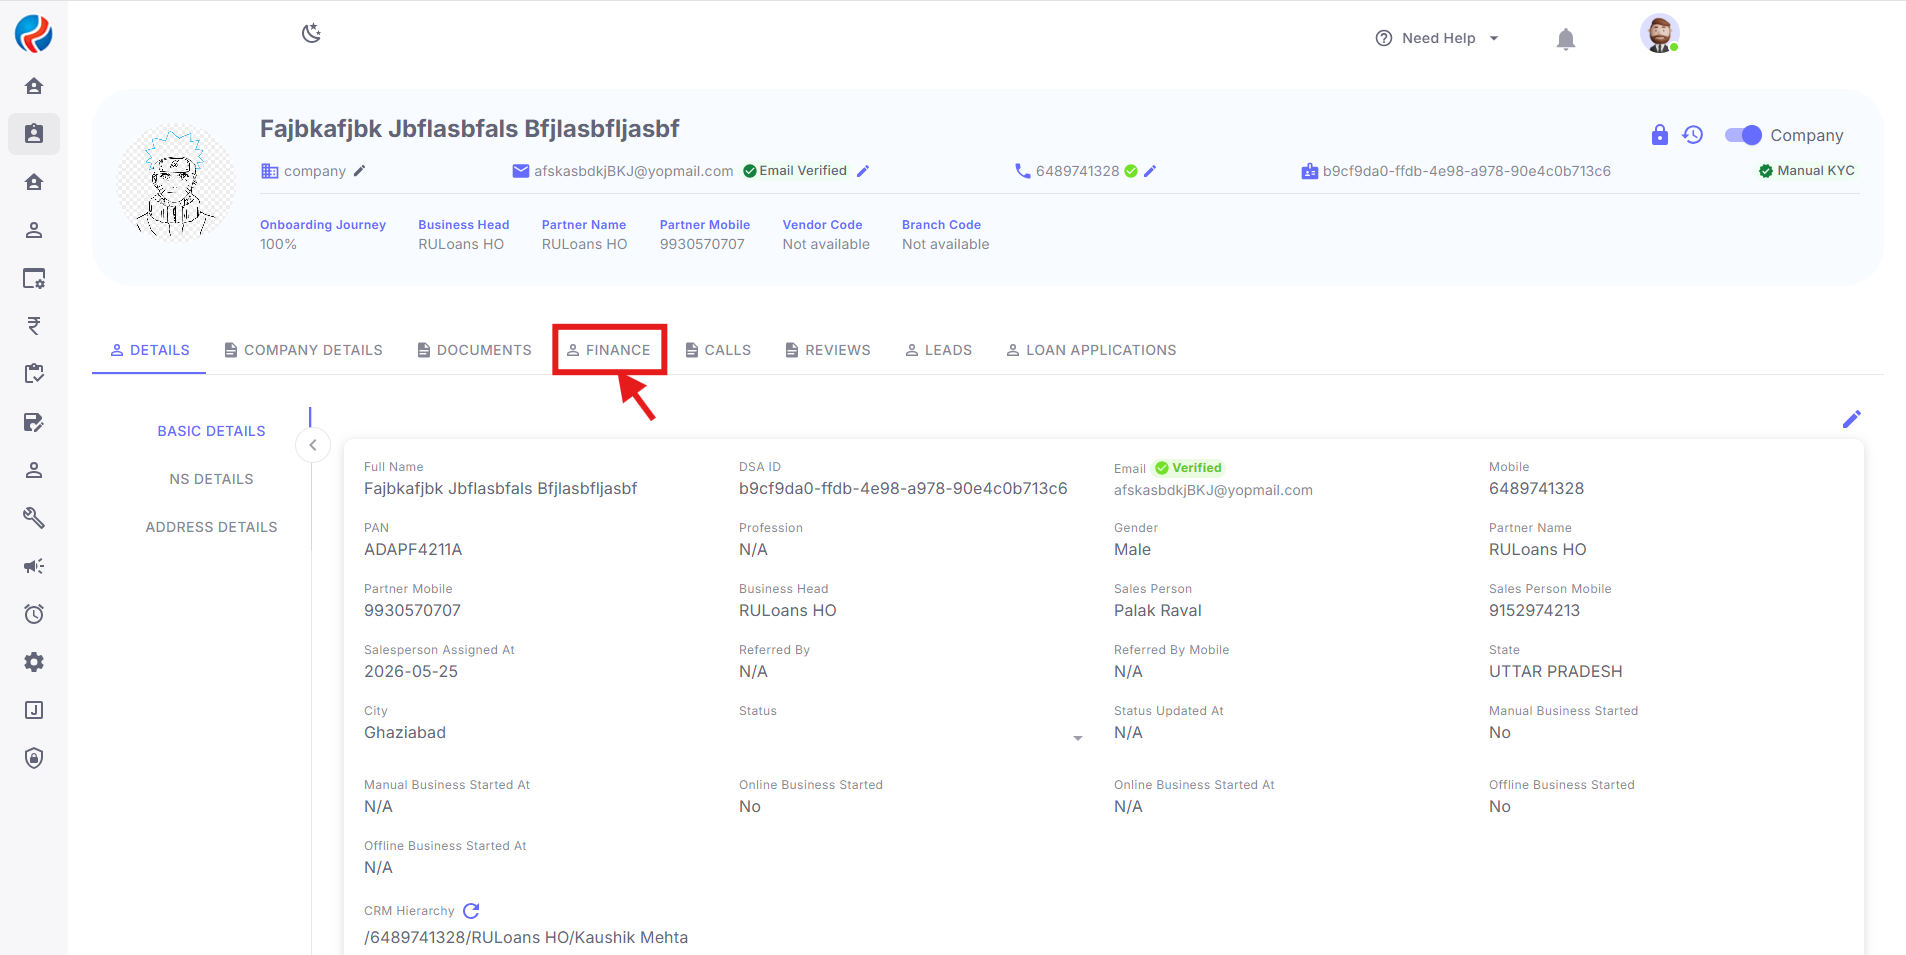
Step 3: Navigate to the Finance Tab
- On the DSA Profile page, click on the Finance tab.
- Within the Finance tab, click on the Bank Details subtab.
Step 4: Add a DSA Individual Bank Account
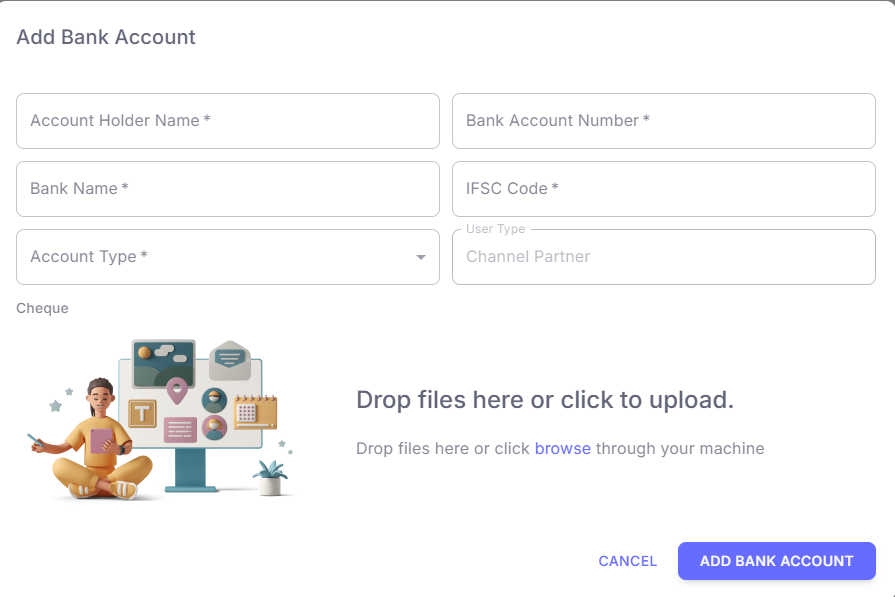
- In the Bank Details subtab, click on the Add button.
- Fill in all the necessary mandatory details for the bank account (account holder name, account number, IFSC code, bank name, branch, etc.).
- Click on the Save button.
- The newly added account moves to Pending Approval status until it is verified and approved.
Note: The 3-Account Limit
- The Bank Details subtab allows a maximum of 3 approved bank accounts for the DSA’s individual profile.
- Once 3 accounts are approved, the Add button is disabled and a message is shown indicating the limit has been reached.
- To add a new account after reaching the limit, an existing account must first be removed.
- Accounts that are still pending approval do not count toward the limit being enforced for adding, but a new account cannot be submitted if 3 approved accounts already exist.
Step 5: Add a Company Bank Account
- Navigate back to the Channel Partner section.
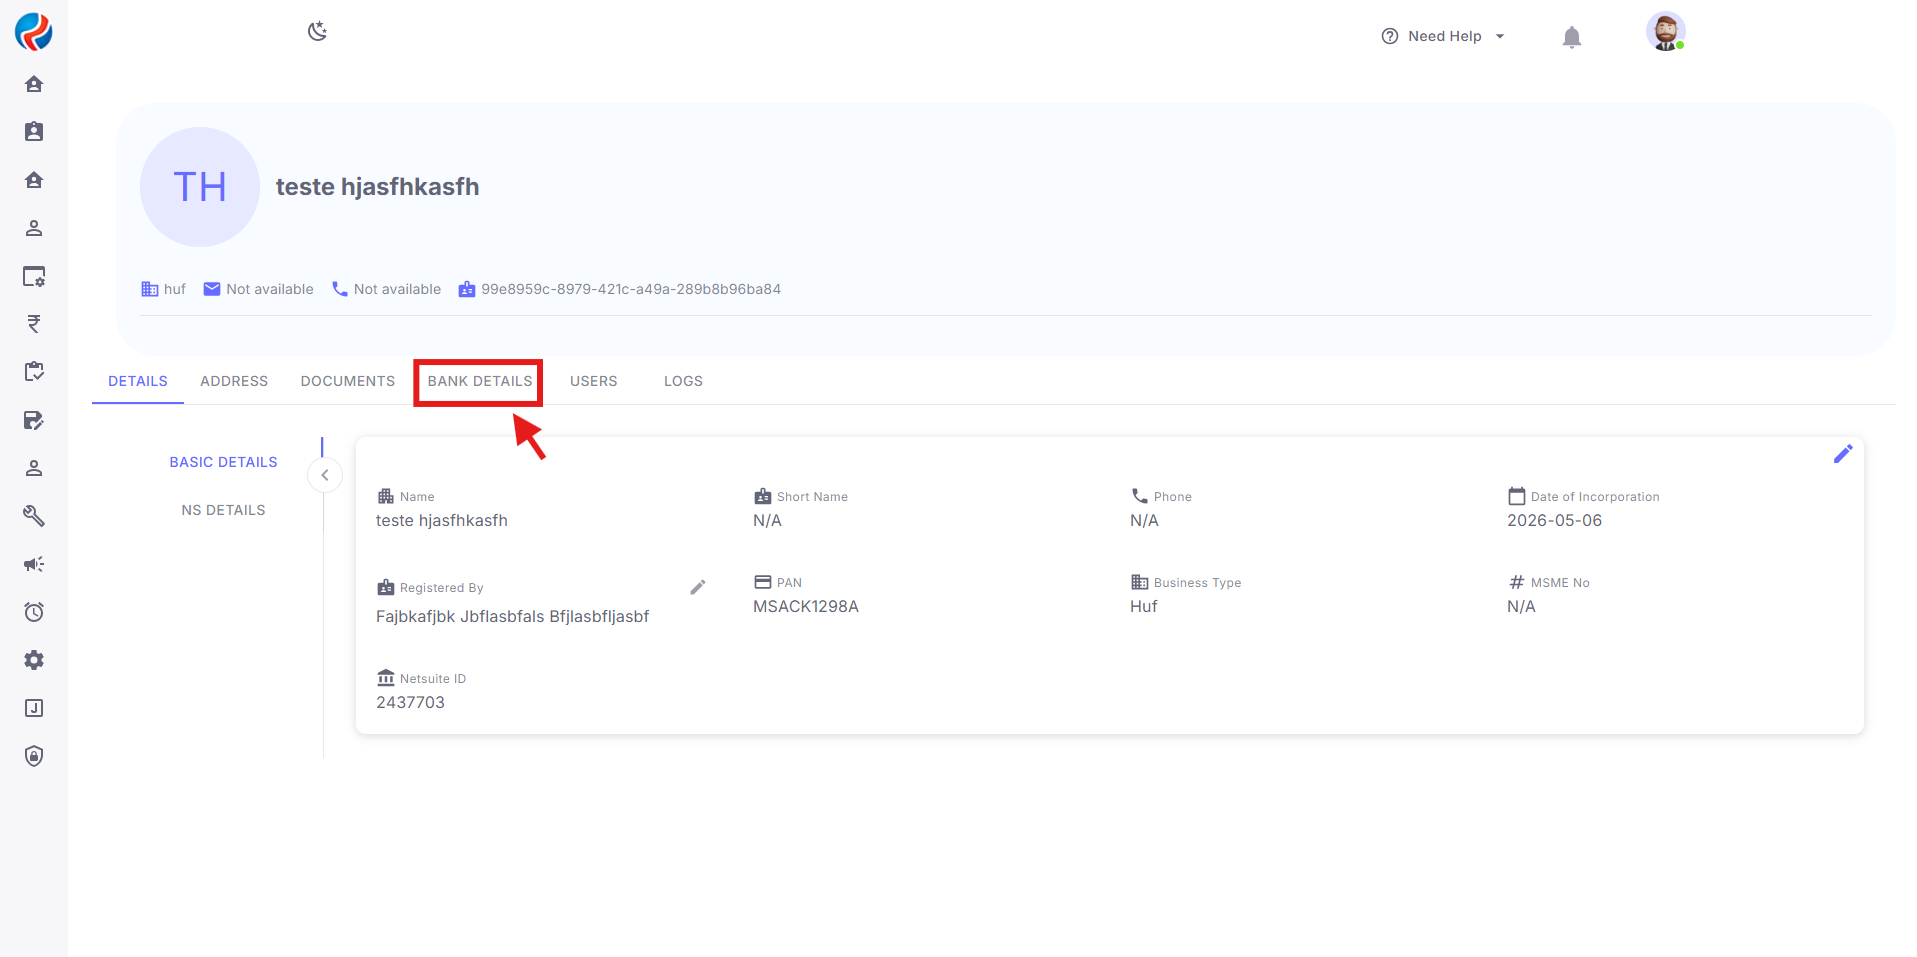
- Click on the Company tab and select the relevant company associated with the DSA.
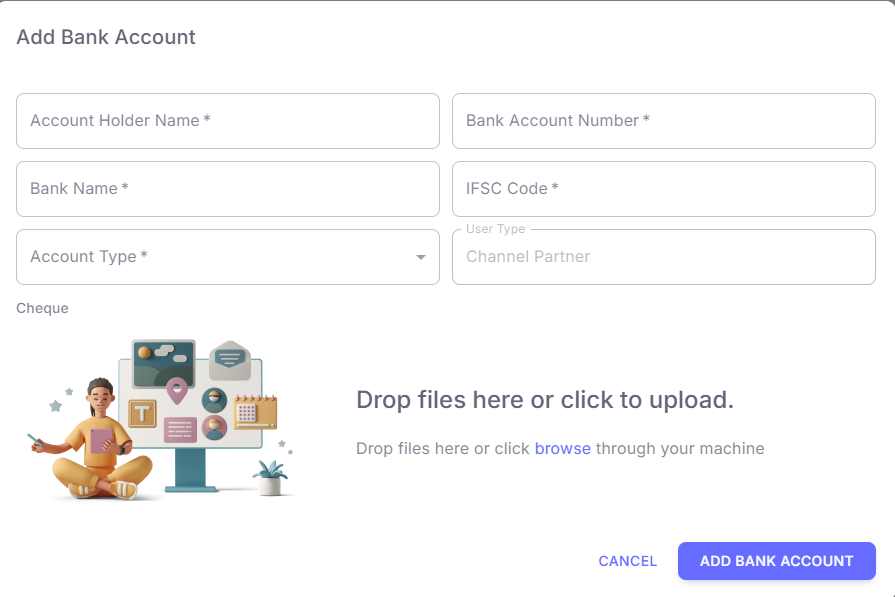
- Within the Company tab, click on the Add button in the Bank Details area.
- Fill in all the necessary mandatory details for the bank account. Ensure the account holder name matches the registered company name.
- Click on the Save button.
- The newly added account moves to Pending Approval status until it is verified and approved.
Note: The 3-Account Limit
- The Company tab also allows a maximum of 3 approved bank accounts for that company.
- This limit is tracked independently of the DSA’s individual bank account limit in the Finance tab.
- Once 3 accounts are approved for the company, the Add button is disabled and a message is shown indicating the limit has been reached.
- To add a new account after reaching the limit, an existing company account must first be removed.
Step 6: Bank Account Approval
- Every newly added bank account (individual or company) is created with a Pending Approval status and must be reviewed before it becomes an active, approved account.
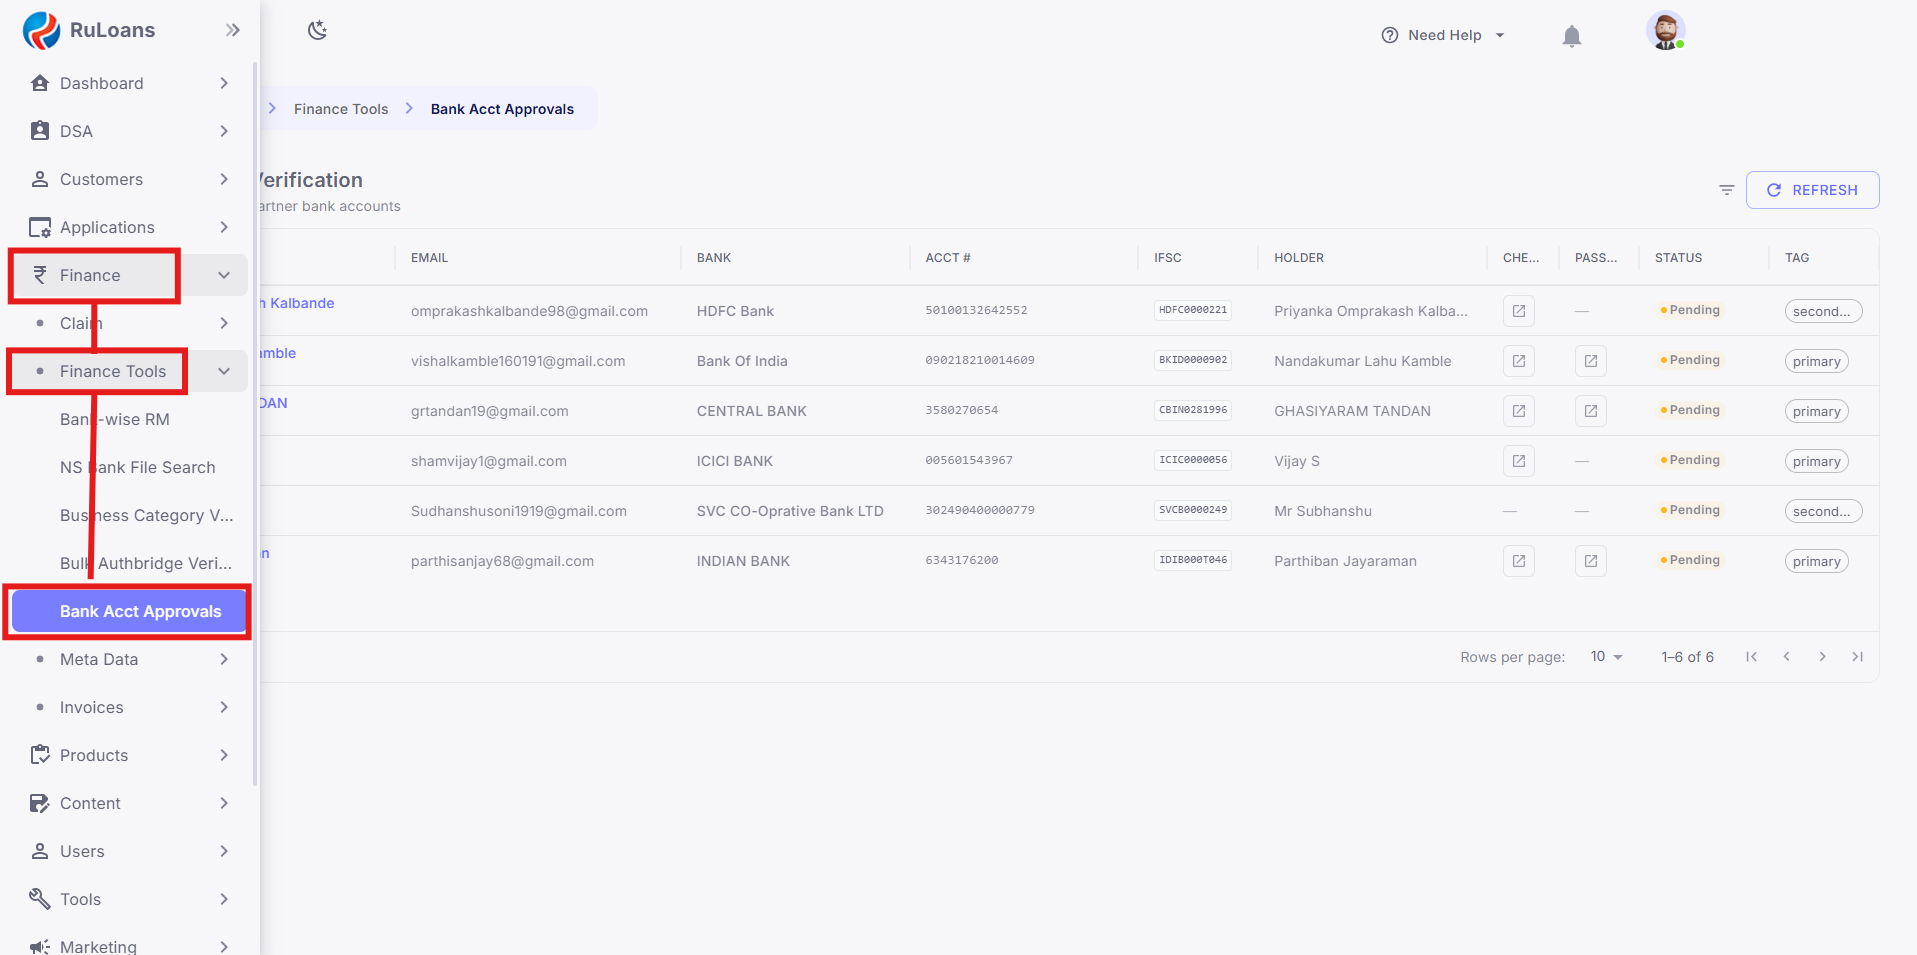
- Authorised users (e.g. Finance/Ops approvers) can view all pending bank accounts in the Bank Account Approvals section of the CRM.
- For each pending account, the authorised user can view the submitted bank details and choose to Approve or Reject the account.
- On Approve, the account status changes to Approved and it becomes eligible to be counted toward the 3-account limit and to be set as Primary/Secondary.
- On Reject, the account is marked Rejected and does not count toward the 3-account limit. The DSA/company can submit a new account in its place.
Note: Auto-Approval for AuthBridge Verified DSAs
- If the DSA is AuthBridge verified, any bank account added for that DSA (individual or company) is auto-approved and does not require manual review in the Bank Account Approvals section.
- The account directly moves to Approved status upon saving, and is immediately available to be counted toward the 3-account limit and designated as Primary/Secondary.
- This auto-approval applies only to DSAs verified via AuthBridge; accounts for DSAs who are not AuthBridge verified continue to follow the manual approval process described above.
Step 7: Designate Primary and Secondary Accounts
- The first approved bank account (whether individual or company) is automatically set as Primary within its respective location.
- Every subsequent approved account in that same location is automatically set as Secondary.
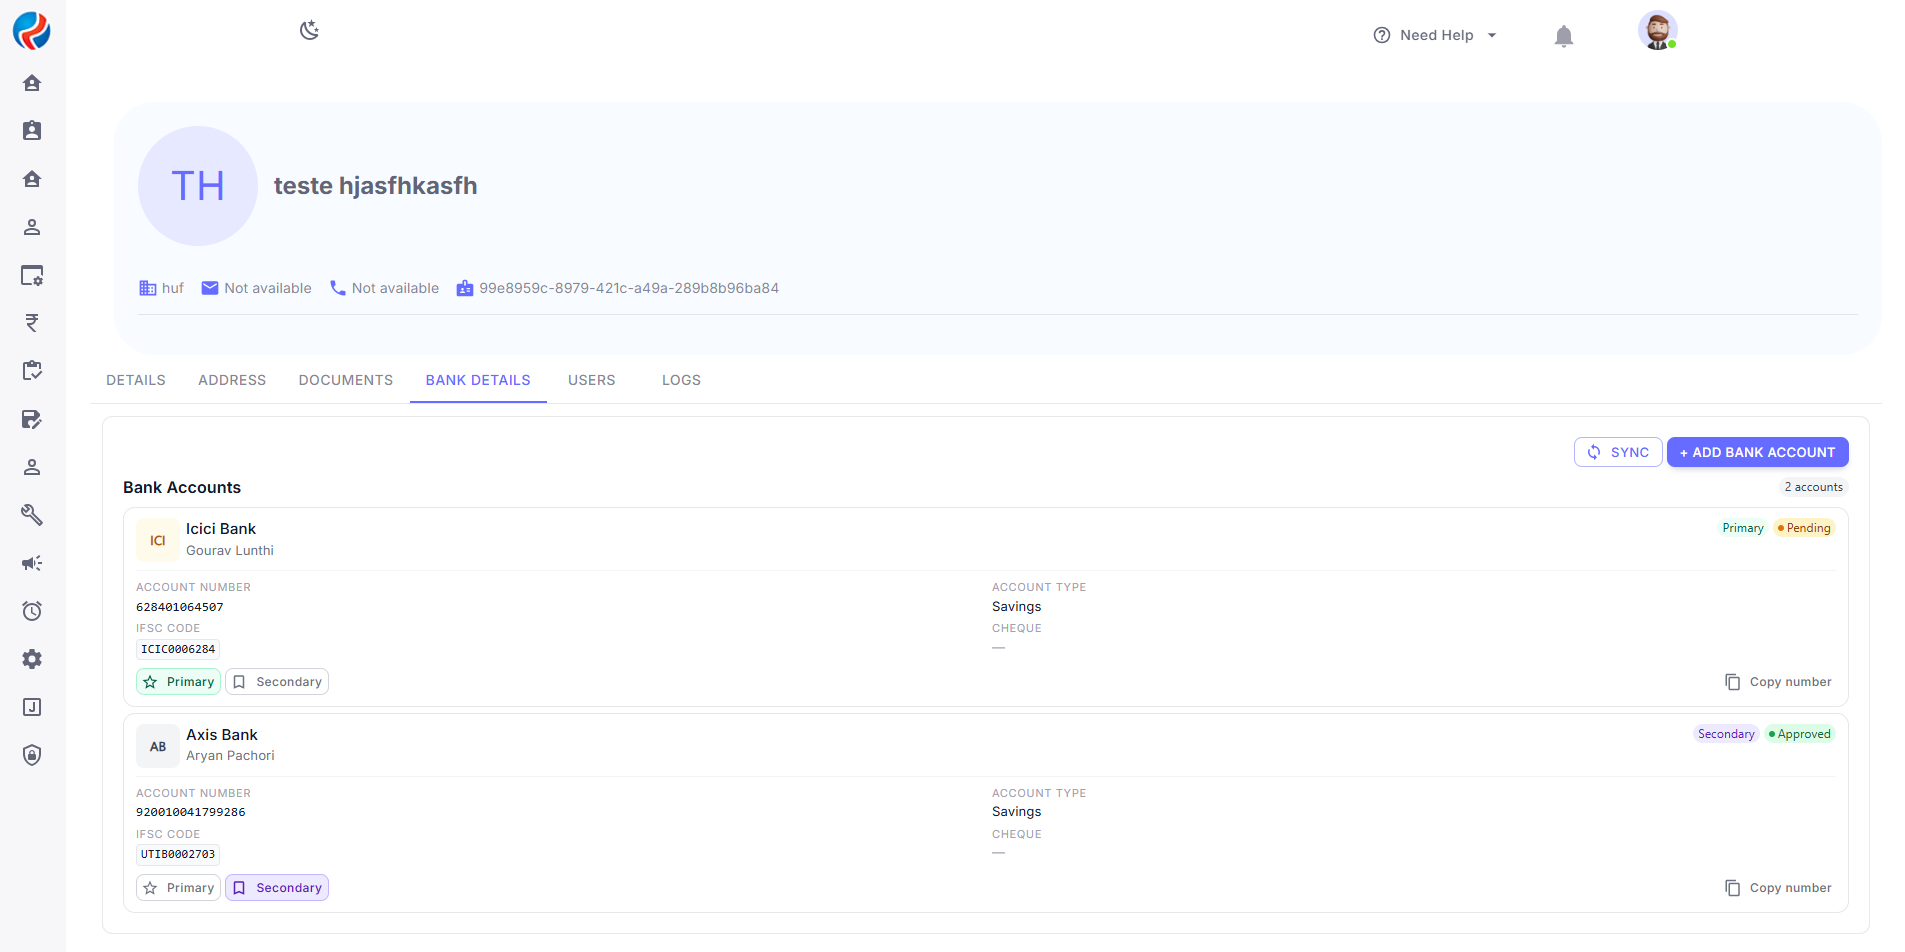
- Each account in the list displays a tag: Primary or Secondary.
- The DSA’s individual Bank Details subtab and the company’s Bank Details in the Company tab each maintain their own Primary account.
Step 8: Switch Primary and Secondary Bank Accounts
- Navigate to the relevant location — DSA Profile → Finance → Bank Details (for individual accounts) or Channel Partner → Company (for company accounts).
- Click on the Set as Primary option next to any Secondary account.
- Confirm the switch when prompted.
- Once confirmed:
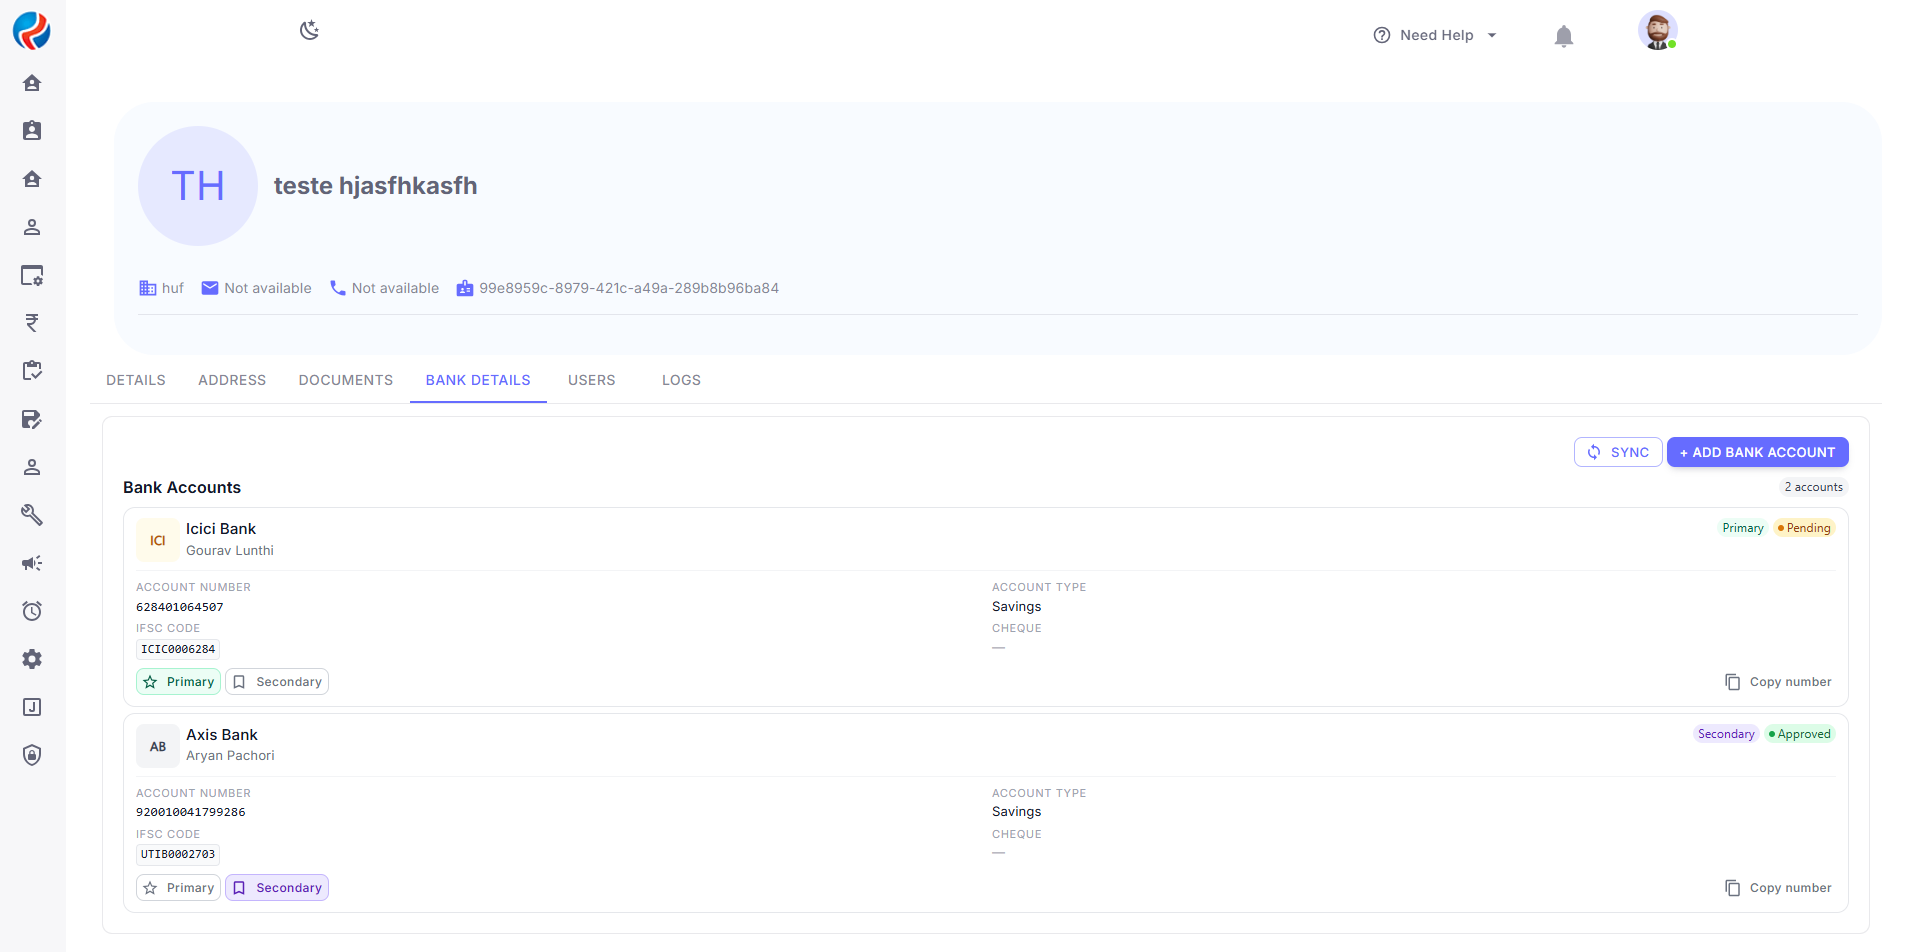
- The selected account is updated to Primary.
- The account that was previously Primary in that location is automatically updated to Secondary.
Note
- Only one account can be Primary at a time within each location (individual or company).
- All payouts/disbursals are processed to the Primary account of the relevant location by default.
- A Secondary account cannot be deleted directly if it’s the only remaining Secondary account and business rules require at least one active account — refer to in-app messaging for account removal eligibility.
Step 9: View Bank Details Overview
- Individual accounts: View all approved and pending accounts under DSA Profile → Finance → Bank Details, along with their Primary/Secondary status.
- Company accounts: View all approved and pending accounts under Channel Partner → Company tab, along with their Primary/Secondary status.